
#545 Wireless YouTube Foot Switch
An ESP8266-powered foot switch for controlling and looping YouTube videos (ideal for music practice).

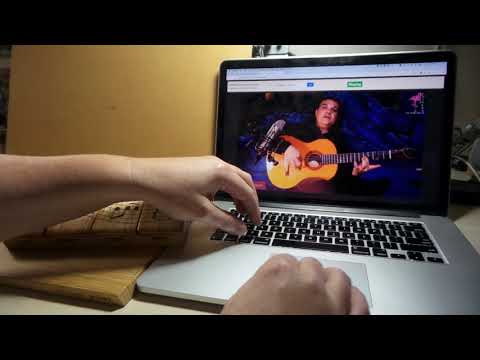
Here’s a quick demo..
Notes
YouTube can be a brilliant place to learn new tricks, especially in the realm of musical/dance performance and technique. But if we are learning something like guitar, controlling YouTube playback can be a pain because we don’t have three hands!
Hence the idea for a foot switch - allowing stop/start, skip and loop control by foot.
The solution I’ve put together here uses an ESP-12E ESP8266 module. The module interfaces with the foot switch hardware (switches and indicator LEDs), and hosts a web page that plays the video. A bit of Javascript reacts to the hardware state and controls the video.
Construction
This project is an assembly of a few components, some of which I’ve built/tested before:
- LEAP#542 - the foot control module with 4 switches and tri-state RGB LEDs
- LEAP#544 - ShengYang 18650 Battery Shield
- an ESP-12E ESP8266 module with an adapter board
- a custom board for mounting the ESP-12 in the Footswitch
The full circuit is as follows:


Installation in the foot switch:

The finished unit, front and rear:


Power
I’m using a ShengYang 18650 Battery Shield for power. This provides 3.2V regulated output, which so far has proven quite sufficient for the ESP8266.
On the plus side, this makes the unit 100% wireless, however since it is only a single cell, the running time between recharge can be limited.
I’m having second thoughts, as I can see myself using the unit for many hours at a time. I may replace the battery module with a 3.3V regulator and power jack for a mains adapter and live with the power cord being attached.
Charging the battery over USB to the micro USB connector. Indicators:
| LED | Meaning |
|---|---|
| L1 (green) | Charged |
| L2 (red ) | Charging |

Programming the ESP8266
I’m using the ESP8266 core for Arduino and the Arduino IDE to program the ESP-12 module. Programming is done on the LEAP#540 DIY Dev Board.
To compile the sources, two things to remember:
- When compiling
YouTubeControl, use theupdate_index_page.rbscript to regenerate the index page content ifpage_design.htmlhas been modified (see discussion below for what this is) - Copy
settings.h.templatetosettings.hand fill in the WiFi access credentials before compiling (settings.his excluded from the repository and is not shared).
Uploading the compiled application to the ESP8266 on the programming board:

Button Tester Program
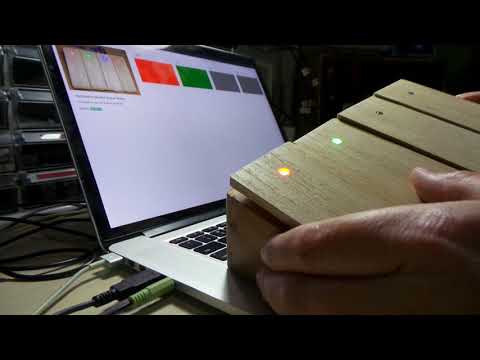
I used the ButtonTester sketch to verify that all foot switches and LEDs are working correctly and can be controlled from the ESP8266.
With a laptop connected on the same wifi network as the footswitch, open the web page http://yt-foot-controller.local/. It will reflect switch changes and the LED colours should match those indicated on the web page:

Here’s a quick scratch video I recorded to check the behaviour:
All good!
The YouTube Control Program
The YouTubeControl sketch combines button and LED control with a web page and Javascript that implements the video control.
The javascript automation of YouTube is based on some earlier experiments from Scripting YouTube.
Control Design - Buttons
| Button | Action | LED States |
|---|---|---|
| SW0 (left) | skip back 10s | Normally off, flash green when skipping |
| SW1 | play/stop | Red - stopped; green - playing |
| SW2 | skip fwd 10s | Normally off, flash green when skipping |
| SW3 (right) | mark/loop | Normally off when no mark or loop. Green after first mark. Blue on 2nd mark and now looping |
How mark/loop works:
- first click: “marks” the start time of the loop
- next click: “marks” the end time of the loop. Video starts looping
- another click: cancels loop and clears the time markers
Status data packet is a hash containing:
- “uptime”: long int; millis since startup (just FYI)
- “changed”: bool; indicates of state has changed since last call
- “event”: int;
- indicates a single (most recent) action to take (missed actions are silently dropped)
- 0: nothing to do
- 1: start playing
- 2: stop playing
- 3: skip back
- 4: skip fwd
- 5: first mark
- 6: second mark, start looping
- 7: reset looping
- “play”: bool; current play/stopped state
- “loop”: bool; current loop state
For simplicity, the current page reloads the entire page when changing to a new video. Reloading the main page causes a reset of the foot controller state to ensure everything stays in sync.
There is one slight annoyance - the YouTube API does not allow immediate automated control (as a defense against invasive autoplay dark patterns). The work around is to require at least one click on the page before the foot switch can take over. A very minor inconvenience, but an extra click that I didn’t really want.
I used a stand-along web page - page_design.html - for mocking up the web page, styling and Javascript. When I have it “just right”, the page content is copied into index_page.h for compilation.
NB: I used the update_index_page.rb script to reformat page_design.html and generate index_page.h automatically.
$ ./update_index_page.rb
Generating index_page.h from page_design.html...
...done!
How it Works

Adding Some Feet
I found some Adhesive 6mm Silicon Pads. They are very cheap and proved extremely effective.

No problems sticking to the wood without any additional adhesive, and they provide a high degree of grip, stopping the unit sliding around under rough handling by foot.

Improvements?
It’s working just great, but some improvements I’ve been putting on a wishlist:
- I’m waiting for some non-slip pads to be delivered. This will stop the unit sliding around under rough handling by foot. DONE√ (see above)
- As mentioned above, I may replace the battery pack with a mains adapter and 3.3V regulator for extended playing sessions
- Add some more features to the web application, e.g.
- maintain a playing history/library of videos
- save and recall particular loop sections
Credits and References
- YouTube Player API Reference
- Scripting YouTube
- LEAP#542 - the foot switch module with 4 switches and tri-state RGB LEDs
- LEAP#544 - ShengYang 18650 Battery Shield
- ESP-12E ESP8266 module - from an aliexpress seller
- ESP-12E adapter board - from an aliexpress seller
- 74HC595 Datasheet
- RGB LED Common anode - example from an aliexpress seller
- tactile limit microswitch - example from an aliexpress seller
- Videos used in the demo:
- the project on hackaday.io