
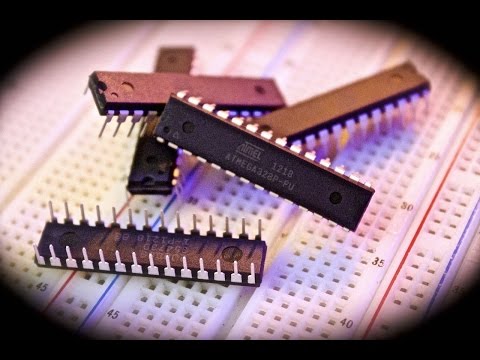
#405 ATmegaSerialProgrammer
All about bootloaders and how to program an ATMEGA328P chip over a serial connection with a CH340G USB-Serial adapter instead of ICSP.

Notes
When one uses the Arduino IDE to program an Arduino Uno over a USB connection, this is what is going on:
- the Arduino Uno provides a USB to serial conversion on the board
- in the Arduino Uno reference design, this is handled by an ATMEGA8U2-MU support chip
- the Arduino Nano has a dedicated USB-to-Serial FTDI FT232RL chip
- many Arduino Nano clones use cheaper USB-to-Serial chips such as the CH340G
- Note: boards like the Arduino Pro Mini that do not included onboard USB-to-Serial. This must be provided externally.
- Communications to the main microcontroller (e.g. ATMEGA328P) are serial over the RX/TX pins,
- The Arduino comes pre-installed with a bootloader on the microcontroller chip that knows how to support a serial programming mode
- When uploading a sketch:
- serial DTR is used to toggle the reset pin and activate the bootloader programming mode
- programming is accepted over the serial RX/TX pins
- chip is reset into run mode (now with a new program)
When we make a project with a bare ATMEGA328P chip (even just on a breadboard), it should be possible to support programming over a USB-to-Serial adapter in addition to bare-metal ICSP programming. See LEAP#099 ATmegaISPShield for more on ICSP programming.
The main (and essential) requirement is that the chip needs a suitable bootloader installed. If the chip does not have a bootloader (often the case for chips purchased in bulk) the first step is to load the bootloader - this must be done the ICSP way.
So for this project I plan to cover all the steps involved in preparing and programming an Atmel ATmega328P chip over a USB-Serial connection:
- How to check what bootloader (if any) is on a chip
- What bootloaders are available?
- How to burn a bootloader with the Arduino IDE
- How to burn a bootloader with Nick Gammon’s incredibly useful Arduino utility sketches
- Breadboard Setup for Programming over USB-Serial (FTDI and CH340 veriants)
- Programming over USB-Serial with the Arduino IDE
- Programming over USB-Serial with avrdude and gcc toolchain
How to Check the Bootloader
The first indication one may see that there’s a bootloader problem is the infamous
avrdude: stk500_recv(): programmer is not responding
error message in the Arduino IDE. For example, this appearing in the console window of the IDE:
avrdude: Version 6.3, compiled on Jan 17 2017 at 12:01:35
         Copyright (c) 2000-2005 Brian Dean, http://www.bdmicro.com/
         Copyright (c) 2007-2014 Joerg Wunsch

         System wide configuration file is "/Applications/Arduino.app/Contents/Java/hardware/tools/avr/etc/avrdude.conf"
         User configuration file is "/Users/paulgallagher/.avrduderc"
         User configuration file does not exist or is not a regular file, skipping

         Using Port                    : /dev/cu.wchusbserial14230
         Using Programmer              : arduino
         Overriding Baud Rate          : 115200
avrdude: stk500_recv(): programmer is not responding
avrdude: stk500_getsync() attempt 1 of 10: not in sync: resp=0x00
avrdude: stk500_recv(): programmer is not responding
... etc ...
avrdude: stk500_recv(): programmer is not responding
avrdude: stk500_getsync() attempt 10 of 10: not in sync: resp=0x00

avrdude done.  Thank you.

Problem uploading to board.  See http://www.arduino.cc/en/Guide/Troubleshooting#upload for suggestions.
Using Atmega_Board_Detector
Nick Gammon’s Atmega_Board_Detector sketch in his arduino_sketches repository is a great utility for finding out exactly what bootloader may already be present on an Atmel ATmega328P chip.
The Atmega_Board_Detector sketch uses one Arduino to detect the signature, fuses, and bootloader of another one. See Nick’s post Sketch to detect Atmega chip types for more details.
The wiring between the master and slave is as required for normal ICSP programming. I’m using my LEAP#099 ATmegaISPShield for this:

But the target chip can also be wired up directly on a breadboard:

Nick Gammon’s arduino_sketches can be downloaded separately, or can be cloned directly into this folder (where they are hidden with a .gitignore) - see clone_gammon_arduino_sketches.sh
Steps:
- wire up the ICSP connections from the chip under test to the host Arduino
- use the Arduino IDE to program the host Arduino with the Atmega_Board_Detector sketch
- open the Arduino IDE console
- sketch will put the chip under test into programming mode and dump chip and bootloader diagnostics to the console
Here’s a test with a fresh ATmega328P chip - as you can see, no bootloader present:
Atmega chip detector.
Written by Nick Gammon.
Version 1.20
Compiled on Jul 29 2018 at 11:49:02 with Arduino IDE 10802.
Attempting to enter ICSP programming mode ...
Entered programming mode OK.
Signature = 0x1E 0x95 0x0F
Processor = ATmega328P
Flash memory size = 32768 bytes.
LFuse = 0x62
HFuse = 0xD9
EFuse = 0xFF
Lock byte = 0xFF
Clock calibration = 0x94
Bootloader in use: No
EEPROM preserved through erase: No
Watchdog timer always on: No
Bootloader is 4096 bytes starting at 7000

Bootloader:

7000: 0xFF 0xFF 0xFF 0xFF 0xFF 0xFF 0xFF 0xFF 0xFF 0xFF 0xFF 0xFF 0xFF 0xFF 0xFF 0xFF
7010: 0xFF 0xFF 0xFF 0xFF 0xFF 0xFF 0xFF 0xFF 0xFF 0xFF 0xFF 0xFF 0xFF 0xFF 0xFF 0xFF
7020: 0xFF 0xFF 0xFF 0xFF 0xFF 0xFF 0xFF 0xFF 0xFF 0xFF 0xFF 0xFF 0xFF 0xFF 0xFF 0xFF
...etc...
7FD0: 0xFF 0xFF 0xFF 0xFF 0xFF 0xFF 0xFF 0xFF 0xFF 0xFF 0xFF 0xFF 0xFF 0xFF 0xFF 0xFF
7FE0: 0xFF 0xFF 0xFF 0xFF 0xFF 0xFF 0xFF 0xFF 0xFF 0xFF 0xFF 0xFF 0xFF 0xFF 0xFF 0xFF
7FF0: 0xFF 0xFF 0xFF 0xFF 0xFF 0xFF 0xFF 0xFF 0xFF 0xFF 0xFF 0xFF 0xFF 0xFF 0xFF 0xFF

MD5 sum of bootloader = 0x51 0xC1 0x49 0x79 0x12 0x8B 0x51 0x80 0x37 0x47 0x16 0x3F 0xE4 0xE4 0x07 0xC8
Bootloader MD5 sum not known.

First 256 bytes of program memory:

00: 0xFF 0xFF 0xFF 0xFF 0xFF 0xFF 0xFF 0xFF 0xFF 0xFF 0xFF 0x17 0xFF 0xFF 0xFF 0xFF
10: 0xFF 0xFF 0xFF 0xFF 0xFF 0xFF 0xFF 0xFF 0xFF 0xFF 0xFF 0xFF 0xFF 0xFF 0xFF 0xFF
20: 0xFF 0xFF 0xFF 0xFF 0xFF 0xFF 0xFF 0xFF 0xFF 0xFF 0xFF 0xFF 0xFF 0xFF 0xFF 0xFF
...etc...
D0: 0xFF 0xFF 0xFF 0xFF 0xFF 0xFF 0xFF 0xFF 0xFF 0xFF 0xFF 0xFF 0xFF 0xFF 0xFF 0xFF
E0: 0xFF 0xFF 0xFF 0xFF 0xFF 0xFF 0xFF 0xFF 0xFF 0xFF 0xFF 0xFF 0xFF 0xFF 0xFF 0xFF
F0: 0xFF 0xFF 0xFF 0xFF 0xFF 0xFF 0xFF 0xFF 0xFF 0xFF 0xFF 0xFF 0xFF 0xFF 0xFF 0xFF

Programming mode off.
Here’s what that looks like in the Arduino IDE:

Here’s a test with a an ATmega328P chip that has a bootloader (but no sketch) loaded via the Arduino IDE.
Atmega chip detector.
Written by Nick Gammon.
Version 1.20
Compiled on Jul 29 2018 at 12:04:18 with Arduino IDE 10802.
Attempting to enter ICSP programming mode ...
Entered programming mode OK.
Signature = 0x1E 0x95 0x0F
Processor = ATmega328P
Flash memory size = 32768 bytes.
LFuse = 0xFF
HFuse = 0xDE
EFuse = 0xFD
Lock byte = 0xCF
Clock calibration = 0x94
Bootloader in use: Yes
EEPROM preserved through erase: No
Watchdog timer always on: No
Bootloader is 512 bytes starting at 7E00

Bootloader:

7E00: 0x11 0x24 0x84 0xB7 0x14 0xBE 0x81 0xFF 0xF0 0xD0 0x85 0xE0 0x80 0x93 0x81 0x00
7E10: 0x82 0xE0 0x80 0x93 0xC0 0x00 0x88 0xE1 0x80 0x93 0xC1 0x00 0x86 0xE0 0x80 0x93
7E20: 0xC2 0x00 0x80 0xE1 0x80 0x93 0xC4 0x00 0x8E 0xE0 0xC9 0xD0 0x25 0x9A 0x86 0xE0
...etc...
7FD0: 0x88 0xE0 0xF5 0xDF 0xFF 0xCF 0x84 0xE1 0xDE 0xCF 0x1F 0x93 0x18 0x2F 0xE3 0xDF
7FE0: 0x11 0x50 0xE9 0xF7 0xF2 0xDF 0x1F 0x91 0x08 0x95 0x80 0xE0 0xE8 0xDF 0xEE 0x27
7FF0: 0xFF 0x27 0x09 0x94 0xFF 0xFF 0xFF 0xFF 0xFF 0xFF 0xFF 0xFF 0xFF 0xFF 0x04 0x04

MD5 sum of bootloader = 0xFB 0xF4 0x9B 0x7B 0x59 0x73 0x7F 0x65 0xE8 0xD0 0xF8 0xA5 0x08 0x12 0xE7 0x9F
Bootloader name: optiboot_atmega328

First 256 bytes of program memory:

00: 0xFF 0xFF 0xFF 0xFF 0xFF 0xFF 0xFF 0xFF 0xFF 0xFF 0xFF 0xFF 0xFF 0xFF 0xFF 0xFF
10: 0xFF 0xFF 0xFF 0xFF 0xFF 0xFF 0xFF 0xFF 0xFF 0xFF 0xFF 0xFF 0xFF 0xFF 0xFF 0xFF
20: 0xFF 0xFF 0xFF 0xFF 0xFF 0xFF 0xFF 0xFF 0xFF 0xFF 0xFF 0xFF 0xFF 0xFF 0xFF 0xFF
...etc...
D0: 0xFF 0xFF 0xFF 0xFF 0xFF 0xFF 0xFF 0xFF 0xFF 0xFF 0xFF 0xFF 0xFF 0xFF 0xFF 0xFF
E0: 0xFF 0xFF 0xFF 0xFF 0xFF 0xFF 0xFF 0xFF 0xFF 0xFF 0xFF 0xFF 0xFF 0xFF 0xFF 0xFF
F0: 0xFF 0xFF 0xFF 0xFF 0xFF 0xFF 0xFF 0xFF 0xFF 0xFF 0xFF 0xFF 0xFF 0xFF 0xFF 0xFF

Programming mode off.
Available Bootloaders
The Arduino Bootloader Development page introduces the basics of the bootloader.
Source code for core Arduino bootloaders is now in the ArduinoCore-avr repo on GitHub.
Older versions of Arduino had a range of processor-specific bootloaders, but now all tend to use the Optiboot bootloader. It claims to be be heavily optimised that is faster and smaller than the (earlier) Arduino standard bootloader.
The STK500v2 bootloader is used for ATmega2560-based boards, but I think can also be used with ATmega328.
How to Burn a Bootloader with the Arduino IDE
The Arduino IDE supports buring a bootloader. The bootloader to be installed depends on the board selected under the “Tools > Board” menu.
It requires a programmer to be selected. I’m using the Arduino as ISP sketch loaded on my LEAP#099 ATmegaISPShield for this.
Steps:
- load the Arduino as ISP sketch on the programming host Arduino
- select the target board under the “Tools > Board” menu. In my case, “Arduino/Genuino Uno”
- select “Tools > Burn Bootloader”
- optionally, go back and use Atmega_Board_Detector to verify the bootloader
What this looks like in the IDE:


The IDE console log will look something like this:
/Applications/Arduino.app/Contents/Java/hardware/tools/avr/bin/avrdude -C/Applications/Arduino.app/Contents/Java/hardware/tools/avr/etc/avrdude.conf -v -patmega328p -cstk500v1 -P/dev/cu.usbmodem14231 -b19200 -e -Ulock:w:0x3F:m -Uefuse:w:0xFD:m -Uhfuse:w:0xDE:m -Ulfuse:w:0xFF:m

avrdude: Version 6.3, compiled on Jan 17 2017 at 12:01:35
         Copyright (c) 2000-2005 Brian Dean, http://www.bdmicro.com/
         Copyright (c) 2007-2014 Joerg Wunsch

         System wide configuration file is "/Applications/Arduino.app/Contents/Java/hardware/tools/avr/etc/avrdude.conf"
         User configuration file is "/Users/paulgallagher/.avrduderc"
         User configuration file does not exist or is not a regular file, skipping

         Using Port                    : /dev/cu.usbmodem14231
         Using Programmer              : stk500v1
         Overriding Baud Rate          : 19200
         AVR Part                      : ATmega328P
         Chip Erase delay              : 9000 us
         PAGEL                         : PD7
         BS2                           : PC2
         RESET disposition             : dedicated
         RETRY pulse                   : SCK
         serial program mode           : yes
         parallel program mode         : yes
         Timeout                       : 200
         StabDelay                     : 100
         CmdexeDelay                   : 25
         SyncLoops                     : 32
         ByteDelay                     : 0
         PollIndex                     : 3
         PollValue                     : 0x53
         Memory Detail                 :

                                  Block Poll               Page                       Polled
           Memory Type Mode Delay Size  Indx Paged  Size   Size #Pages MinW  MaxW   ReadBack
           ----------- ---- ----- ----- ---- ------ ------ ---- ------ ----- ----- ---------
           eeprom        65    20     4    0 no       1024    4      0  3600  3600 0xff 0xff
           flash         65     6   128    0 yes     32768  128    256  4500  4500 0xff 0xff
           lfuse          0     0     0    0 no          1    0      0  4500  4500 0x00 0x00
           hfuse          0     0     0    0 no          1    0      0  4500  4500 0x00 0x00
           efuse          0     0     0    0 no          1    0      0  4500  4500 0x00 0x00
           lock           0     0     0    0 no          1    0      0  4500  4500 0x00 0x00
           calibration    0     0     0    0 no          1    0      0     0     0 0x00 0x00
           signature      0     0     0    0 no          3    0      0     0     0 0x00 0x00

         Programmer Type : STK500
         Description     : Atmel STK500 Version 1.x firmware
         Hardware Version: 2
         Firmware Version: 1.18
         Topcard         : Unknown
         Vtarget         : 0.0 V
         Varef           : 0.0 V
         Oscillator      : Off
         SCK period      : 0.1 us

avrdude: AVR device initialized and ready to accept instructions

Reading | ################################################## | 100% 0.02s

avrdude: Device signature = 0x1e950f (probably m328p)
avrdude: erasing chip
avrdude: reading input file "0x3F"
avrdude: writing lock (1 bytes):

Writing | ################################################## | 100% 0.01s

avrdude: 1 bytes of lock written
avrdude: verifying lock memory against 0x3F:
avrdude: load data lock data from input file 0x3F:
avrdude: input file 0x3F contains 1 bytes
avrdude: reading on-chip lock data:

Reading | ################################################## | 100% 0.01s

avrdude: verifying ...
avrdude: 1 bytes of lock verified
avrdude: reading input file "0xFD"
avrdude: writing efuse (1 bytes):

/Applications/Arduino.app/Contents/Java/hardware/tools/avr/bin/avrdude -C/Applications/Arduino.app/Contents/Java/hardware/tools/avr/etc/avrdude.conf -v -patmega328p -cstk500v1 -P/dev/cu.usbmodem14231 -b19200 -Uflash:w:/Applications/Arduino.app/Contents/Java/hardware/arduino/avr/bootloaders/optiboot/optiboot_atmega328.hex:i -Ulock:w:0x0F:m

avrdude: Version 6.3, compiled on Jan 17 2017 at 12:01:35
         Copyright (c) 2000-2005 Brian Dean, http://www.bdmicro.com/
         Copyright (c) 2007-2014 Joerg Wunsch

         System wide configuration file is "/Applications/Arduino.app/Contents/Java/hardware/tools/avr/etc/avrdude.conf"
         User configuration file is "/Users/paulgallagher/.avrduderc"
         User configuration file does not exist or is not a regular file, skipping

         Using Port                    : /dev/cu.usbmodem14231
         Using Programmer              : stk500v1
         Overriding Baud Rate          : 19200
Writing | ################################################## | 100% 0.01s

avrdude: 1 bytes of efuse written
avrdude: verifying efuse memory against 0xFD:
avrdude: load data efuse data from input file 0xFD:
avrdude: input file 0xFD contains 1 bytes
avrdude: reading on-chip efuse data:

Reading | ################################################## | 100% 0.01s

avrdude: verifying ...
avrdude: 1 bytes of efuse verified
avrdude: reading input file "0xDE"
avrdude: writing hfuse (1 bytes):

Writing | ################################################## | 100% 0.01s

avrdude: 1 bytes of hfuse written
avrdude: verifying hfuse memory against 0xDE:
avrdude: load data hfuse data from input file 0xDE:
avrdude: input file 0xDE contains 1 bytes
avrdude: reading on-chip hfuse data:

Reading | ################################################## | 100% 0.01s

avrdude: verifying ...
avrdude: 1 bytes of hfuse verified
avrdude: reading input file "0xFF"
avrdude: writing lfuse (1 bytes):

Writing | ################################################## | 100% 0.01s

avrdude: 1 bytes of lfuse written
avrdude: verifying lfuse memory against 0xFF:
avrdude: load data lfuse data from input file 0xFF:
avrdude: input file 0xFF contains 1 bytes
avrdude: reading on-chip lfuse data:

Reading | ################################################## | 100% 0.01s

avrdude: verifying ...
avrdude: 1 bytes of lfuse verified

avrdude done.  Thank you.

         AVR Part                      : ATmega328P
         Chip Erase delay              : 9000 us
         PAGEL                         : PD7
         BS2                           : PC2
         RESET disposition             : dedicated
         RETRY pulse                   : SCK
         serial program mode           : yes
         parallel program mode         : yes
         Timeout                       : 200
         StabDelay                     : 100
         CmdexeDelay                   : 25
         SyncLoops                     : 32
         ByteDelay                     : 0
         PollIndex                     : 3
         PollValue                     : 0x53
         Memory Detail                 :

                                  Block Poll               Page                       Polled
           Memory Type Mode Delay Size  Indx Paged  Size   Size #Pages MinW  MaxW   ReadBack
           ----------- ---- ----- ----- ---- ------ ------ ---- ------ ----- ----- ---------
           eeprom        65    20     4    0 no       1024    4      0  3600  3600 0xff 0xff
           flash         65     6   128    0 yes     32768  128    256  4500  4500 0xff 0xff
           lfuse          0     0     0    0 no          1    0      0  4500  4500 0x00 0x00
           hfuse          0     0     0    0 no          1    0      0  4500  4500 0x00 0x00
           efuse          0     0     0    0 no          1    0      0  4500  4500 0x00 0x00
           lock           0     0     0    0 no          1    0      0  4500  4500 0x00 0x00
           calibration    0     0     0    0 no          1    0      0     0     0 0x00 0x00
           signature      0     0     0    0 no          3    0      0     0     0 0x00 0x00

         Programmer Type : STK500
         Description     : Atmel STK500 Version 1.x firmware
         Hardware Version: 2
         Firmware Version: 1.18
         Topcard         : Unknown
         Vtarget         : 0.0 V
         Varef           : 0.0 V
         Oscillator      : Off
         SCK period      : 0.1 us

avrdude: AVR device initialized and ready to accept instructions

Reading | ################################################## | 100% 0.02s

avrdude: Device signature = 0x1e950f (probably m328p)
avrdude: NOTE: "flash" memory has been specified, an erase cycle will be performed
         To disable this feature, specify the -D option.
avrdude: erasing chip
avrdude: reading input file "/Applications/Arduino.app/Contents/Java/hardware/arduino/avr/bootloaders/optiboot/optiboot_atmega328.hex"
avrdude: writing flash (32768 bytes):

Writing | ################################################## | 100% 0.00s

avrdude: 32768 bytes of flash written
avrdude: verifying flash memory against /Applications/Arduino.app/Contents/Java/hardware/arduino/avr/bootloaders/optiboot/optiboot_atmega328.hex:
avrdude: load data flash data from input file /Applications/Arduino.app/Contents/Java/hardware/arduino/avr/bootloaders/optiboot/optiboot_atmega328.hex:
avrdude: input file /Applications/Arduino.app/Contents/Java/hardware/arduino/avr/bootloaders/optiboot/optiboot_atmega328.hex contains 32768 bytes
avrdude: reading on-chip flash data:

Reading | ################################################## | 100% 0.00s

avrdude: verifying ...
avrdude: 32768 bytes of flash verified
avrdude: reading input file "0x0F"
avrdude: writing lock (1 bytes):

Writing | ################################################## | 100% 0.02s

avrdude: 1 bytes of lock written
avrdude: verifying lock memory against 0x0F:
avrdude: load data lock data from input file 0x0F:
avrdude: input file 0x0F contains 1 bytes
avrdude: reading on-chip lock data:

Reading | ################################################## | 100% 0.01s

avrdude: verifying ...
avrdude: 1 bytes of lock verified

avrdude done.  Thank you.
How to Burn a Bootloader with the Nick Gammon’s Atmega_Board_Programmer
Nick Gammon’s Atmega_Board_Programmer sketch in his arduino_sketches repository is a great utility verifying and burning a bootloader.
Note: there are alternatives, such as OptiLoader
Nick’s post Atmega bootloader programmer describes this in great detail.
It is also demonstrated very clearly in the “Best Way to Burn Arduino Bootloaders Tutorial!” by Kevin Darrah:
The Atmega_Board_Programmer sketch uses one Arduino to burn the bootloader of another one.
The wiring between the master and slave is as required for normal ICSP programming. I’m using my LEAP#099 ATmegaISPShield for this.
Steps:
- wire up the ICSP connections from the chip under test to the host Arduino
- use the Arduino IDE to program the host Arduino with the Atmega_Board_Programmer sketch
- open the Arduino IDE console
- sketch will put the chip under test into programming mode and dump chip diagnostics to the console
- burn the bootloader with commands entered in the serial console:
- enter ‘U’ to select Uno (16 MHz) loader
- enter ‘G’ to program the chip with the bootloader
- this will burn the bootloader and take the chip out of programming mode
- enter ‘C’ to re-enable programming mode so that we can run verification
- enter ‘U’ to select Uno (16 MHz) loader
- enter ‘V’ to verify
- this will verify the bootloader and should return with “No errors found”
Here’s a full transcript with a ATmega328P chip:
Atmega chip programmer.
Written by Nick Gammon.
Version 1.38
Compiled on Jul 29 2018 at 08:36:16 with Arduino IDE 10802.
Attempting to enter ICSP programming mode ...
Entered programming mode OK.
Signature = 0x1E 0x95 0x0F
Processor = ATmega328P
Flash memory size = 32768 bytes.
LFuse = 0xFF
HFuse = 0xDE
EFuse = 0xFD
Lock byte = 0xFF
Clock calibration = 0x8E
Type 'L' to use Lilypad (8 MHz) loader, or 'U' for Uno (16 MHz) loader ...
Using Uno Optiboot 16 MHz loader.
Bootloader address = 0x7E00
Bootloader length = 512 bytes.
Type 'Q' to quit, 'V' to verify, or 'G' to program the chip with the bootloader ...
Verifying ...
Verification error at address 7E00. Got: 0xFF  Expected: 0x11
Verification error at address 7E01. Got: 0xFF  Expected: 0x24
Verification error at address 7E02. Got: 0xFF  Expected: 0x84
...etc...
Verification error at address 7E63. Got: 0xFF  Expected: 0x34
Verification error at address 7E64. Got: 0xFF  Expected: 0x61
Verification error at address 7E65. Got: 0xFF  Expected: 0xF4
496 verification error(s).
First 100 shown.
Programming mode off.
Type 'C' when ready to continue with another chip ...
Attempting to enter ICSP programming mode ...
Entered programming mode OK.
Signature = 0x1E 0x95 0x0F
Processor = ATmega328P
Flash memory size = 32768 bytes.
LFuse = 0xFF
HFuse = 0xDE
EFuse = 0xFD
Lock byte = 0xFF
Clock calibration = 0x8E
Type 'L' to use Lilypad (8 MHz) loader, or 'U' for Uno (16 MHz) loader ...
Using Uno Optiboot 16 MHz loader.
Bootloader address = 0x7E00
Bootloader length = 512 bytes.
Type 'Q' to quit, 'V' to verify, or 'G' to program the chip with the bootloader ...
Erasing chip ...
Writing bootloader ...
Committing page starting at 0x7E00
Committing page starting at 0x7E80
Committing page starting at 0x7F00
Committing page starting at 0x7F80
Written.
Verifying ...
No errors found.
Writing fuses ...
LFuse = 0xFF
HFuse = 0xDE
EFuse = 0xFD
Lock byte = 0xEF
Clock calibration = 0x8E
Done.
Programming mode off.
Type 'C' when ready to continue with another chip ...
Attempting to enter ICSP programming mode ...
Entered programming mode OK.
Signature = 0x1E 0x95 0x0F
Processor = ATmega328P
Flash memory size = 32768 bytes.
LFuse = 0xFF
HFuse = 0xDE
EFuse = 0xFD
Lock byte = 0xEF
Clock calibration = 0x8E
Type 'L' to use Lilypad (8 MHz) loader, or 'U' for Uno (16 MHz) loader ...
Using Uno Optiboot 16 MHz loader.
Bootloader address = 0x7E00
Bootloader length = 512 bytes.
Type 'Q' to quit, 'V' to verify, or 'G' to program the chip with the bootloader ...
Verifying ...
No errors found.
Done.
Programming mode off.
Type 'C' when ready to continue with another chip ...
Here it is in the console:

Breadboard Setup for Programming over USB-Serial
The basic connections required from the USB-Serial adapter to the chip (pin numbers are for Atmega328P-PU 28-pin DIP package):
| USB-Serial | ATmega | ATmega Pin |
|---|---|---|
| +5V | VCC, AVCC | 7, 20 |
| GND | GND | 8, 22 |
| DTR | RESET | 1 |
| RXD | TX | 3 |
| TXD | RX | 2 |
Here’s the breadboard layout and schematic:


Note: this includes a manual reset switch, which is not actually required for any of the procedures here (but might come in handy)
Selecting a USB-Serial Adapter
The leading USB-Serial adapters are probably those based on the FTDI USB-UART chips such as the SparkFun USB to Serial Breakout - FT232RL. The main benefit of using the FTDI chips is that driver support is likely already present in your operating system
However the most common adapters are probably those based on the CH340G USB-UART. It is also present on many Arduino Nano clones. While very cheap and readily available, drivers may need to be installed.
I’m using a CH340G USB adapter that I got along with an Arduino mini (seems no longer available, but variants are likely available from other sources). Key features:
- it has a 5V/3.3V selector. I discovered that this switches VCC from 5V/3.3V. It does not level shift the data lines - they will still be 5V.
- it has pins for both DTR and CTS connections
There are similar adapters such as CH340G-based USB to UART adapter but note that many do not break out the DTR pin.
MacOSX driver support for the CH340G
I first used CH340G chips with MacOSX Yosemite. It was not recognised by default and I had to hunt around for drivers. The last driver I installed (Sierra-compatible) is available at github.com/adrianmihalko/ch340g-ch34g-ch34x-mac-os-x-driver. I’ve since updated to High Sierra without driver issues (though I’m not sure if this is because the OS now supports CH340 chips directly, or the driver I installed before the update is still working).
See “How to use cheap Chinese Arduinos that come with with CH340G / CH341G Serial/USB chip” for more info - a great guide. There also appears to be a professional drive kit available (at cost) from www.mac-usb-serial.com
Here’s an ATmega328P on a breadboard hooked up for programming with a CH340G USB-Serial adapter:
Programming over USB-Serial with the Arduino IDE
With a USB-Serial adapter correctly connected to an Atmega328P on a breadboard, the Arduino IDE works exactly like it was connected to a real Arduino Uno.
Sketches are uploaded as normal and .. it just works!
Note: if the USB-Serial adapter does not support or connect DTR to the chip’s reset line, then it may still be possible to get things to work by manually reseting the chip at just the right moment This is a common trick for Arduino Pro Minis!.
Programming over USB-Serial with the Arduino IDE:

Programming over USB-Serial with avrdude and gcc toolchain
The Arduino IDE actually uses avrdude under the cover to program the Arduino, so of course it is possible to do so directly from the command line.
I covered this in more detail in LEAP#220 GccToolchain.
In the blinky folder I have an example program and Makefile for compiling and programming over USB-Serial.
It’s necessary to identify the serial device. I’m on MacOSX so like this:
$ ls -1 /dev/*serial*
/dev/cu.wchusbserial14230
/dev/tty.wchusbserial14230
Interestingly, both /dev/cu. and /dev/tty. variants work with avrdude.
The main difference is that tty is blocking while cu isn’t.
Here’s a transcript of successfull programming:
cd blinky
$ make flash PORT=/dev/cu.wchusbserial14230
avr-gcc -w -Os -Wl,--gc-sections -DF_CPU=16000000UL -mmcu=atmega328p -c blinky.c
avr-gcc -mmcu=atmega328p -Wl,-Map,blinky.map blinky.o -o blinky.elf
avr-objcopy -j .text -j .data -O ihex blinky.elf blinky.hex
avr-objdump -h -S blinky.elf > blinky.lst
avrdude -v -D -c arduino -p atmega328p -P /dev/cu.wchusbserial14230 -b 115200 -U flash:w:blinky.hex:i

avrdude: Version 6.3, compiled on Mar 15 2016 at 21:26:45
         Copyright (c) 2000-2005 Brian Dean, http://www.bdmicro.com/
         Copyright (c) 2007-2014 Joerg Wunsch

         System wide configuration file is "/usr/local/Cellar/avrdude/6.3/etc/avrdude.conf"
         User configuration file is "/Users/paulgallagher/.avrduderc"
         User configuration file does not exist or is not a regular file, skipping

         Using Port                    : /dev/cu.wchusbserial14230
         Using Programmer              : arduino
         Overriding Baud Rate          : 115200
         AVR Part                      : ATmega328P
         Chip Erase delay              : 9000 us
         PAGEL                         : PD7
         BS2                           : PC2
         RESET disposition             : dedicated
         RETRY pulse                   : SCK
         serial program mode           : yes
         parallel program mode         : yes
         Timeout                       : 200
         StabDelay                     : 100
         CmdexeDelay                   : 25
         SyncLoops                     : 32
         ByteDelay                     : 0
         PollIndex                     : 3
         PollValue                     : 0x53
         Memory Detail                 :

                                  Block Poll               Page                       Polled
           Memory Type Mode Delay Size  Indx Paged  Size   Size #Pages MinW  MaxW   ReadBack
           ----------- ---- ----- ----- ---- ------ ------ ---- ------ ----- ----- ---------
           eeprom        65    20     4    0 no       1024    4      0  3600  3600 0xff 0xff
           flash         65     6   128    0 yes     32768  128    256  4500  4500 0xff 0xff
           lfuse          0     0     0    0 no          1    0      0  4500  4500 0x00 0x00
           hfuse          0     0     0    0 no          1    0      0  4500  4500 0x00 0x00
           efuse          0     0     0    0 no          1    0      0  4500  4500 0x00 0x00
           lock           0     0     0    0 no          1    0      0  4500  4500 0x00 0x00
           calibration    0     0     0    0 no          1    0      0     0     0 0x00 0x00
           signature      0     0     0    0 no          3    0      0     0     0 0x00 0x00

         Programmer Type : Arduino
         Description     : Arduino
         Hardware Version: 3
         Firmware Version: 4.4
         Vtarget         : 0.3 V
         Varef           : 0.3 V
         Oscillator      : 28.800 kHz
         SCK period      : 3.3 us

avrdude: AVR device initialized and ready to accept instructions

Reading | ################################################## | 100% 0.02s

avrdude: Device signature = 0x1e950f (probably m328p)
avrdude: safemode: hfuse reads as 0
avrdude: safemode: efuse reads as 0
avrdude: reading input file "blinky.hex"
avrdude: writing flash (178 bytes):

Writing | ################################################## | 100% 0.12s

avrdude: 178 bytes of flash written
avrdude: verifying flash memory against blinky.hex:
avrdude: load data flash data from input file blinky.hex:
avrdude: input file blinky.hex contains 178 bytes
avrdude: reading on-chip flash data:

Reading | ################################################## | 100% 0.11s

avrdude: verifying ...
avrdude: 178 bytes of flash verified

avrdude: safemode: hfuse reads as 0
avrdude: safemode: efuse reads as 0
avrdude: safemode: Fuses OK (E:00, H:00, L:00)

avrdude done.  Thank you.
Credits and References
- LEAP#220 GccToolchain
- LEAP#099 ATmegaISPShield
- Atmel ATmega328P Product Info
- ATMEGA8U2-MU
- FTDI FT232RL
- SparkFun USB to Serial Breakout - FT232RL
- SparkFun Serial Basic Breakout - CH340G
- cp2102 usb - serial conversion module (with RTS)
- Nick Gammon’s Atmega bootloader page
- Nick Gammon’s arduino_sketches
- OptiLoader
- avrdude
- avrdude manual
- Arduino Bootloader Development
- Arduino bootloaders source
- Installing an Arduino Bootloader - good guide from sparkfun
- Arduino USB Auto-Reset Hack - good reading if you need to address board reset issues
- ..as mentioned on my blog