
#099 ATmegaISPShield
A DIY ATmega programming shield using an Arduino as the ISP
Notes
The LEAP#068 ATmegaViaArduinoISP project tested programming an ATmega chip on a breadboard using an Arduino as the in-system programmer.
It’s a very convenient way to program an ATmega chip, but it is a bit of a chore to setup the circuit each time it is required.
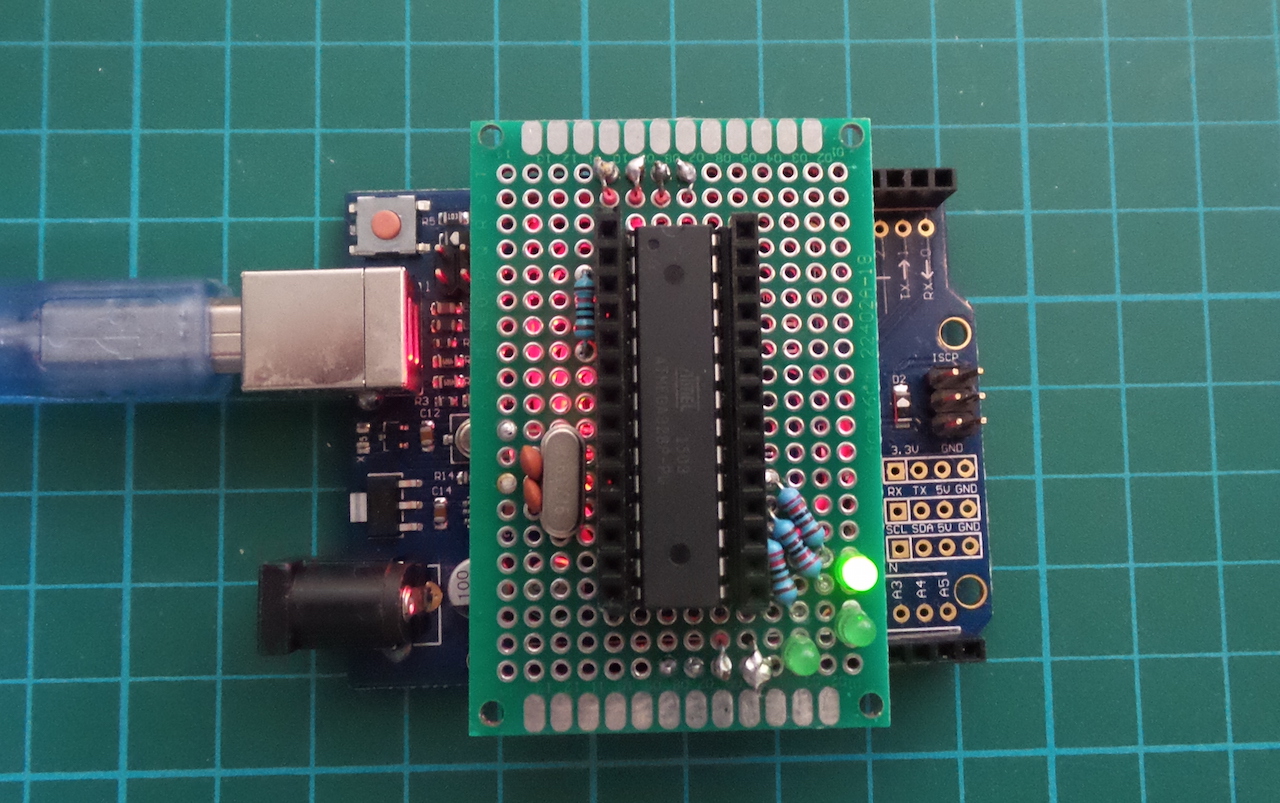
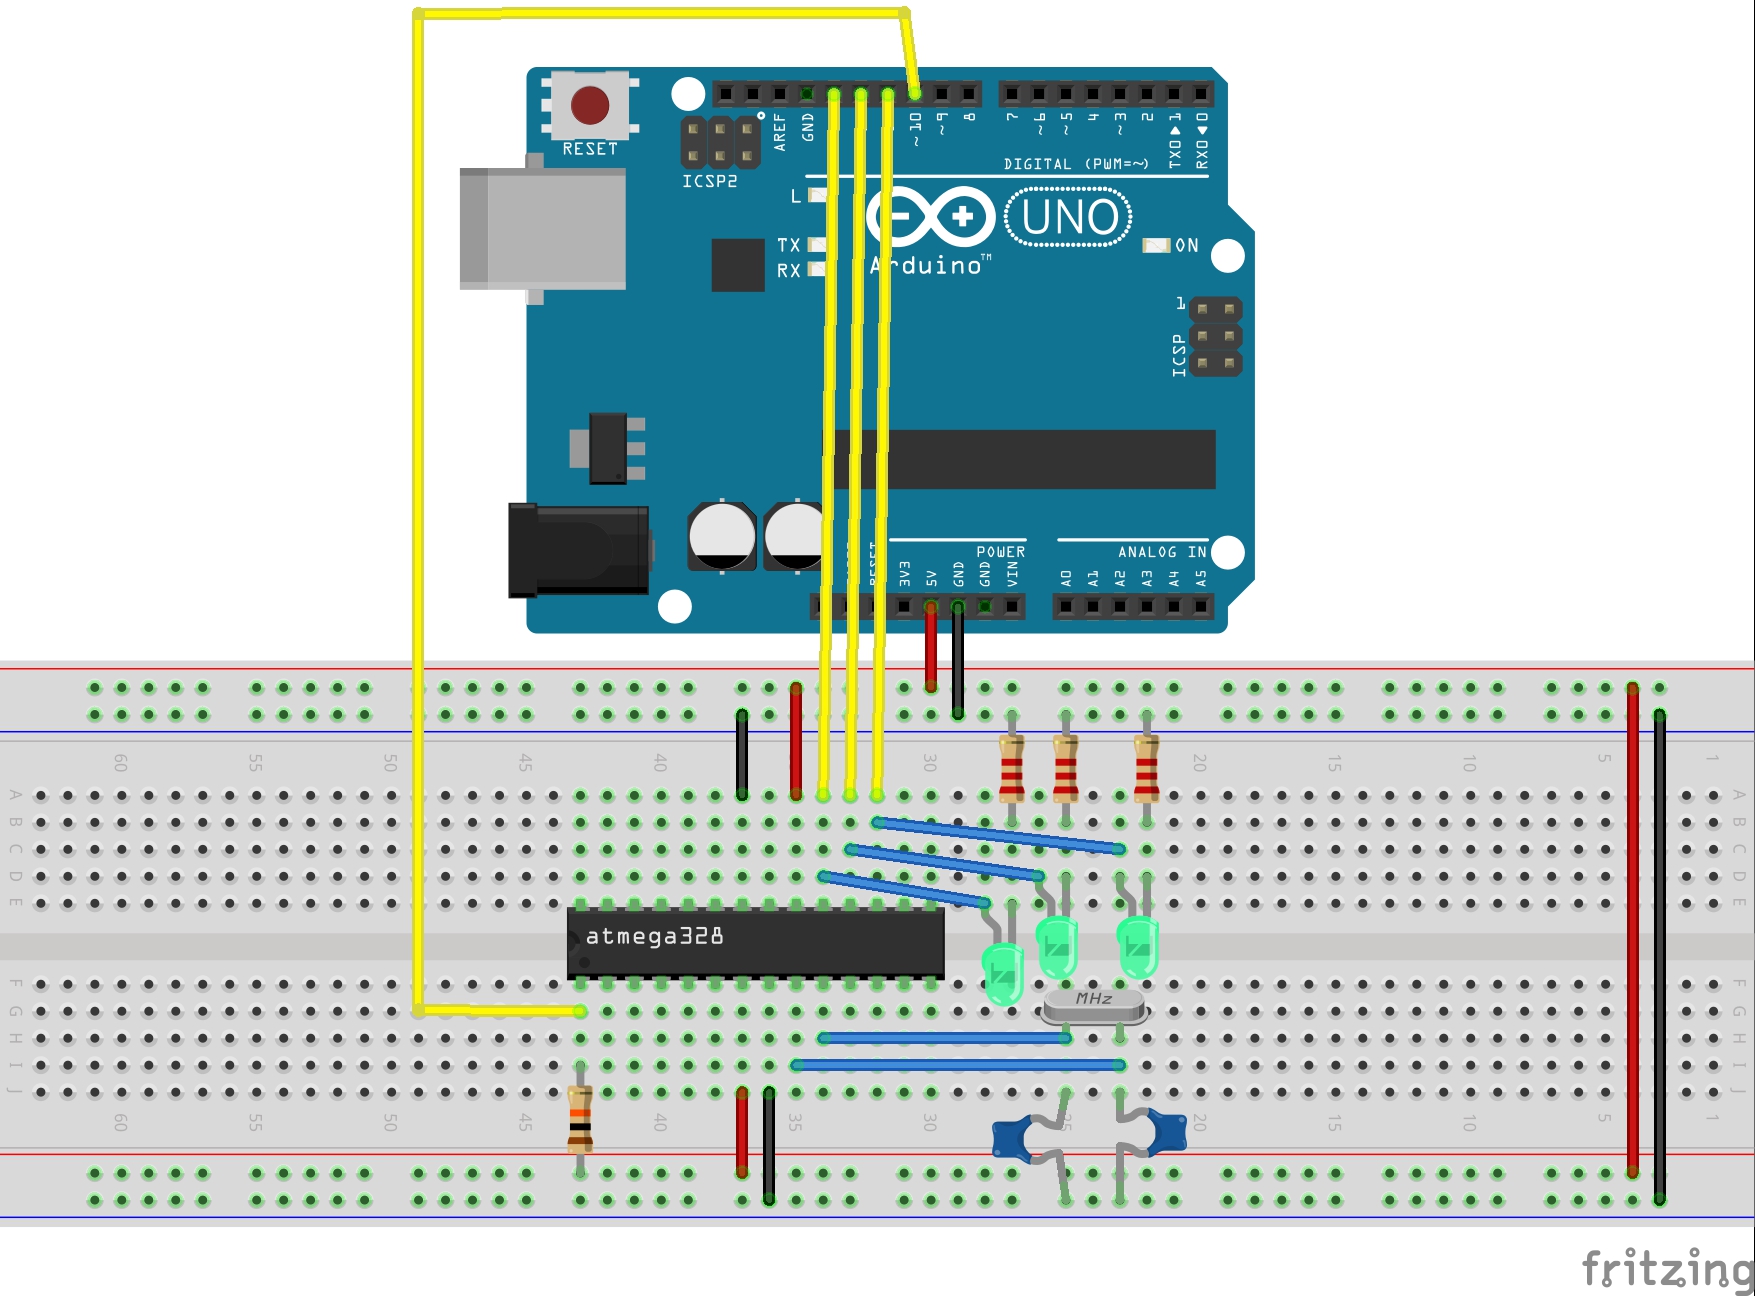
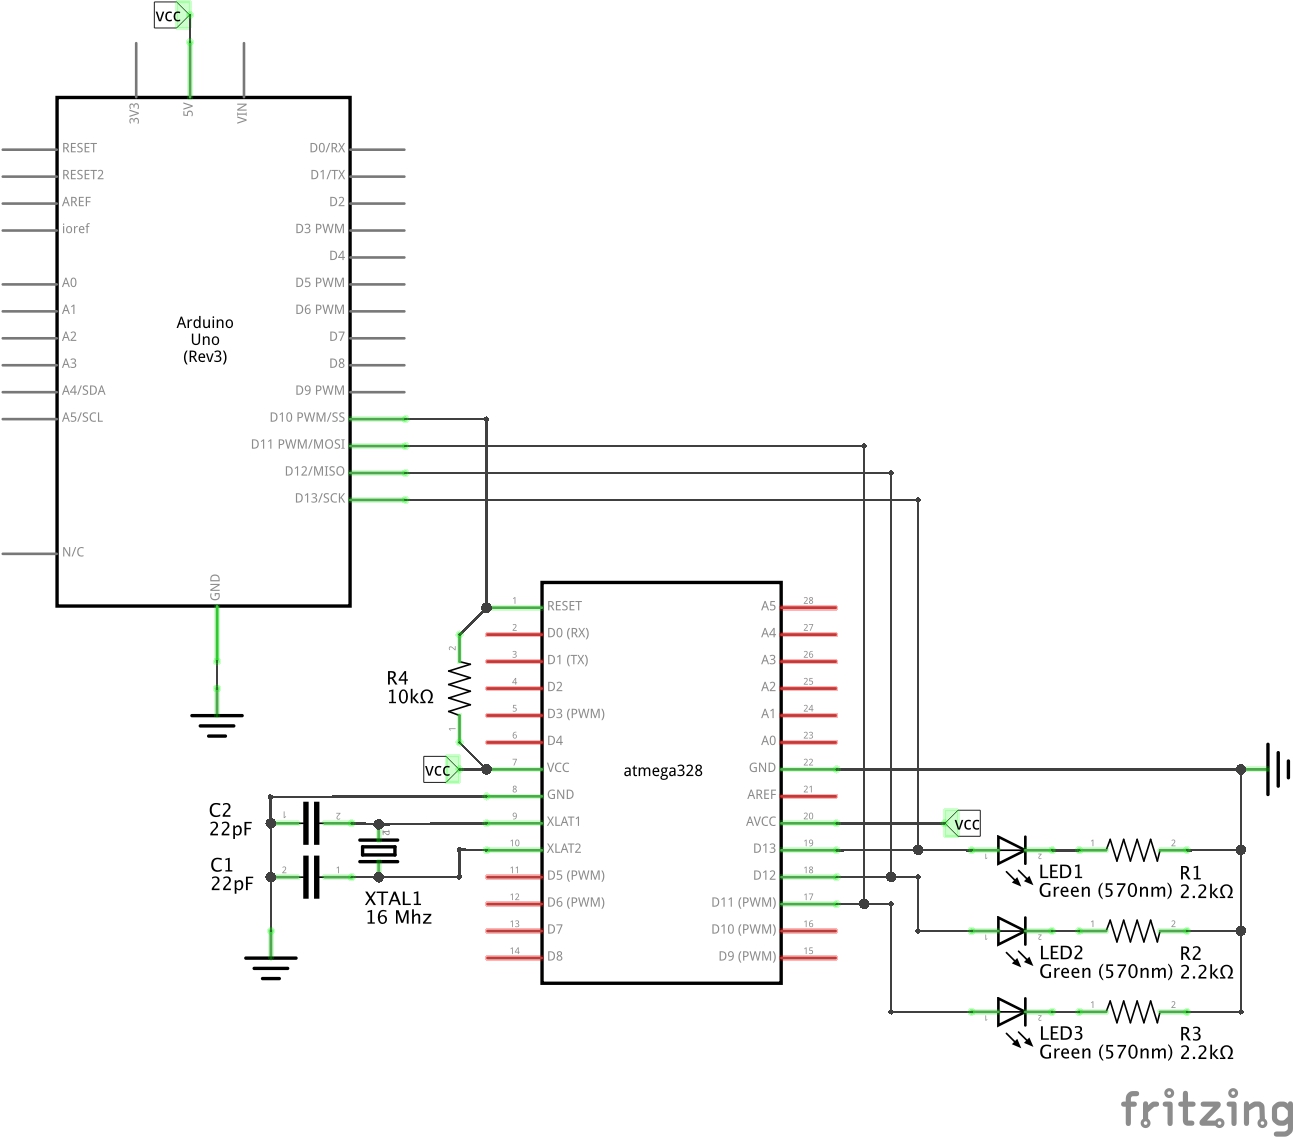
This project puts a 28-pin DIP socket on a protoboard that can plug into an Arduino as a custom daughter-board/shield. The board also includes:
- 16MHz crystal
- reset pull-up resistor
- LEDs with resistors on MOSI, MISO, and SCK pins
- breakout sockets for all pins on the ATmega chip
The LEDs on the shield will indicated activity during programming. They can also be used for test sketches (the LEDs correspond to digital pins 11, 12 and 13). The ATmegaISPShield.ino sketch included here is a simple variant of the Blink sketch that flashes all the LEDs, and can be used for testing the programmer.
How to Use the Shield
The procedure for programming a 28-pin ATmega chip like the ATMEGA328P-PU on the board is:
- insert an ATmega chip into the 28-pin DIP socket
- plug the board onto an Arduino Uno (or Mega)
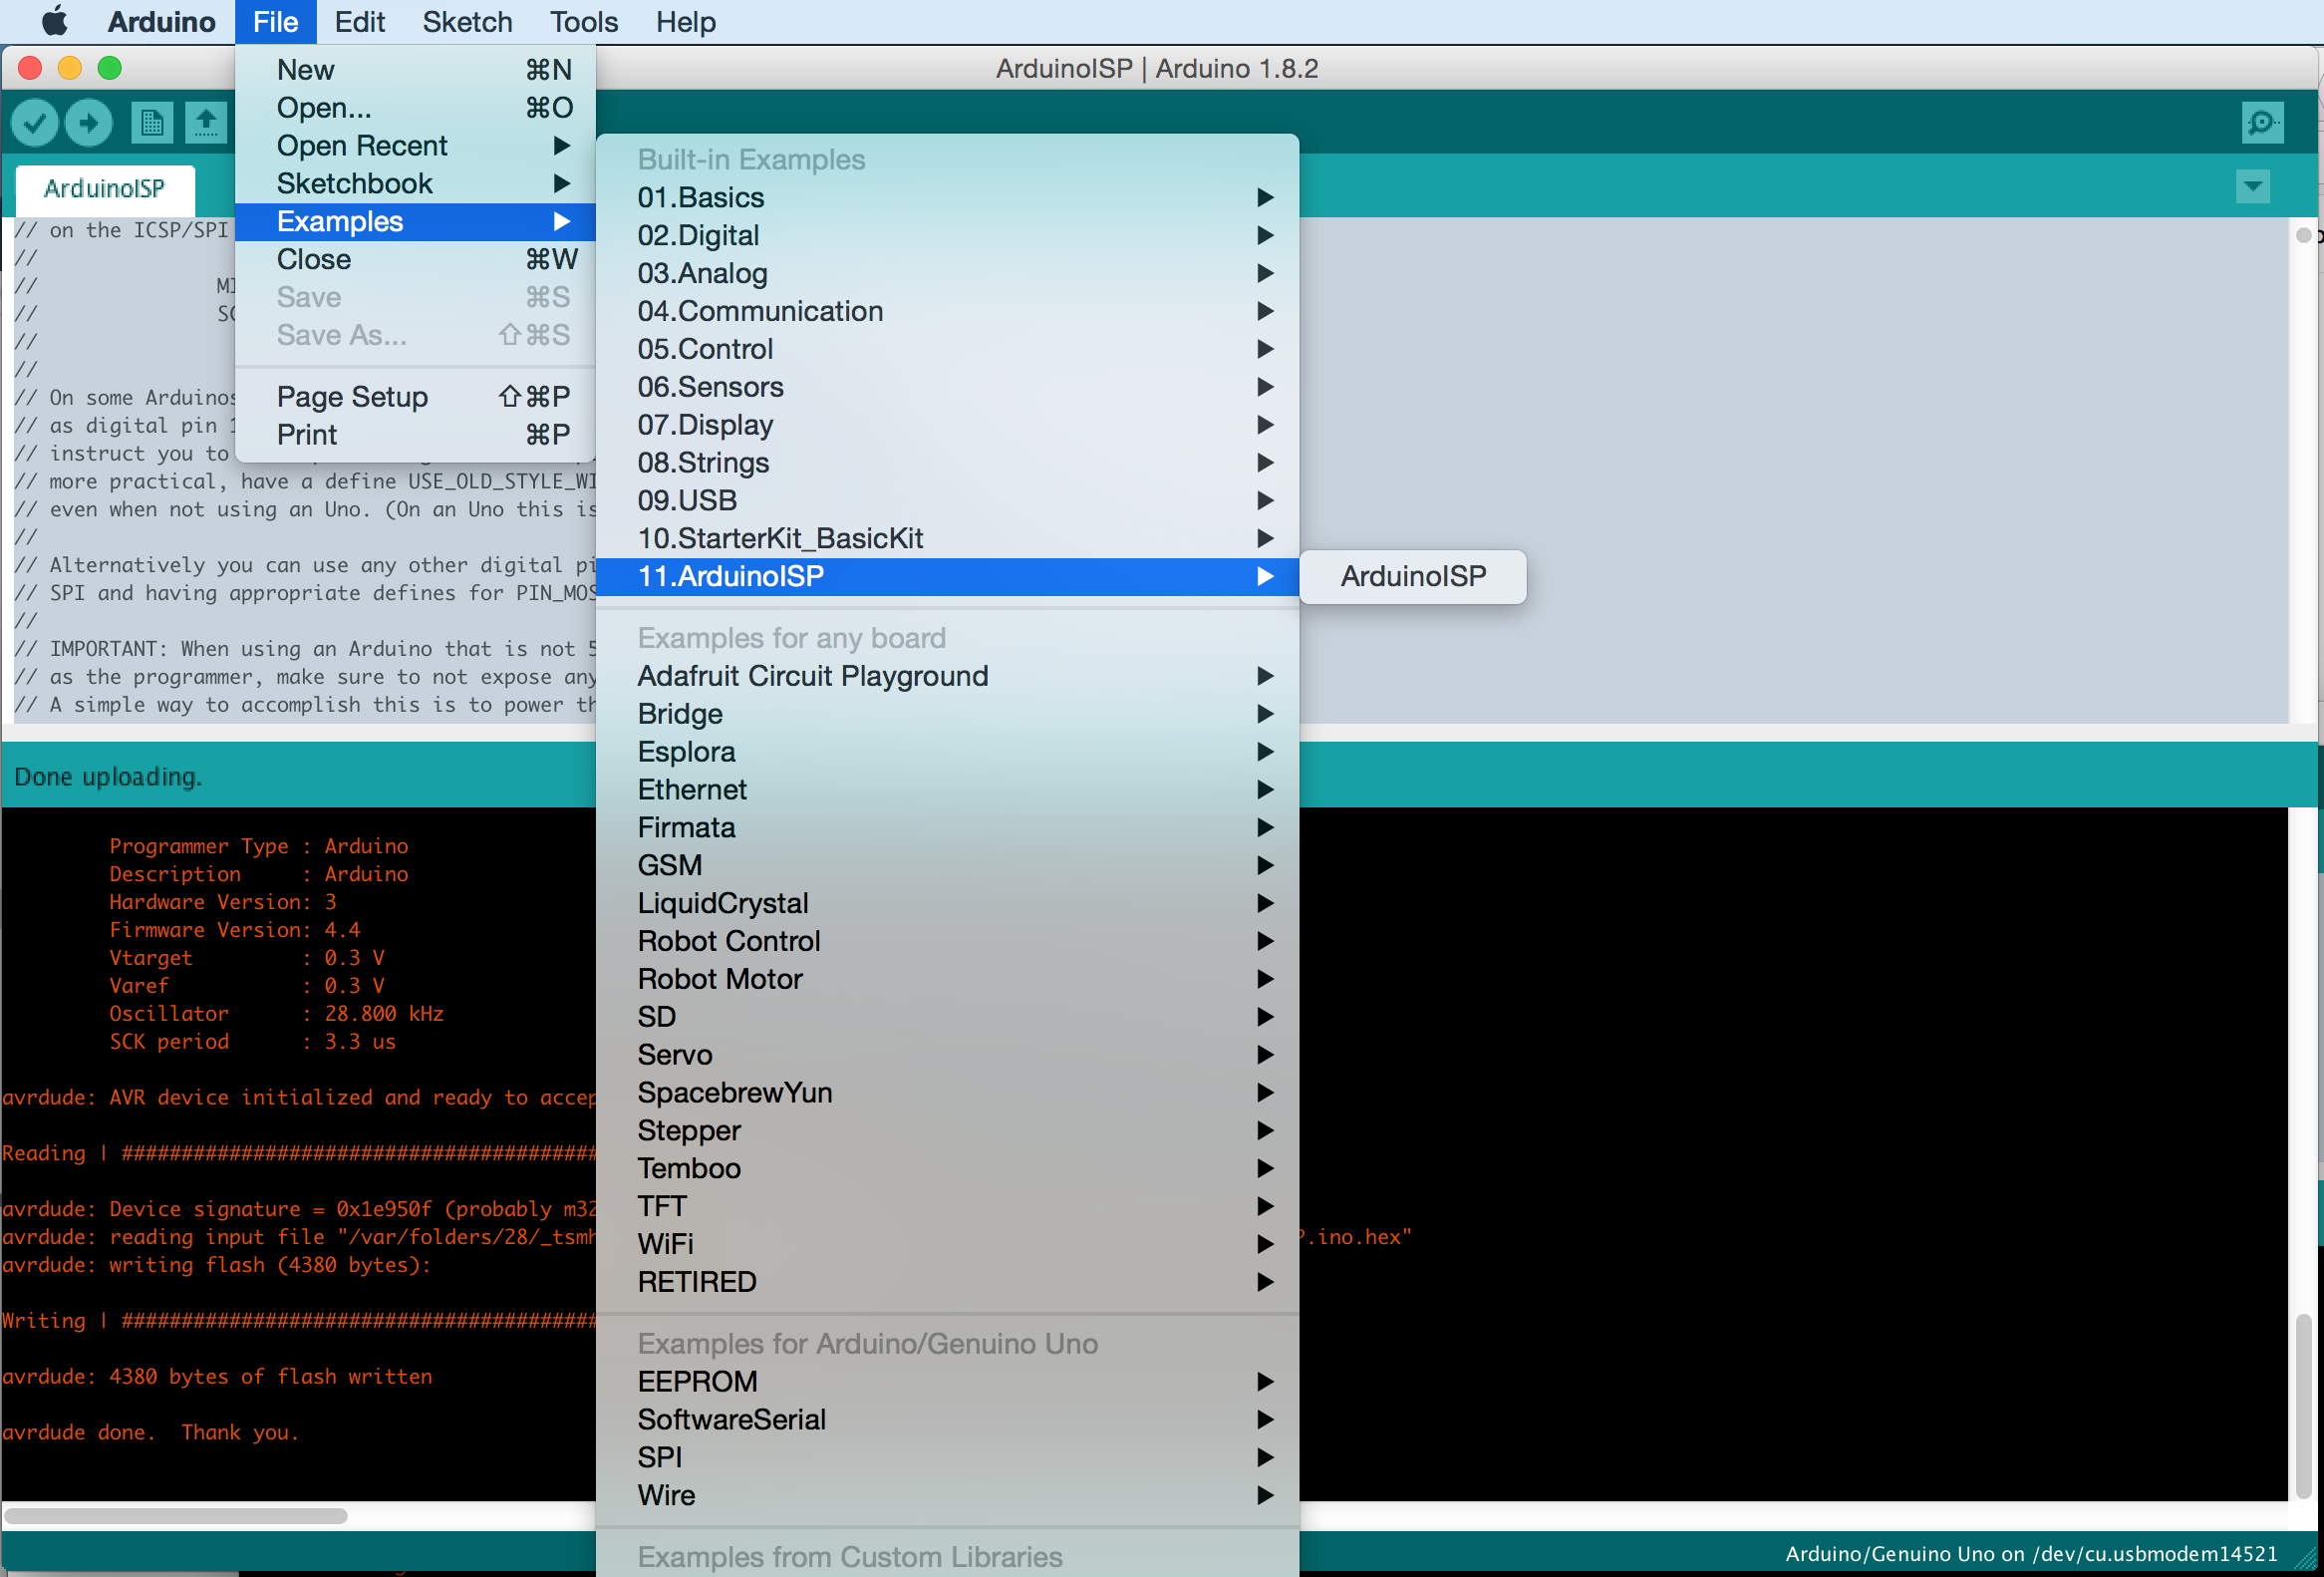
- program (upload) the Arduino host with the ArduinoISP sketch
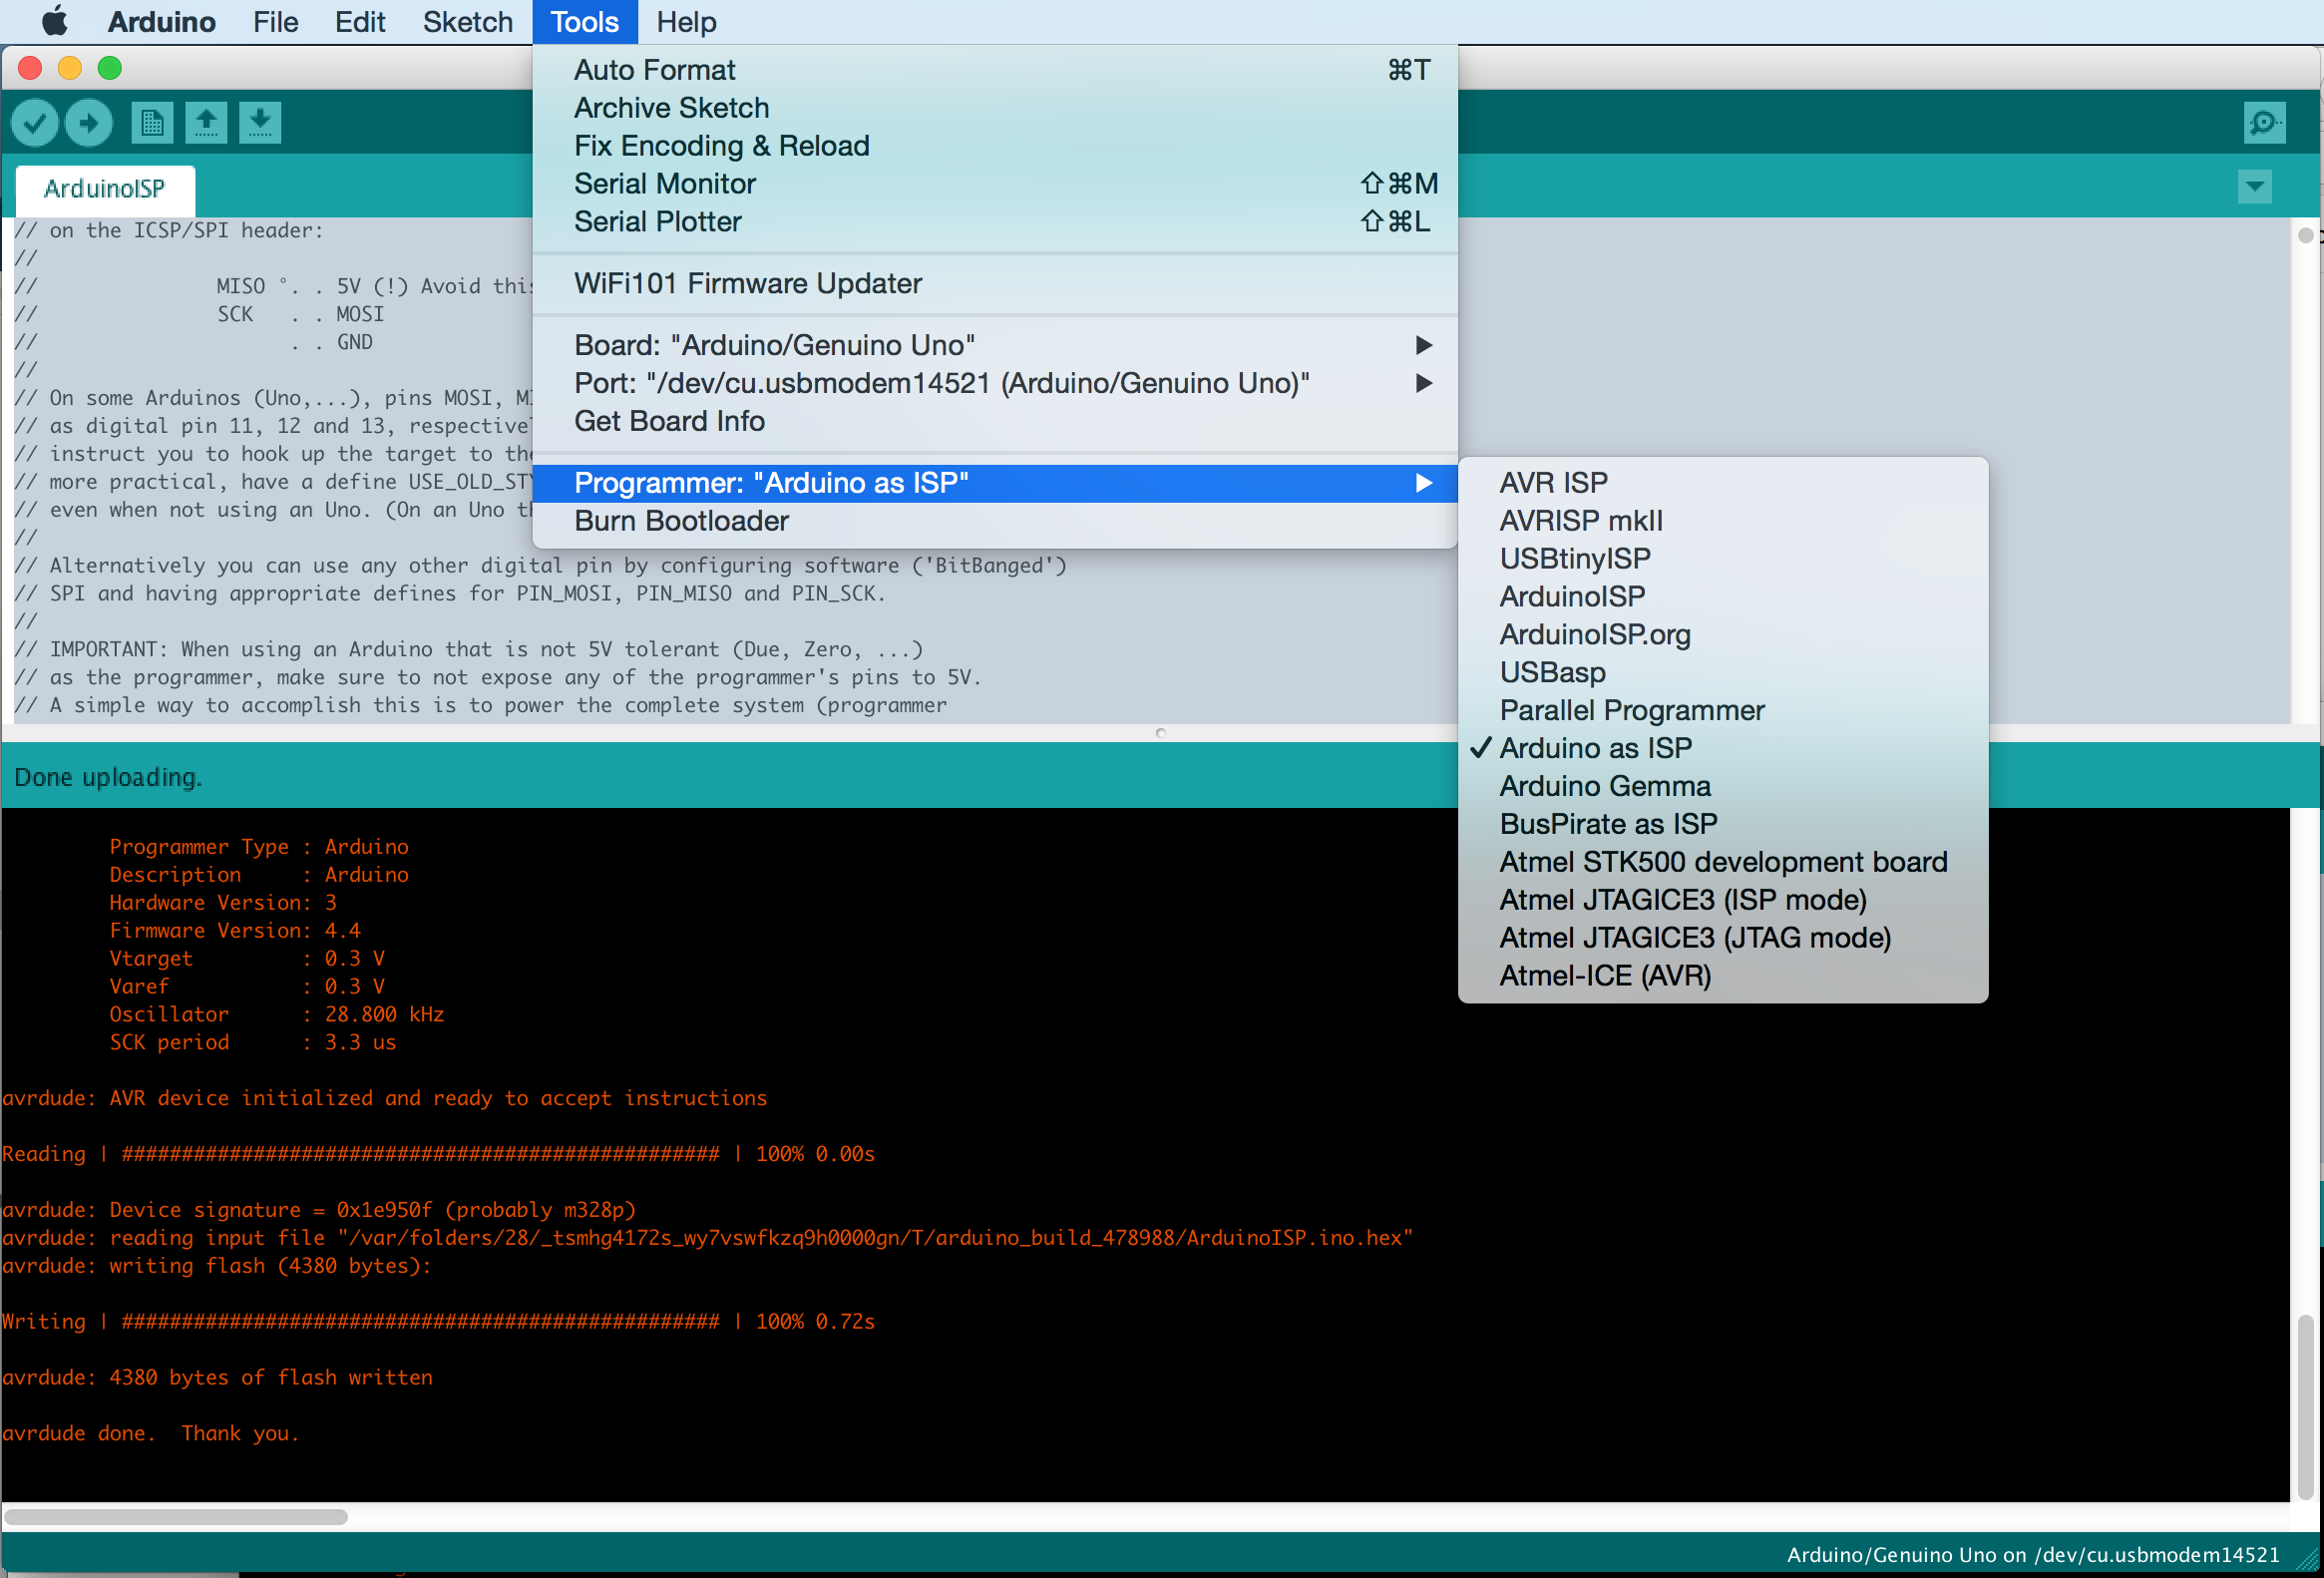
- select
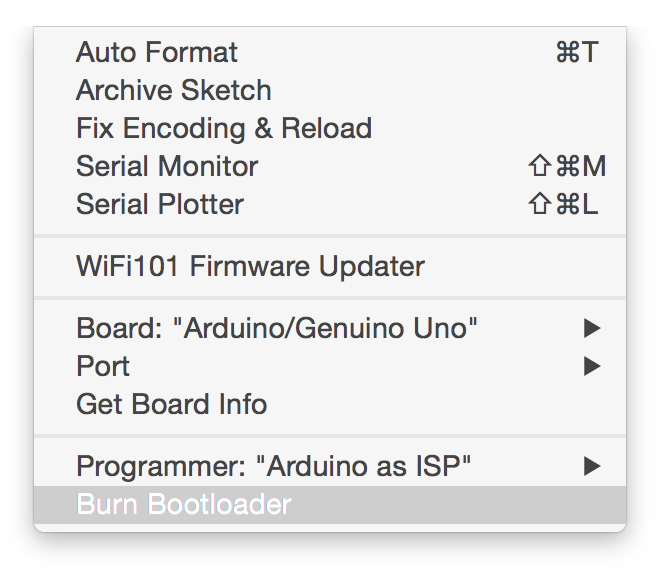
Arduino as ISPunderTools > Programmer - burn the bootloader - this is optional if the chip already has the bootloader, but if unsure it is a good idea to burn again. This will ensure fuses are set correctly so the chip runs as expected.
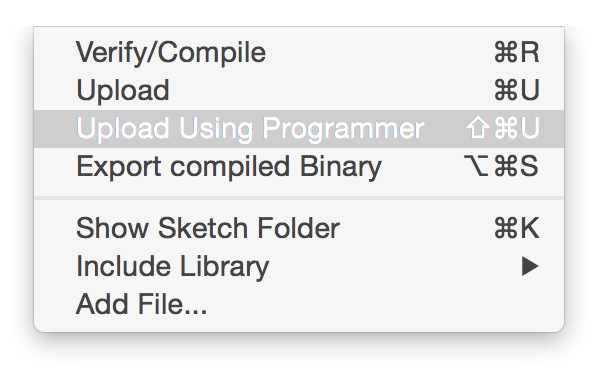
- send the desired sketch to the ATmega chip using the “Upload using Programmer” option
Program the host with the ArduinoISP sketch:
Set the programmer:
Burn the bootloader:
Upload using programmer:
Construction

Credits and References
- LEAP#068 ATmegaViaArduinoISP - programming an ATmega via Arduino ISP on a breadboard