
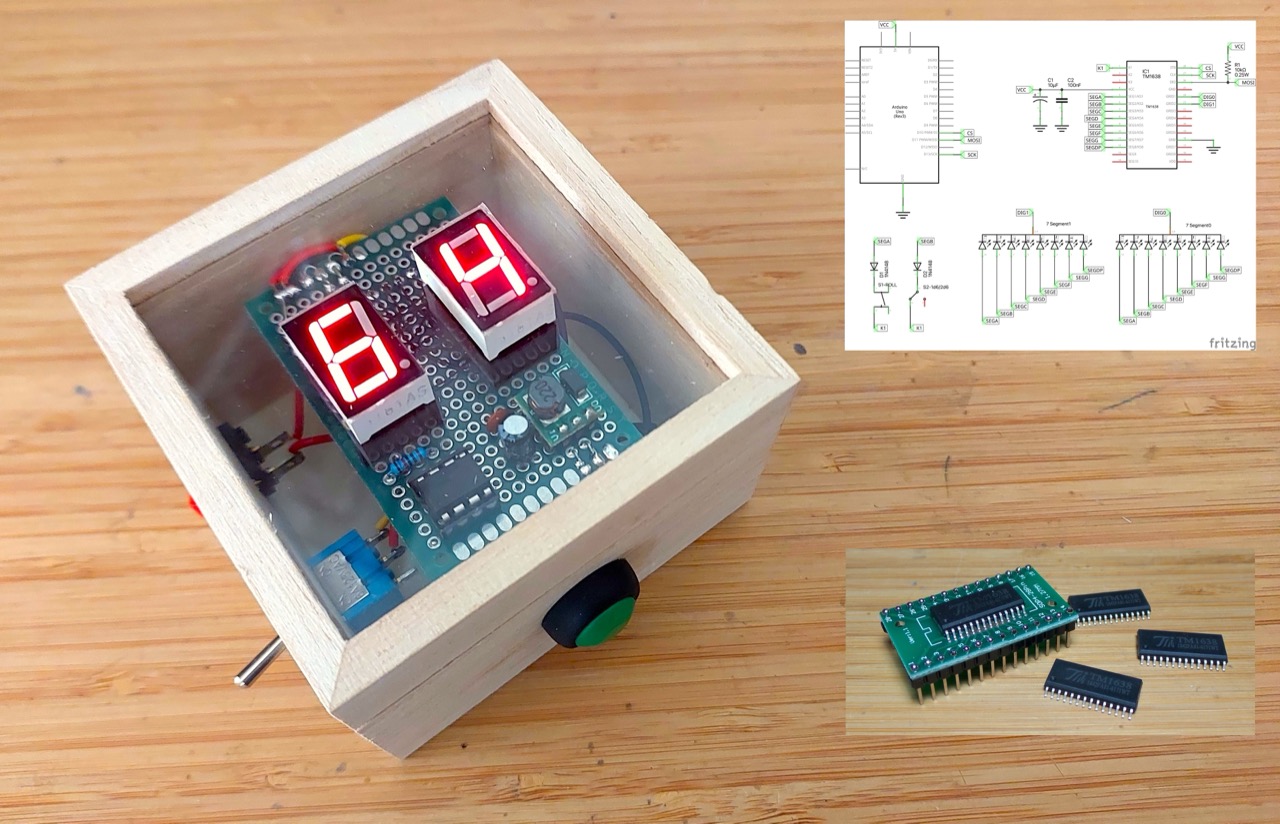
#847 2d6 Dice Roller
A little 1d6 or 2d6 dice roller using the TM1638 and ATtiny85.
Here’s a quick demo..
Notes
I have a number of games that require one or two 6-side dice. Rather than hunt for some dice or need space to roll them, how about a simple Arduino-based gadget?
Here are my basic requirements:
- Toggle between d6 or 2d6 die modes
- Roll with a button press: hold to shake and release to roll
- The “shake and roll” should be animated:
- constant changing of the LED display while “shaking”
- then decelerate to final value while “rolling”
- Auto-off? Rather than have on/off switch:
- the unit should turn on when the die roll button is pressed
- and auto-off after some delay (like 3 mins)
- Battery powered (no wires)
Technology selections:
- This is going to be an Arduino-based project:
- prototype with Arduino Uno
- perhaps final gadget using ATtiny85
- Final gadget power at 5V:
- 9V battery with buck converter or 3V with a boost converter
- Use two 7-segment LEDs to represent the two dice
- LED driver:
- options:
- MAX7219 & SPI: can handle 2 digits with 3 pins for SPI
- 2 x 74HC595 shift registers: can handle 2 digits with 3 pins
- 2 x CD4026: can handle 2 digits with 2 pins
- TM1638: LED control and button input with 3 pins
- I’ve decided to use the TM1638, at least for a first prototype. It simplifies LED and push-button management, but I am not sure I can figure out a way for the push-button to also trigger the device wake-up.
- options:
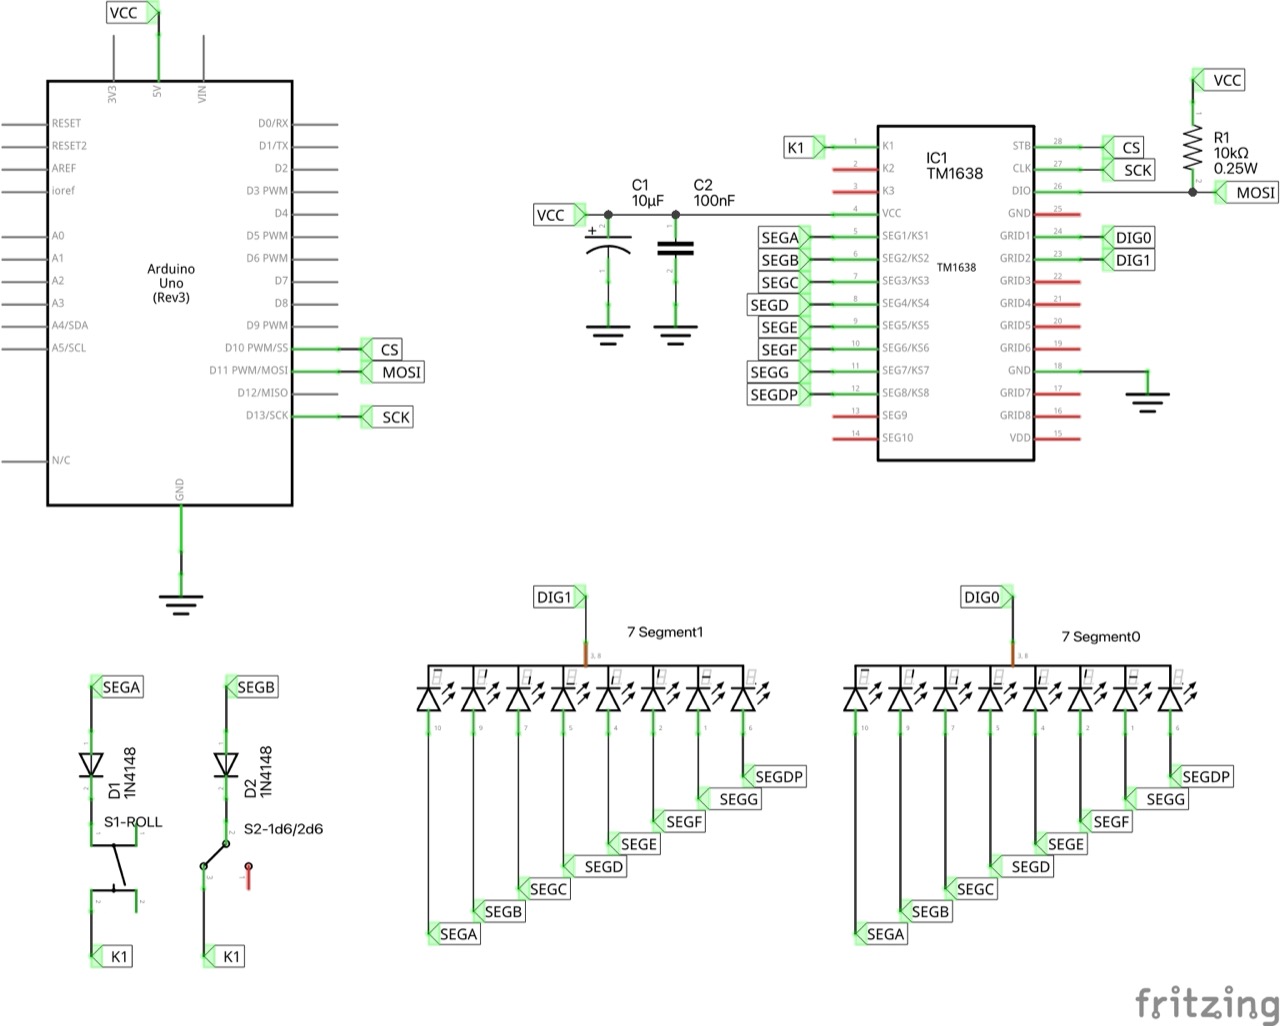
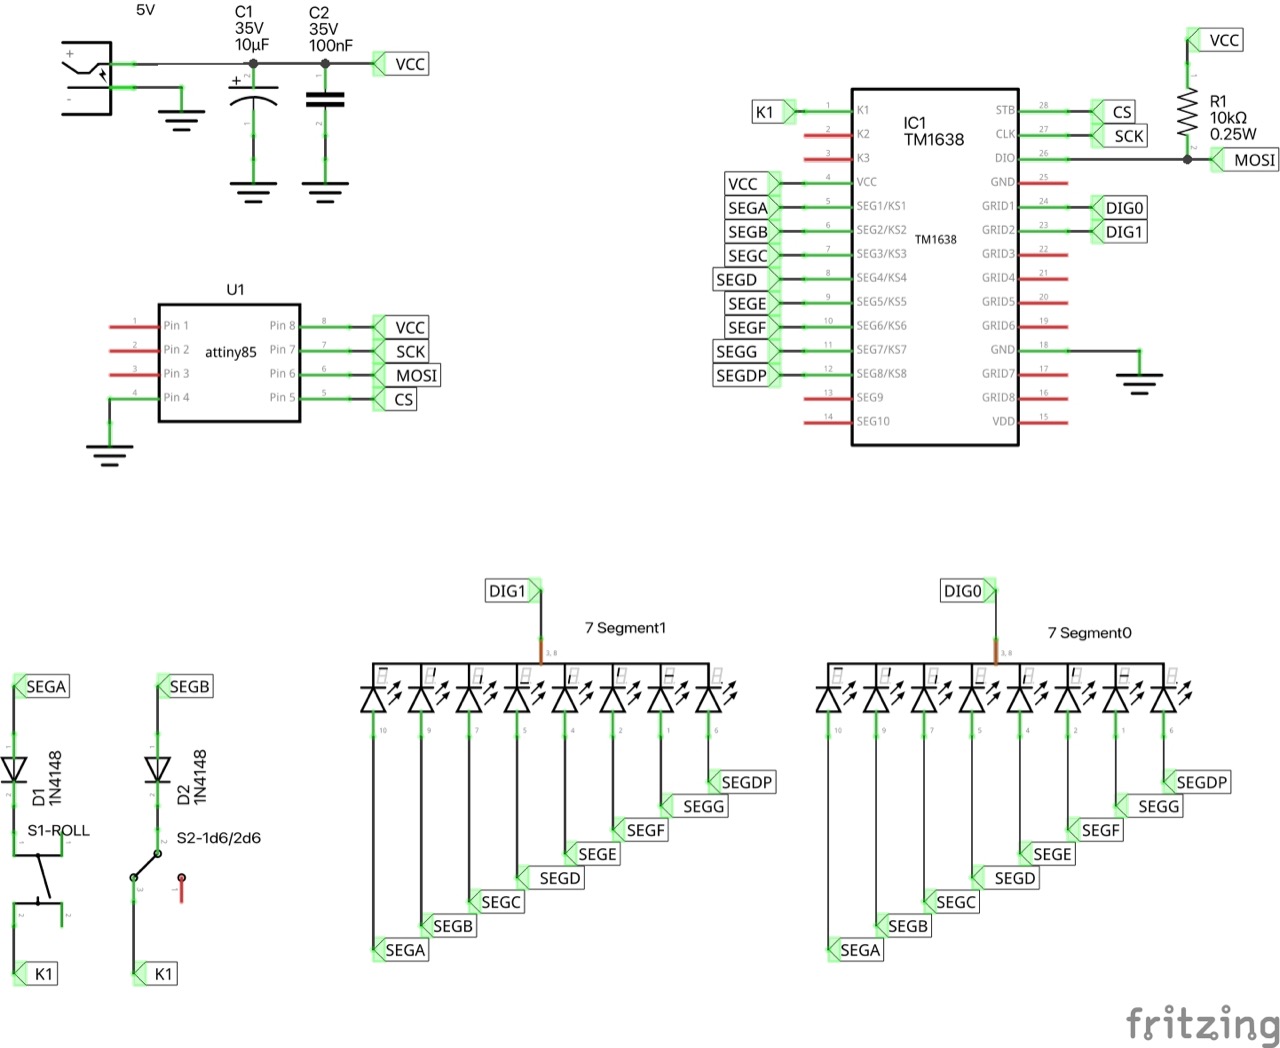
LED 7-Segment Components
The 7-segment components I’m using here are similar to the SC56-11.
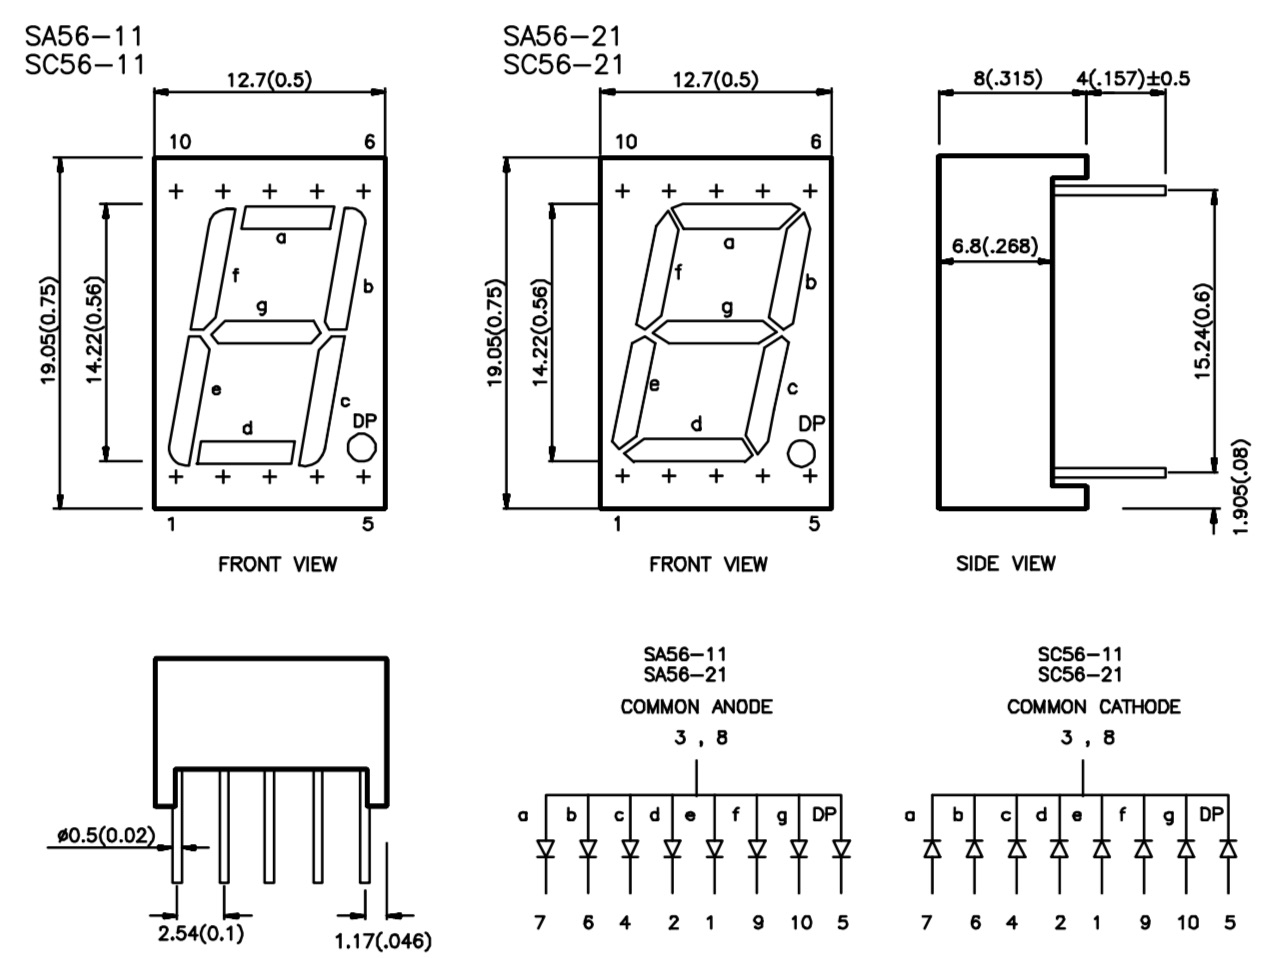
I’m using common cathode variants, so segments are wired to the TM1638 segment pins, and each digits cathode goes to the corresponding grid pin.
| Segment | SC56-11 pin | TM1638 SEG pin |
|---|---|---|
| a | 7 | SEG1: 5 |
| b | 6 | SEG2: 6 |
| c | 4 | SEG3: 7 |
| d | 2 | SEG4: 8 |
| e | 1 | SEG5: 9 |
| f | 9 | SEG6: 10 |
| g | 10 | SEG7: 11 |
| dp | 5 | SEG8: 12 |
Arduino Uno Prototype Circuit Design
Designed with Fritzing: see 2d6.fzz.
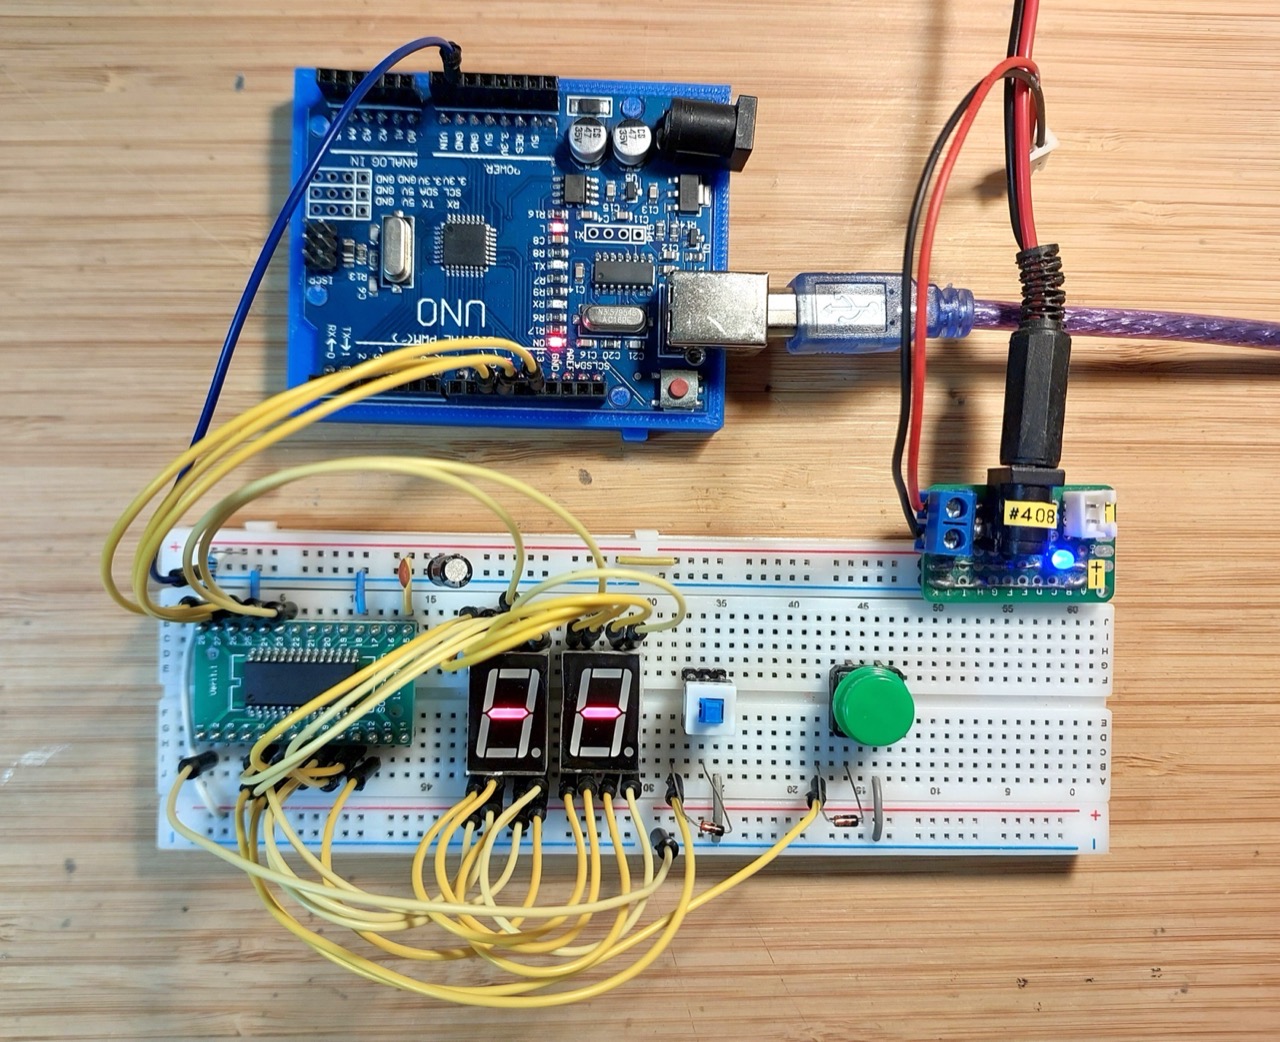
The first prototype uses an Arduino Uno for convenience of programming.
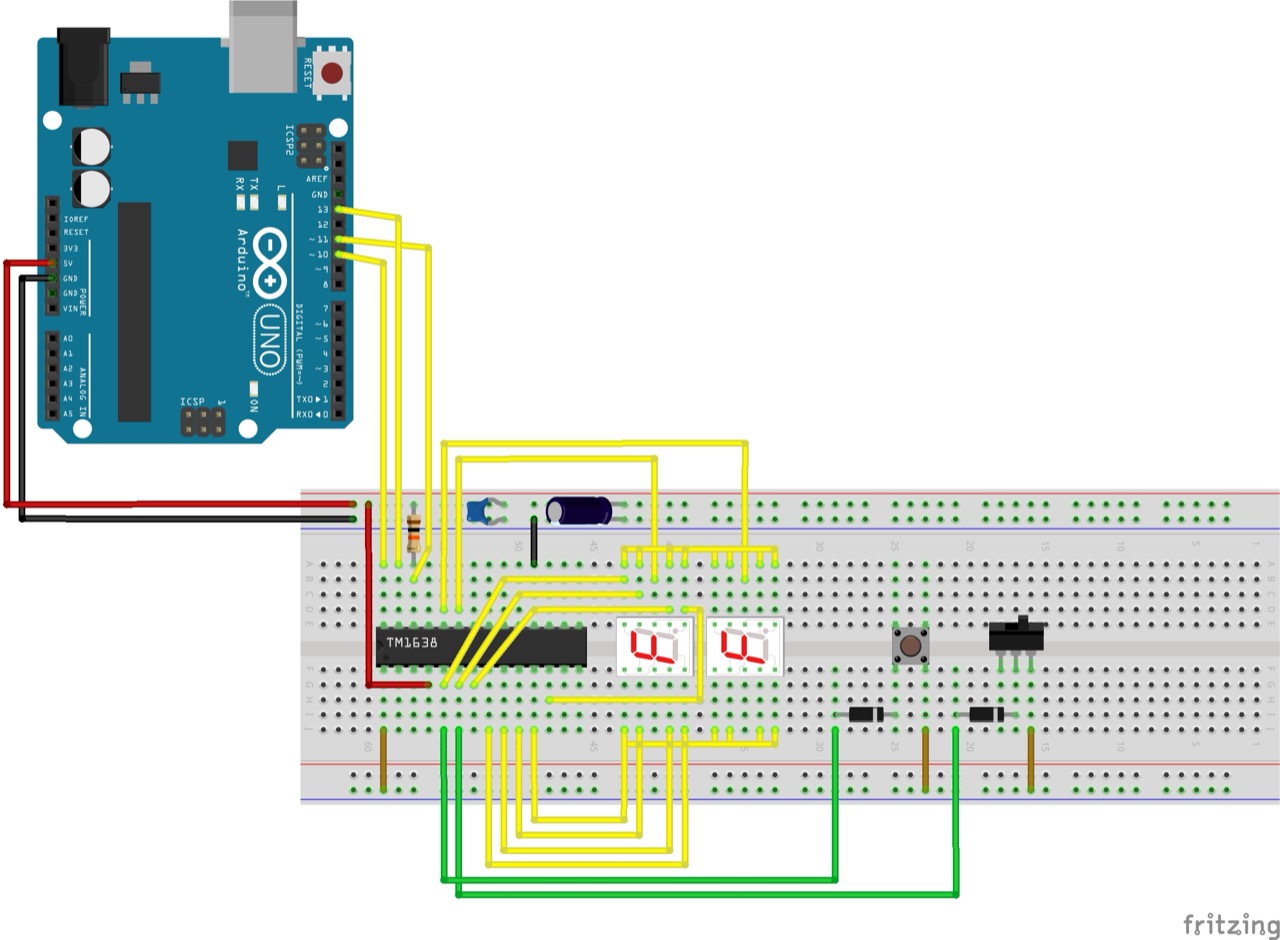
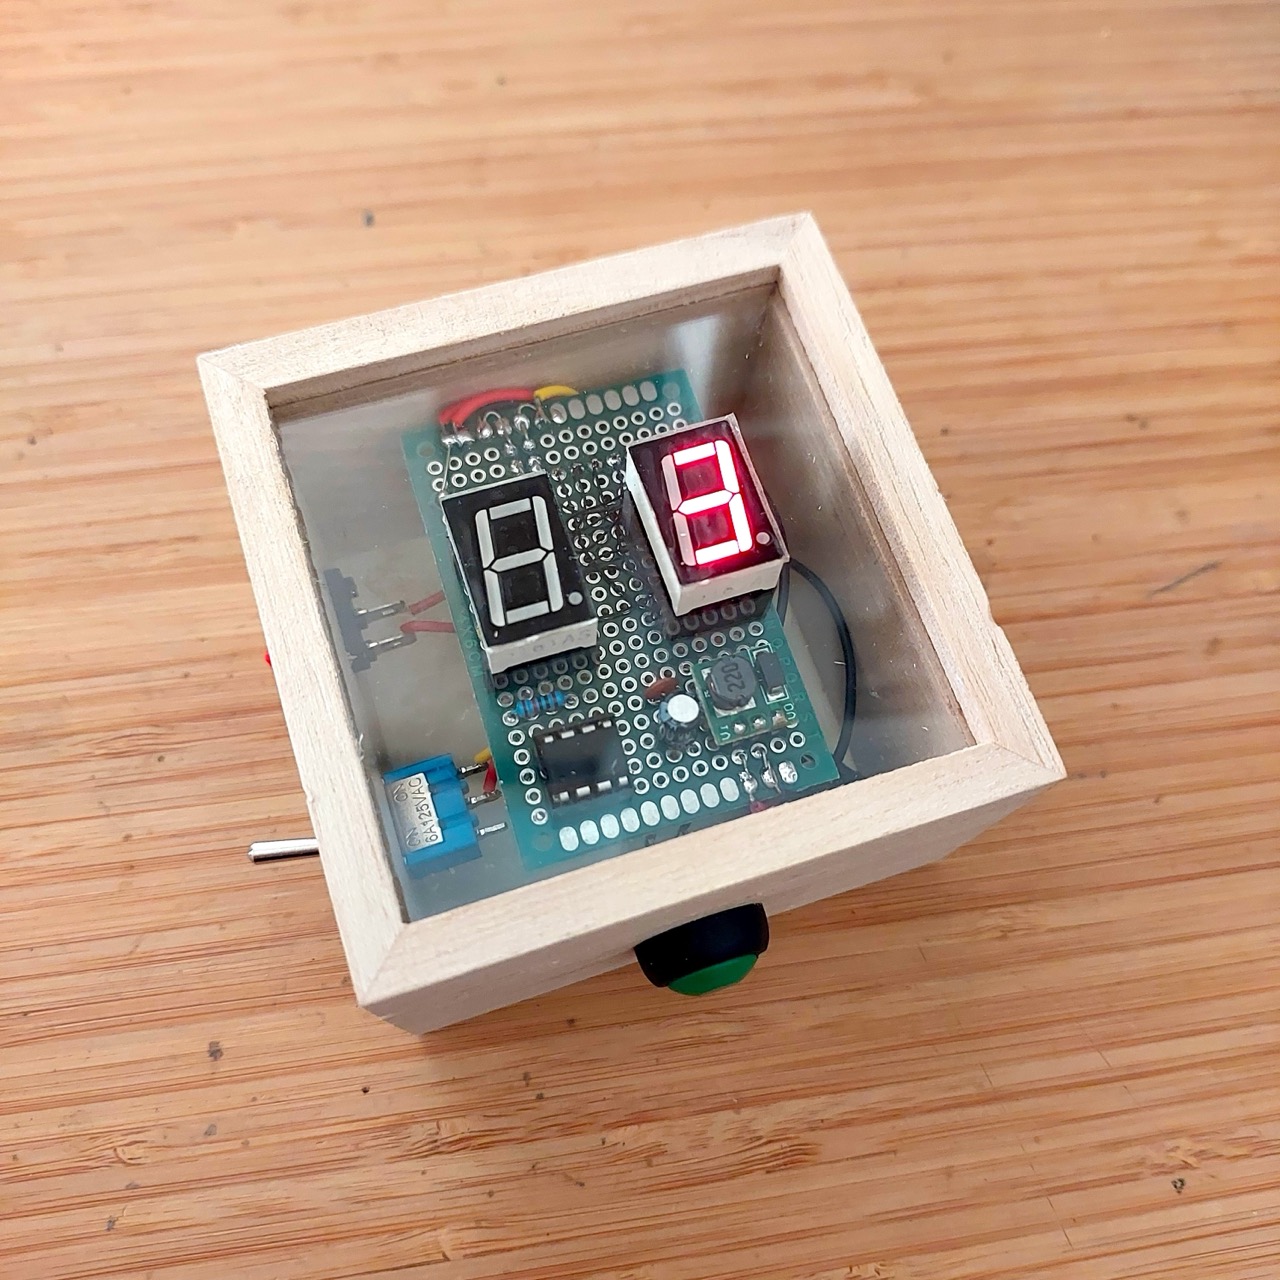
This is working nicely. On startup, the die values are blank (“–”):
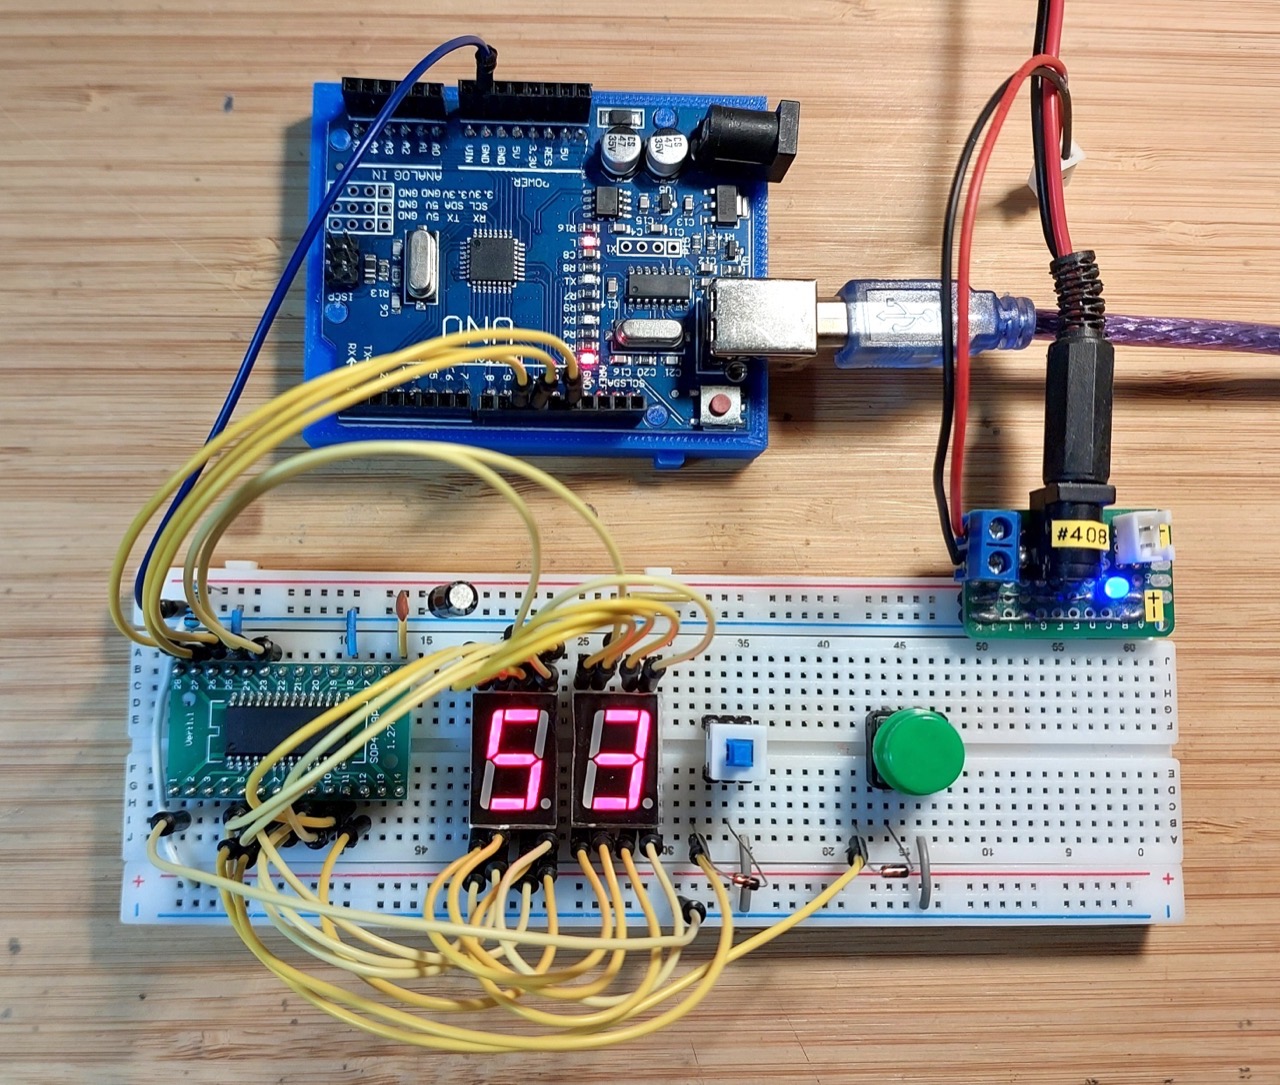
After a roll:
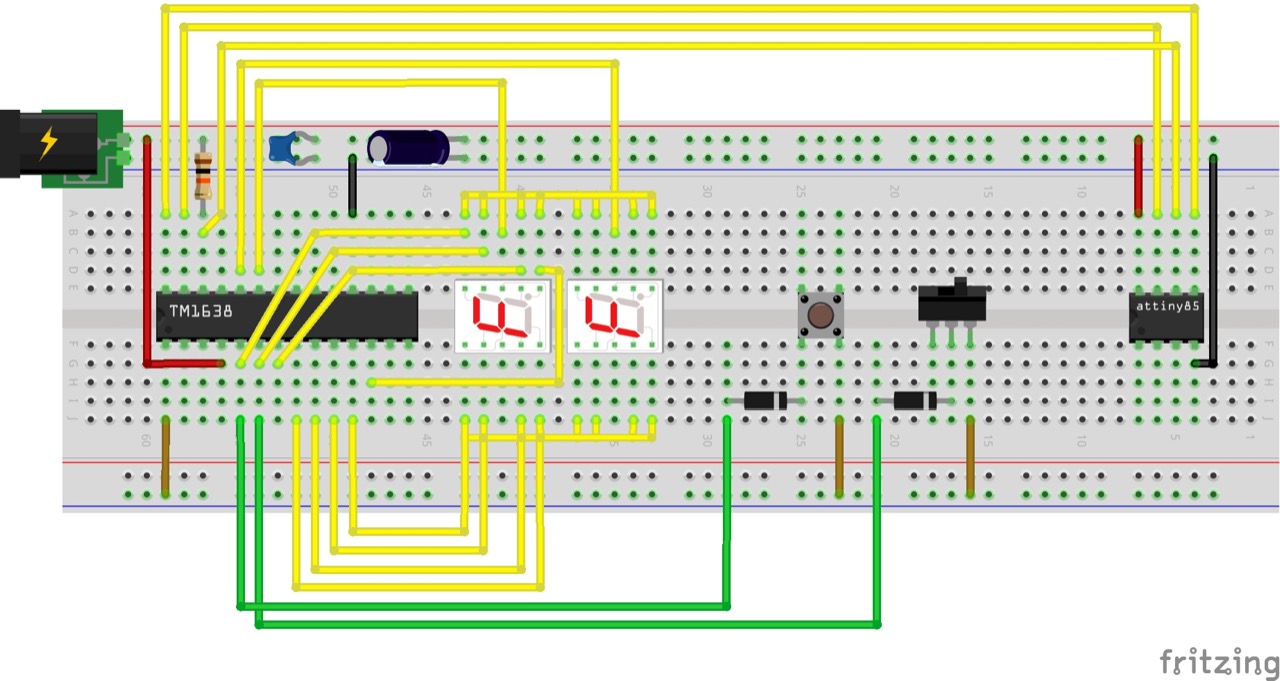
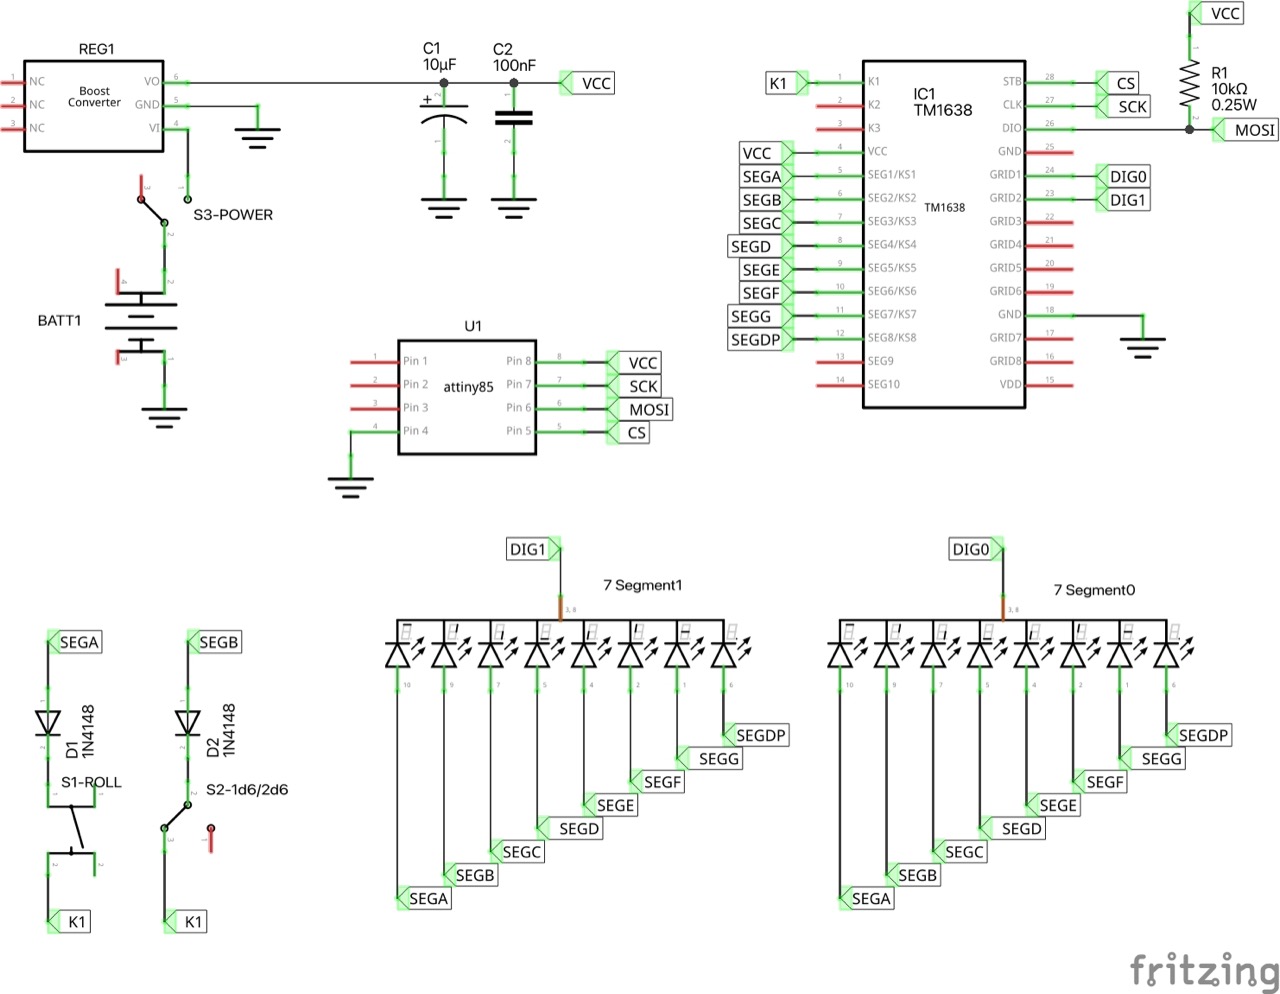
ATtiny85 Prototype Circuit Design
Designed with Fritzing: see 2d6-ATtiny85.fzz.
Reconfigured to use an ATtiny85. This mainly entailed modifying the microcontroller pin selection: 2d6.ino uses the ARDUINO_attiny definition to conditionally compile pin configurations based ont he processor.
Running nicely on the ATtiny85:
Auto-off?
I haven’t been able to figure out how to incorporate auto-power off without introducing another switch, or a different switch.
The SPST momentary push-button used for the “roll” function can’t also be used to trigger power-on, because it needs to be floating to be scanned by the TM1638.
Options:
- Replace the SPST with a DPST momentary push-button, but I don’t have any in my parts collection, and they appear to be quite an uncommon component at least in small footprint/low power.
- Component options are limited, so this is not ideal
- Don’t use the TM1638 to scan the roll switch, read direct from the microcontroller
- Becomes self-defeating: if I don’t use the TM1638 for the switches, then why use a TM1638 at all? Better to just use CD4026 or equivalent for the LEDs, and read the switches directly.
- Add another switch for power control
- Unfortunately, perhaps the best option for a TM1638-based design.
Decision: I’m sticking with the TM1638, and since there’s no great solution for supporting auto-off, I’m going to scrap that idea for this version of the 2d6, and just use simple on/off switch.
I’ll probably do another version of the 2d6 with CD4026 instead of the TM1638 but with auto-off and no extra buttons or switches.
The Sketch
The program is organised as follows:
- 2d6.ino
- main program loop
- Die.h / Die.cpp
- models all operations for a single die
- TM1638.h / TM1638.cpp
- TM1638 driver
- doesn’t expose all capabilities of the TM1638, just enough to handle the two LED 7-segment displays and two buttons.
- KeyController.h / KeyController.cpp
- models key states, using the TM1638 driver under the cover
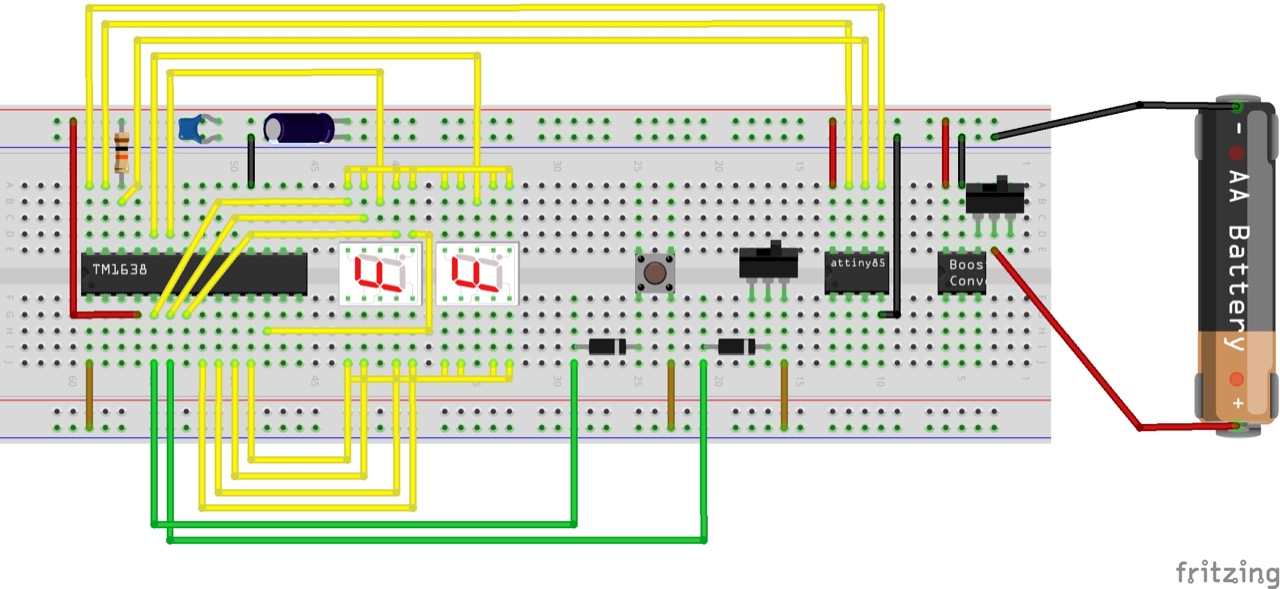
Final Build
For the final build:
- 5V bench power supply replaced by 1xAAA battery and a 5V boost converter
- Using a “0.9-5V To 5V DC-DC Step-Up Power Module Voltage Boost Converter Board 1.5V 1.8V 2.5V 3V 3.3V 3.7V 4.2V To 5V” (aliexpress seller listing)
- Purchased for SG$1.74 including tax for 5 pieces (Nov-2024)
- See LEAP#760 AAA 5v Power Pack for more on this module
- Transferred the circuit to 4x6cm protoboard
- Selected some more appropriate switches
- Mounted in a small wooden box I found at Daiso for SG$2
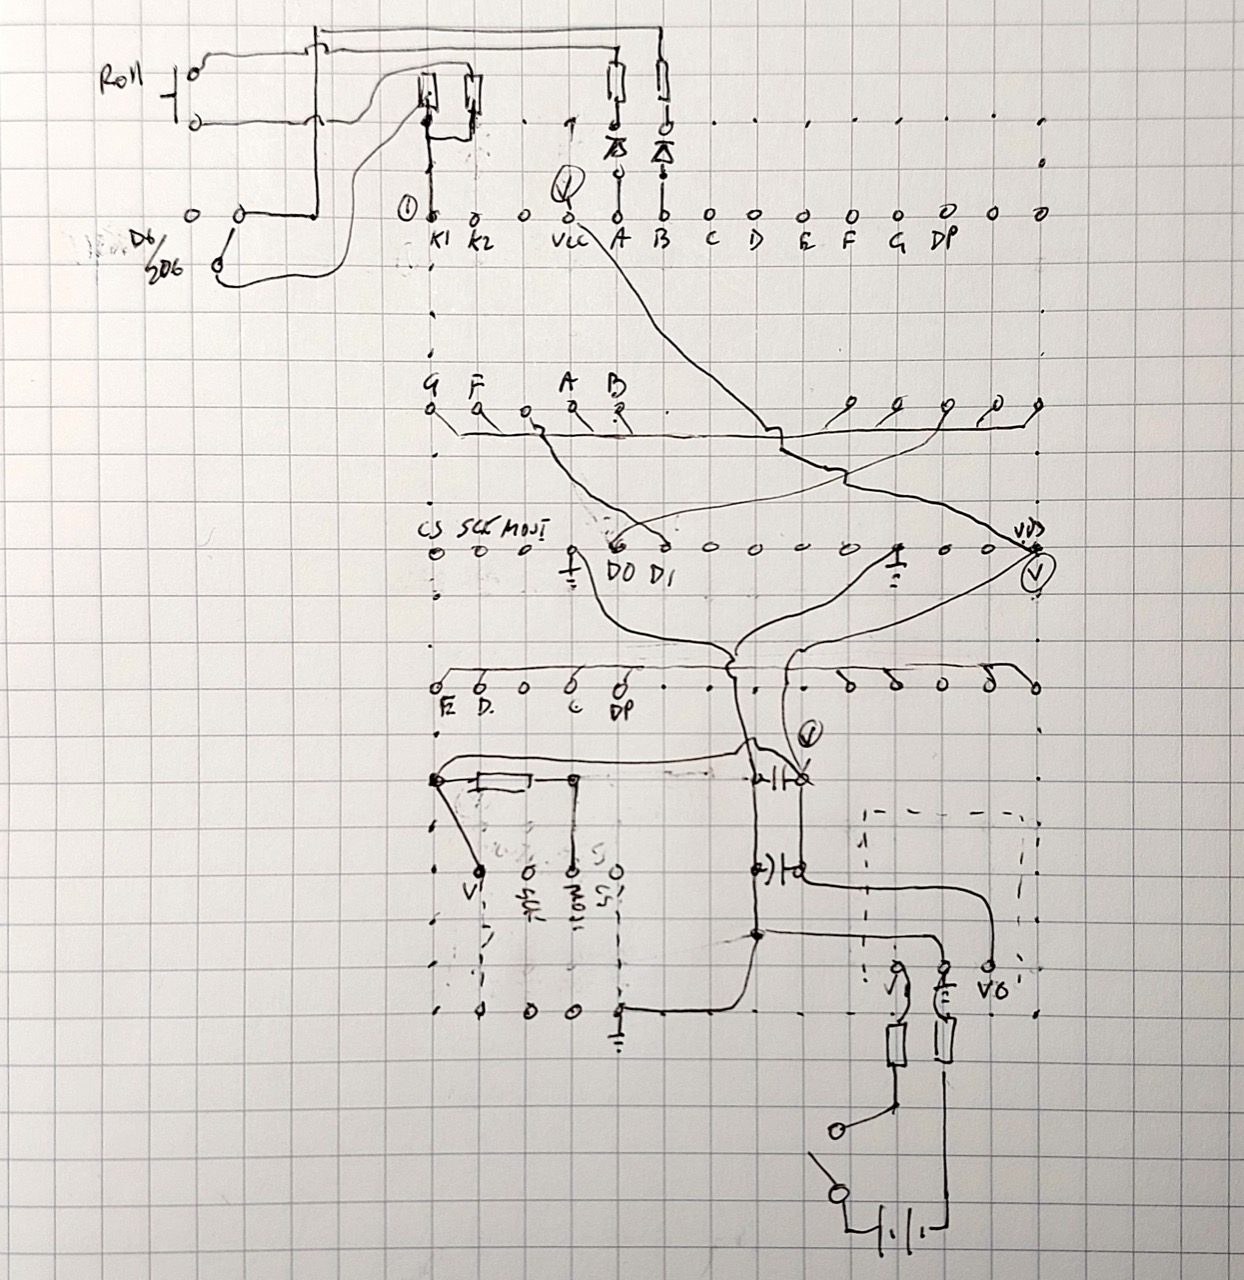
Updated design with Fritzing: see 2d6-ATtiny85-final.fzz.
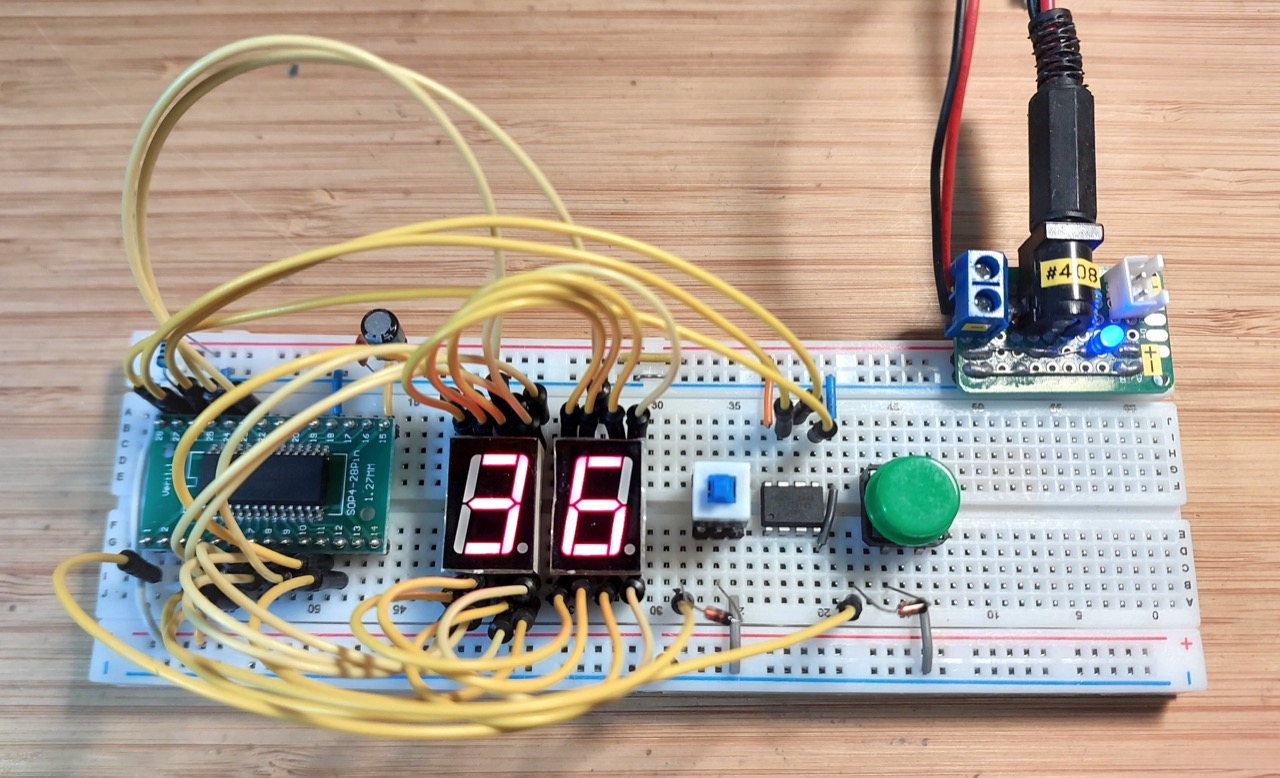
Running nicely on the ATtiny85:
Here’s the protoboard layout:
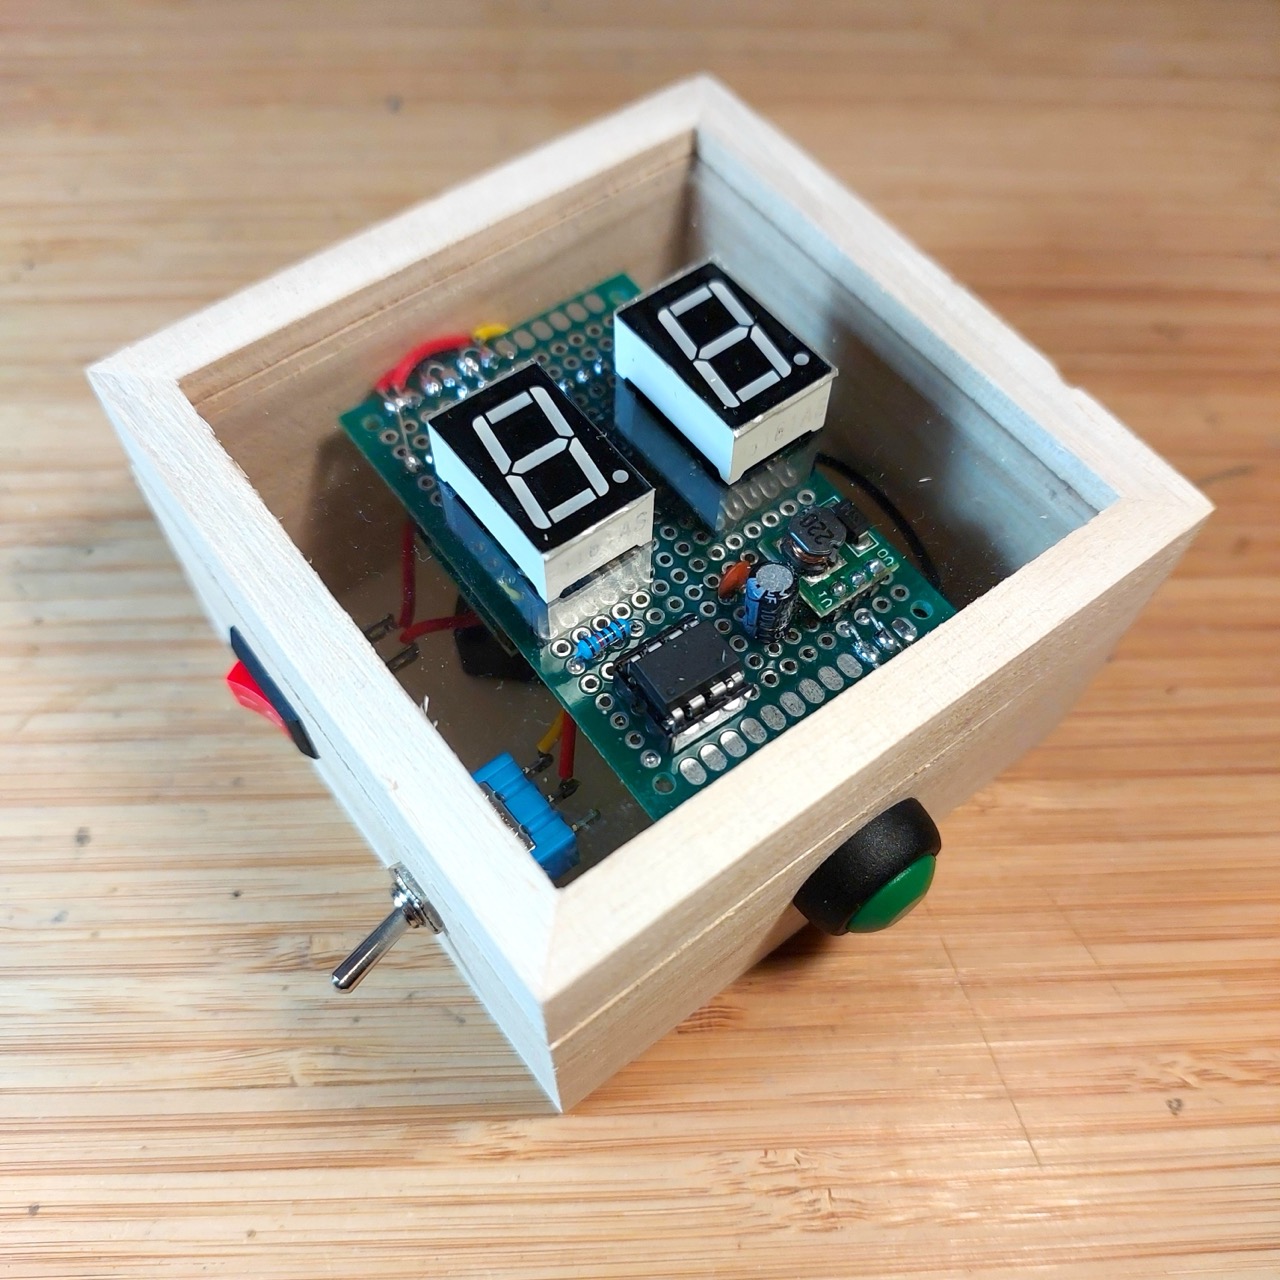
Testing the circuit before final assembly:
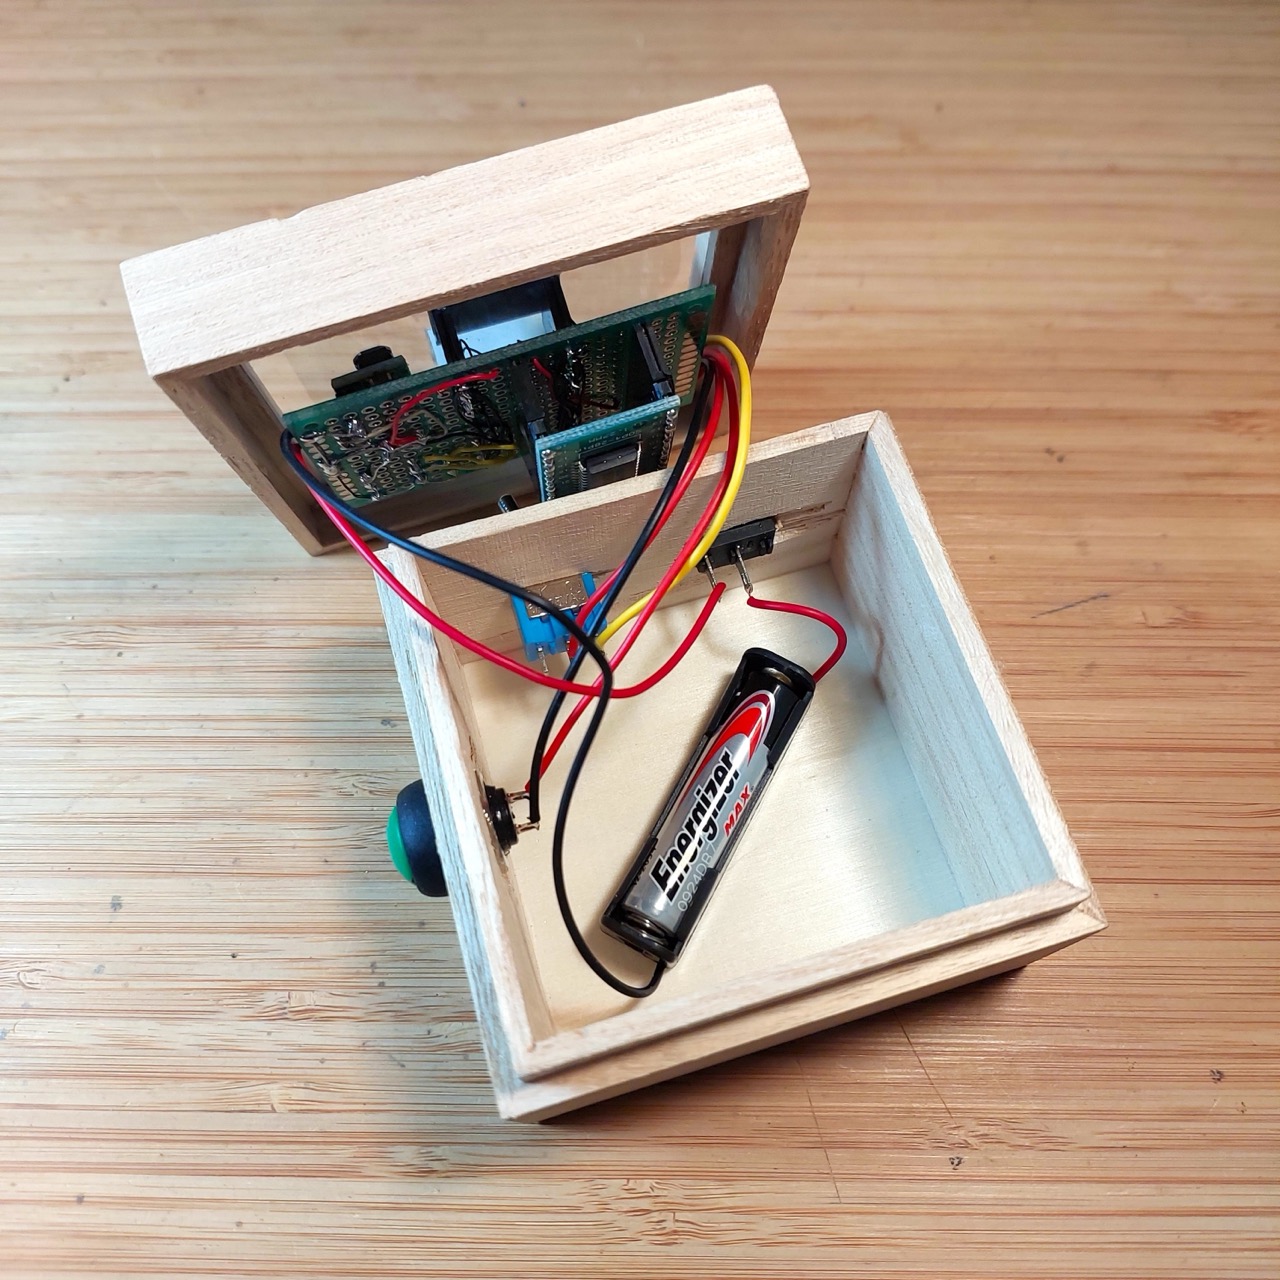
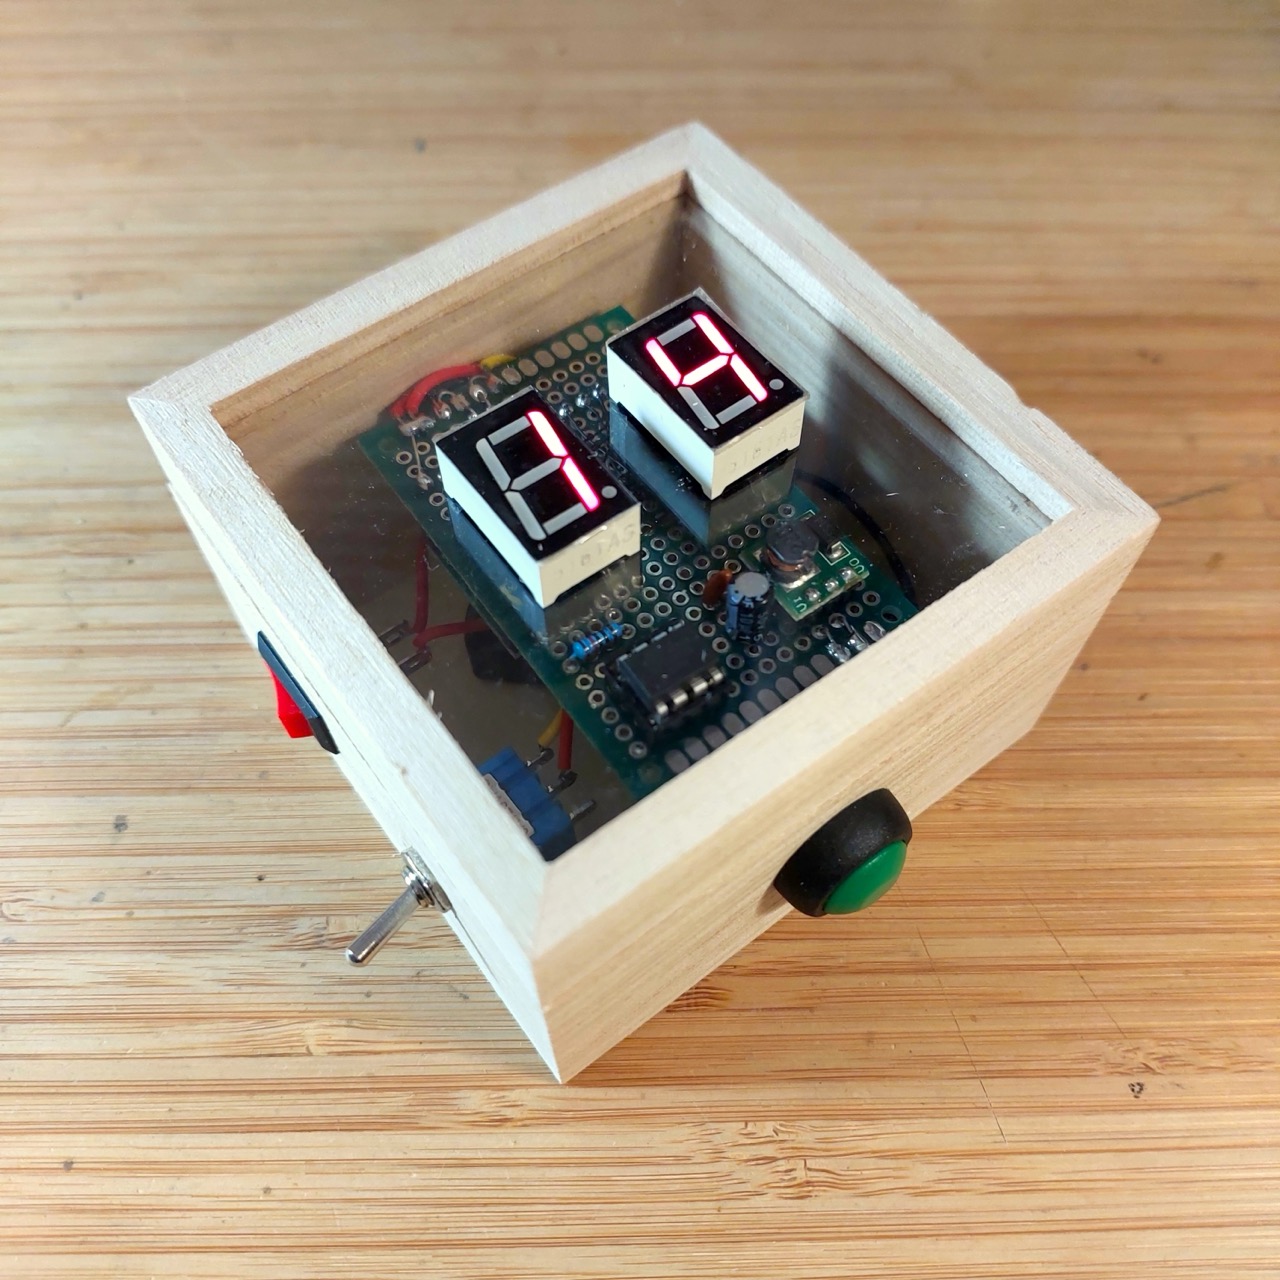
Installed in the $2 wooden box from Daiso:
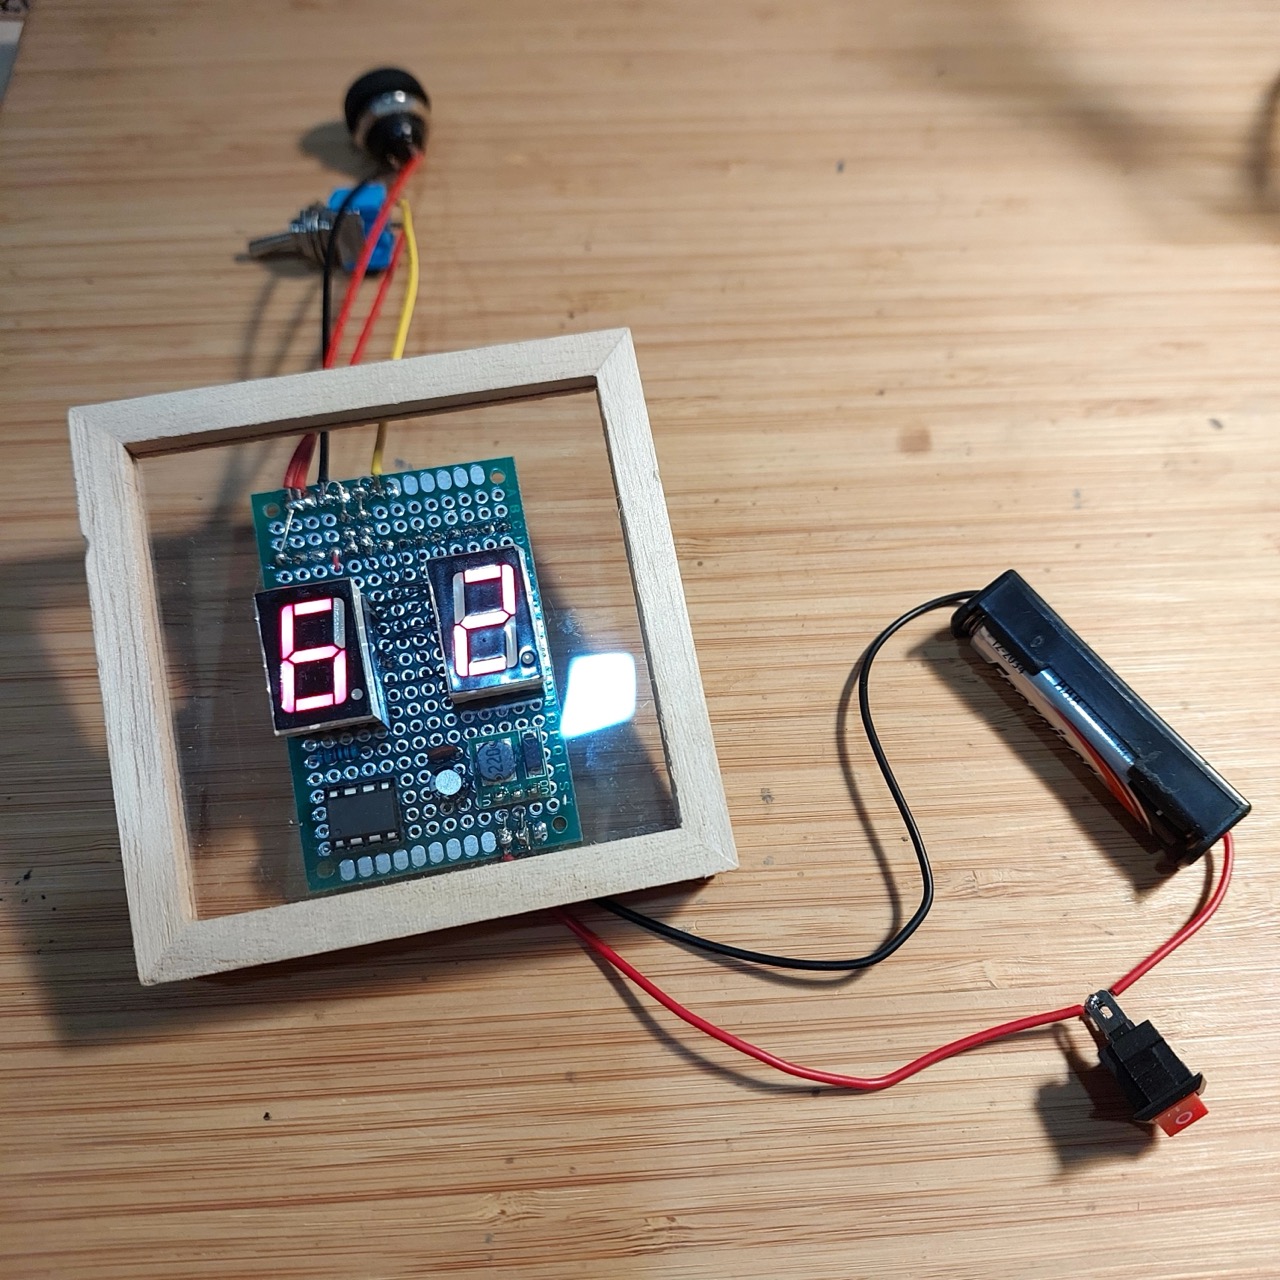
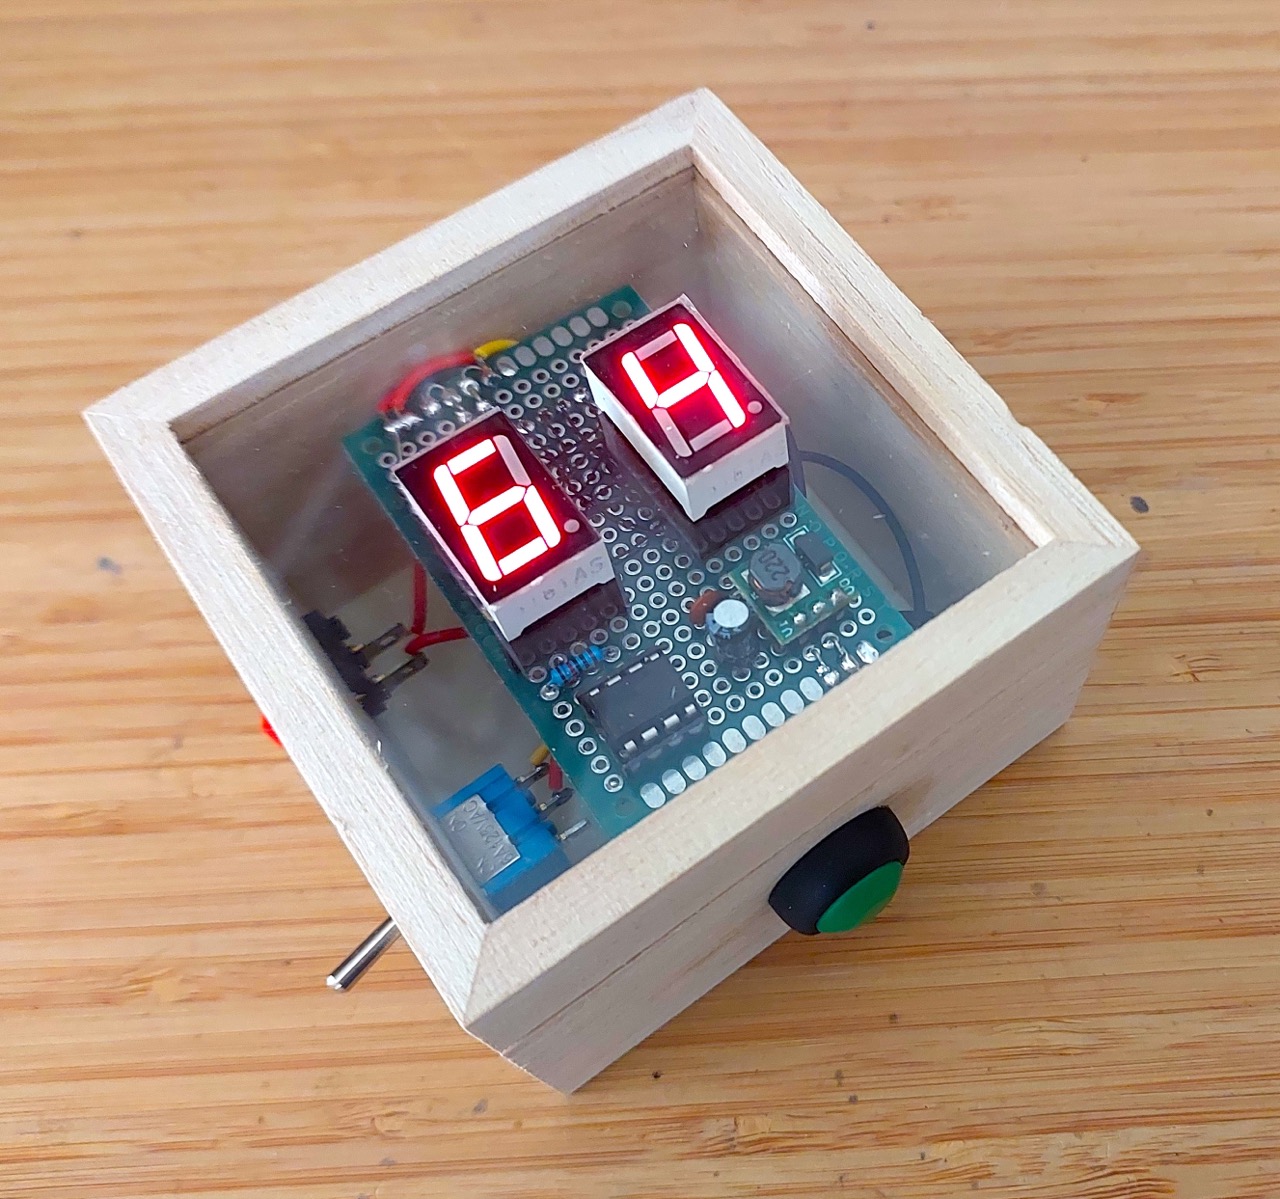
Testing, 2d6 mode:
Testing, 1d6 mode:
Conclusions and Next Steps
It’s a nice little gadget that gets the job done:
I was a little disappointed that I couldn’t figure out a good way to enable auto-off and reset with the roll button with the TM1368.
I will probably make some more die rolling projects:
- my partner immediately asked for a 3 die version!
- swap out the TM1368 for perhaps the CD4026, and do a true auto-off/single-button control version
- and perhaps a fully configurable multi-die roller with LCD or OLED display that can handle a wide variety of die configurations
Credits and References
- Titam TM1638 - info from the original manufacturer, Shenzhen Titan Micro Electronics Co., Ltd. (深圳市天微电子股份有限公司)
- “0.9-5V To 5V DC-DC Step-Up Power Module Voltage Boost Converter Board 1.5V 1.8V 2.5V 3V 3.3V 3.7V 4.2V To 5V” (aliexpress seller listing)
- Purchased for SG$1.74 including tax for 5 pieces (Nov-2024)
- See LEAP#760 AAA 5v Power Pack for more on this module