#018 FretBoard
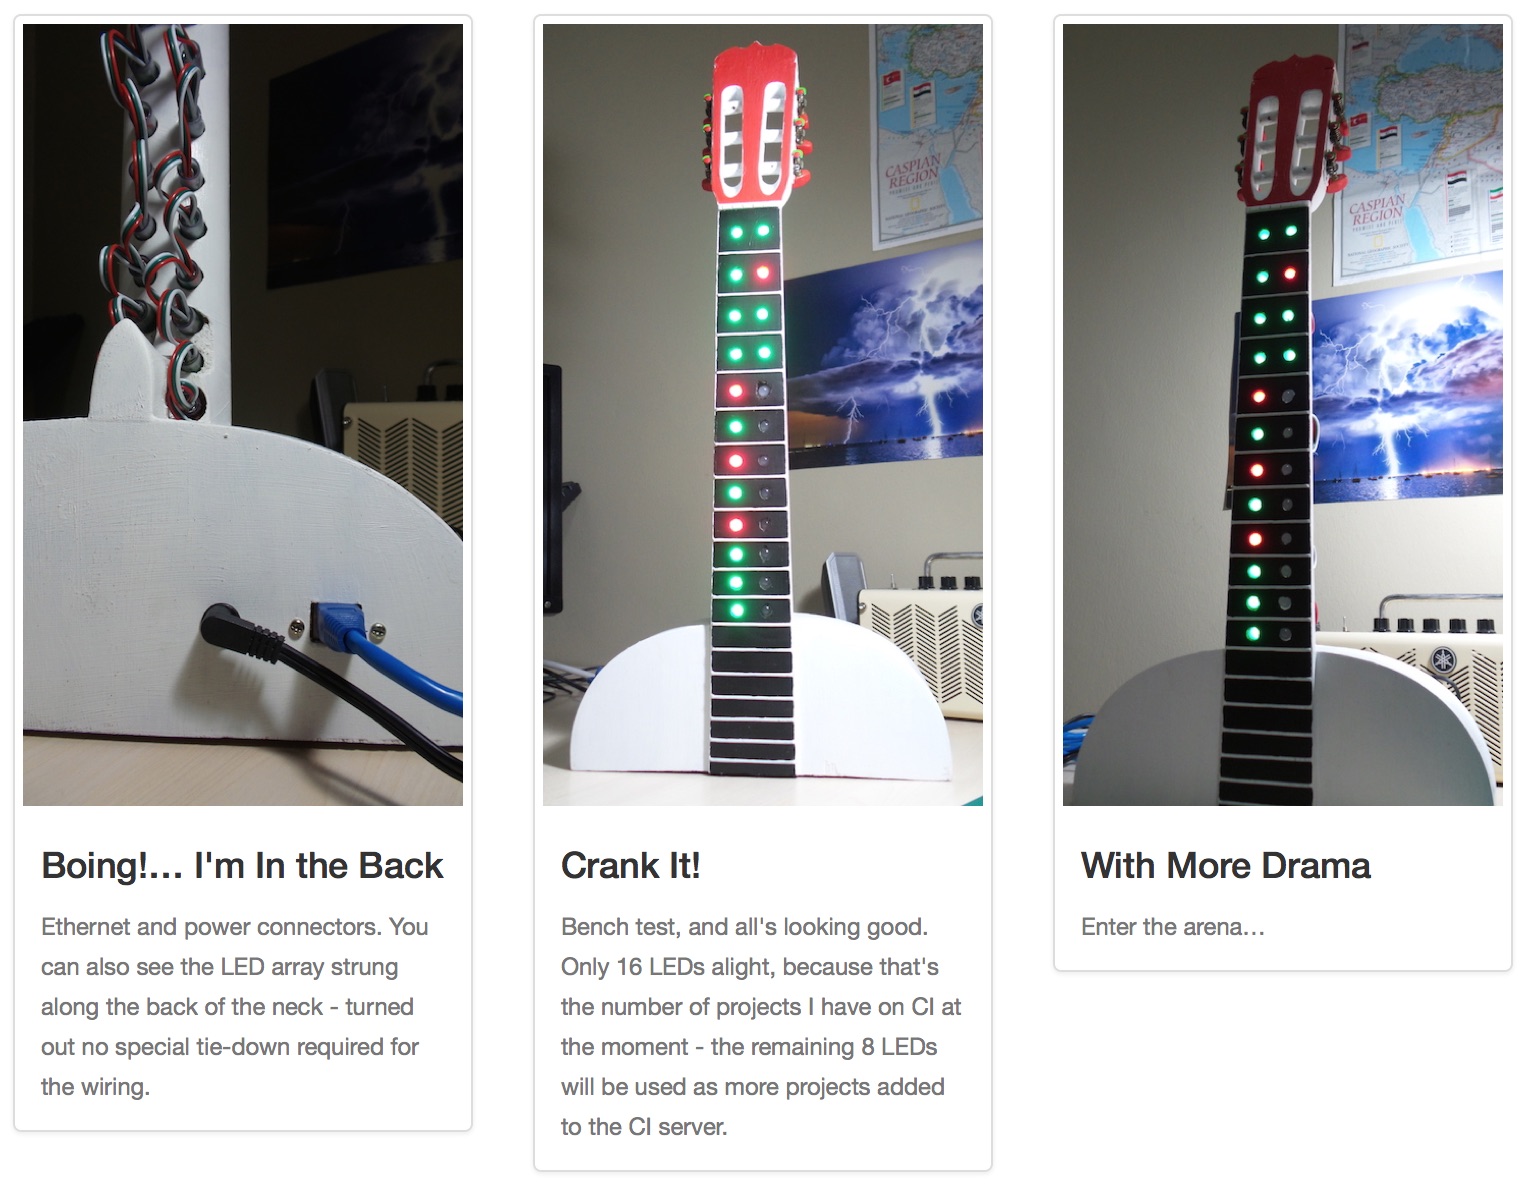
FretBoard is a multi-project build status indicator, using a WS2811-based LED Strip to display the status of each project.
Full details of the project are available at fretboard.tardate.com
Done:
- parse build status from the net using Ethernet shield
- driving the LED Array with basic build status indication
- added LED effects (glow) using timer driver
- added visual indicator when the build status is refreshed and builds-in-progress
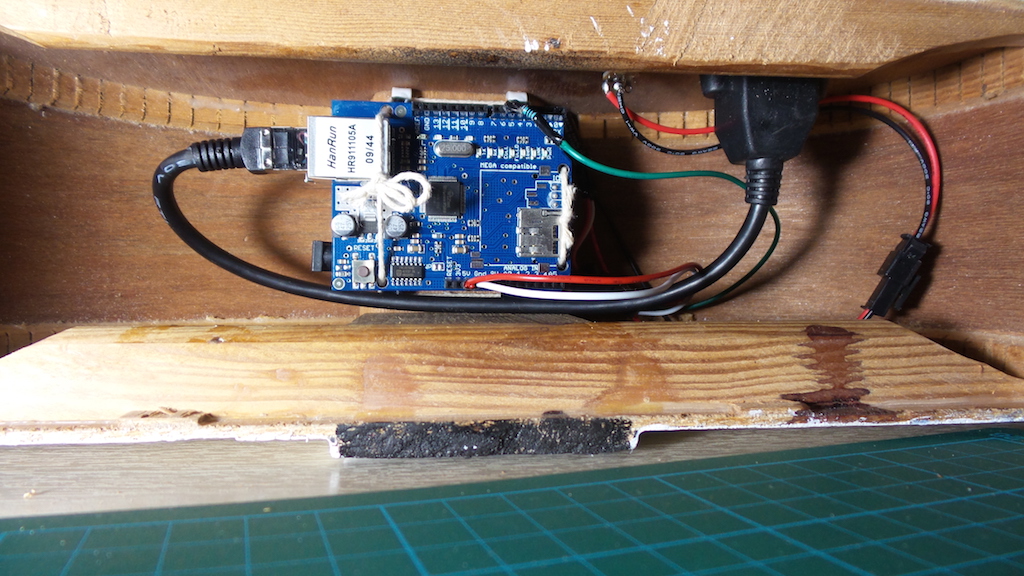
- the physical build - housing this in a suitable case for display
- wrap up the documentation
Notes
The Build Status Web Response
We get build status from a web server that supports a simple HTTP 1.0 CSV response. This is probably a proxy to the actual build server. See the fretboard web repository for an example of a proxy that can handle Circle CI JSON API and CruiseControl XmlStatusReport response formats.
The response looks like this:
$ curl -i -0 --raw http://fretboard.tardate.com/status.csv

HTTP/1.1 200 OK
Connection: close
Content-Type: text/csv;charset=utf-8
Content-Length: 288
X-Content-Type-Options: nosniff
Server: WEBrick/1.3.1 (Ruby/2.0.0/2014-11-13)
Date: Sun, 01 Feb 2015 09:04:18 GMT
Via: 1.1 vegur

dummy_project_1,Sleeping,Success
dummy_project_2,Sleeping,Failure
dummy_project_3,CheckingModifications,Success
dummy_project_4,CheckingModifications,Failure
dummy_project_5,Building,Success
dummy_project_6,Building,Failure
dummy_project_7,Unknown,Success
dummy_project_8,Unknown,Failure
Each line of the CSV response includes three elements:
- project name
- build activity (CheckingModifications,Building,Sleeping,Unknown)
- build status (Success,Unknown,Failure)
A couple of features make this easy to deal with:
- HTTP 1.0 means the Arduino doesn’t need to deal with chunked-encoding.
- The CSV format is easy to parse either natively from EthernetClient or with the assistance of a library like TextFinder
- project build status are provided in alphabetical order, hence the Arduino doesn’t need to worry about ordering of results
Parsing the Web Request
I’m using TextFinder to parse the web response. Note that the GitHub repository version of TextFinder is an enhanced version of the original library available from the Arduino Playground.
Other libraries that could be used are amcewen/HttpClient and interactive-matter/HTTPClient.
Power
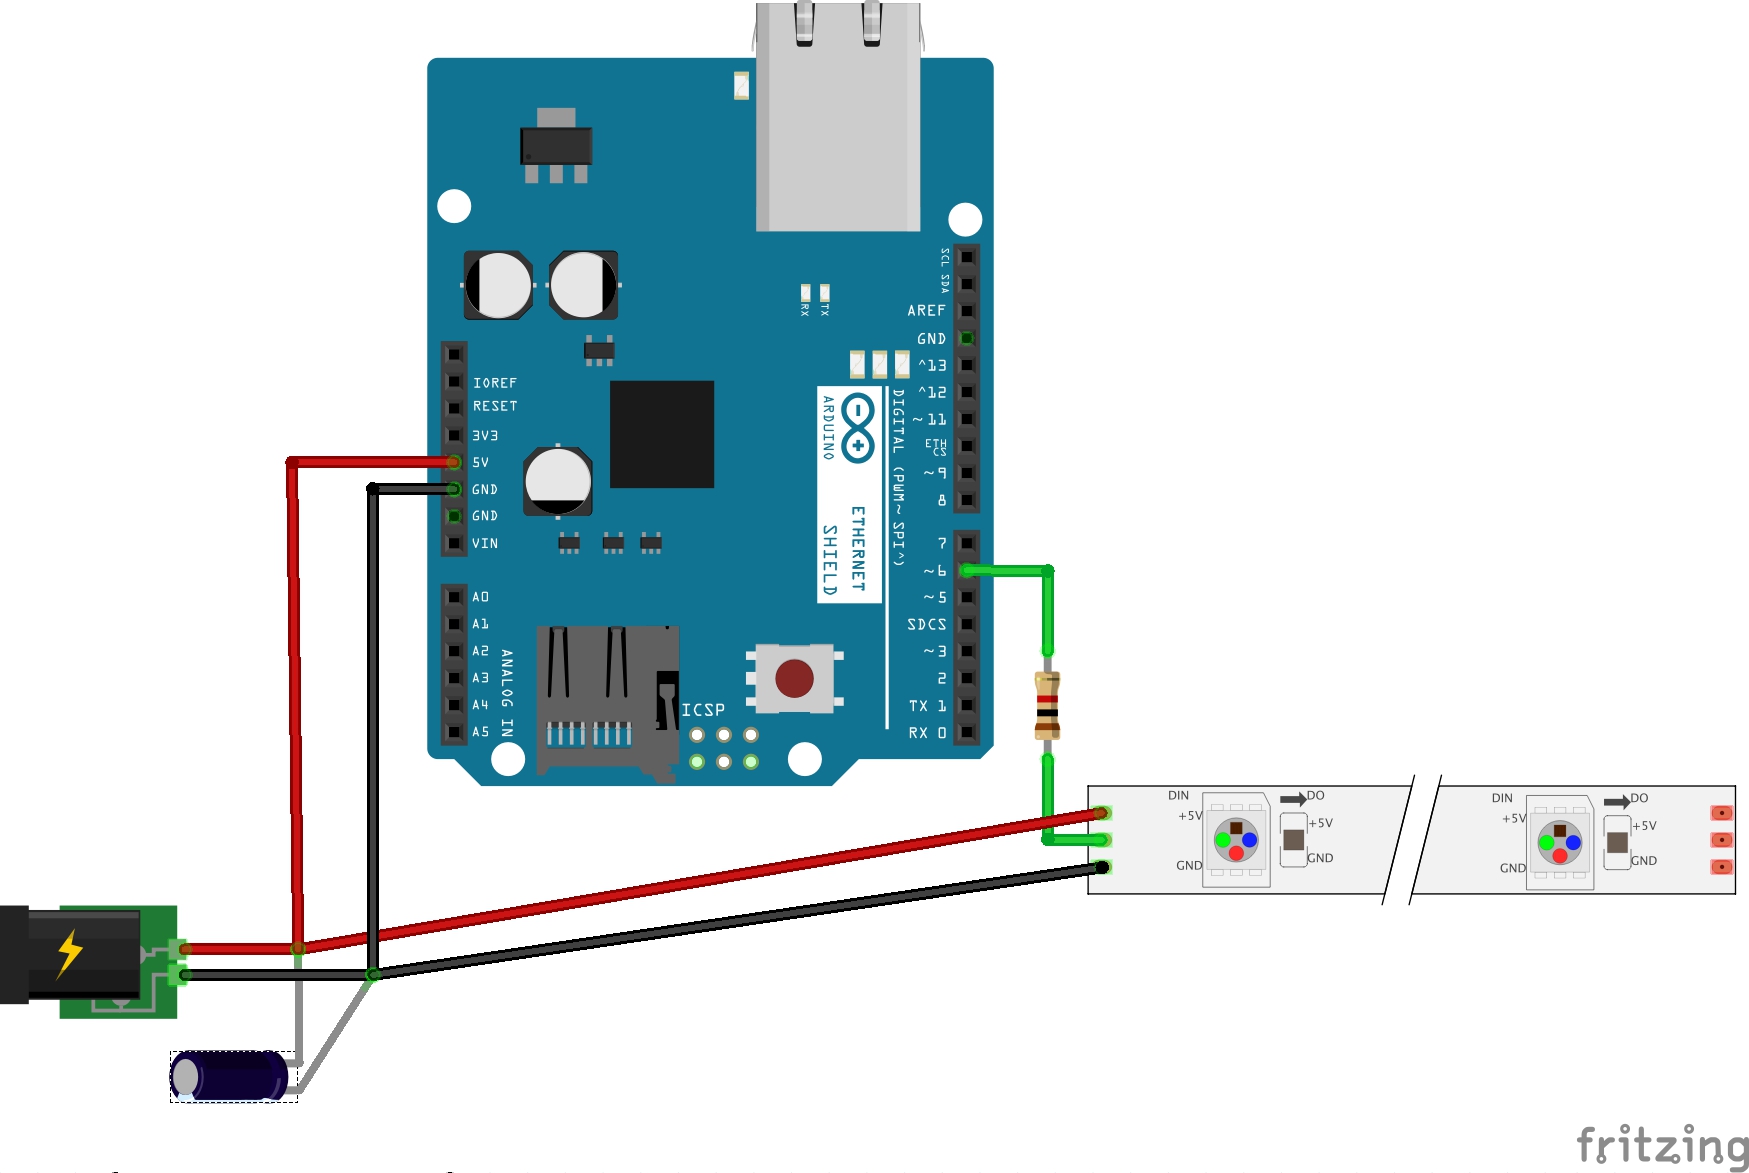
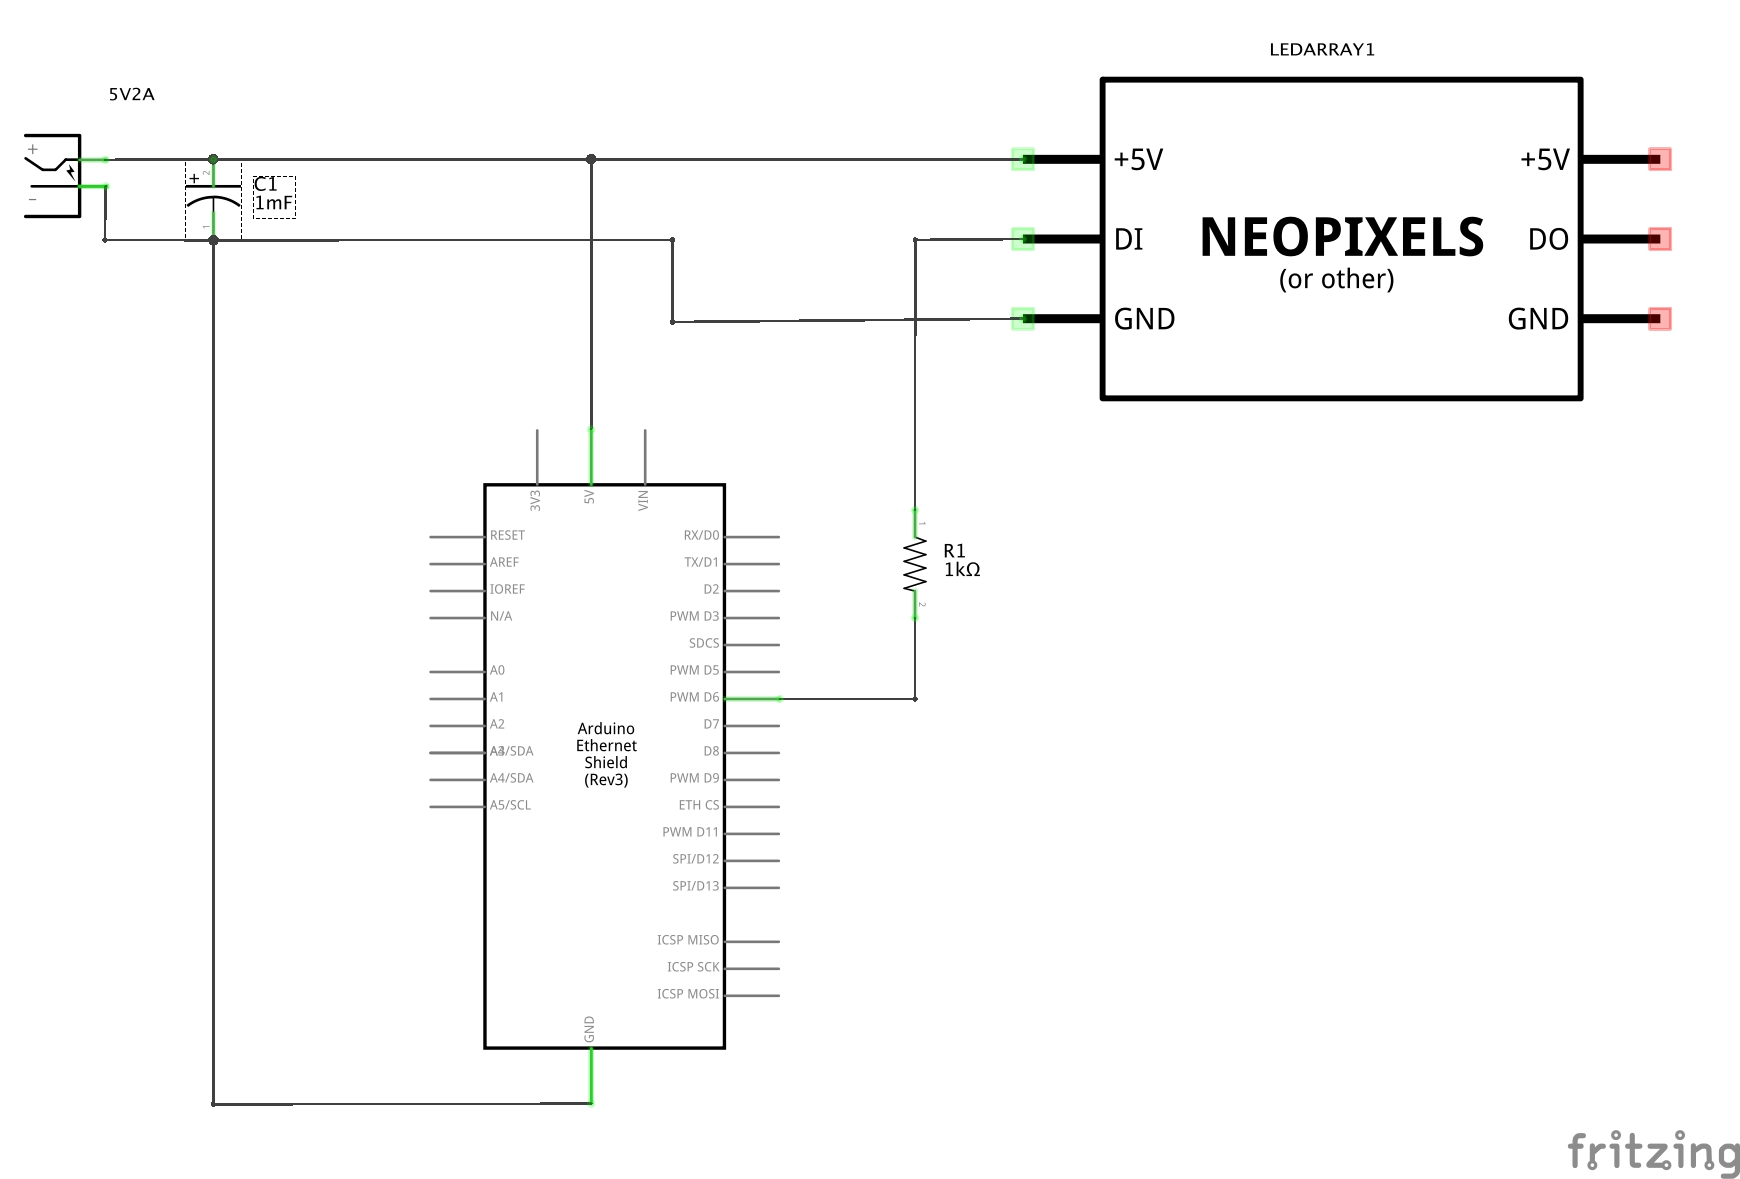
The LED strip requires 5V and with all 24 LEDs on, current should max out at 1.44A (0.3W * 24 / 5V).
For testing, I’m powering the LED Array from a 5V 2A adapter and the Arduino from USB.
For the final build, I’ll be powering the Arduino from the same 5V adapter powering the LEDs (direct to the 5V pin on the Arduino). There is lots of advice on how to do this e.g. here
- along with strong caveats since the 5V pin bypasses the onboard regulator, and it is essential to ensure no other power source is simultaneously provided to the Arduino. However, the 5V adapter I am using is regulated, and under test it has worked fine to power the Arduino and LED array together.
Construction


Parts
Not much to the electronics. Core parts:
- Arduino Uno
- Arduino Ethernet shield
- WS2811-based LED Strip
- 1000µF capacitor for power supply smoothing
- 1kΩ resistor for current-limiting the LED data line
And then connectors etc depending on the physical housing.
LED Strip Data
WS2811-based LED Strip ships in a strip of 50 LEDs (cut down to 24 for this project). The basic details:
- Certification: EMC,FCC,LVD,RoHS
- Brand Name: olym-led
- Features: ws2811
- Model Number: ol-rgb-0.3w
- Voltage: 5V
- LED Power: 0.3W
- Waterproof IP Grade: IP68
- Led Lifespan: Over 50000 hours
- Light Color: RGB FULL Color
References
- fretboard.tardate.com - vanity site for the project
- The GitHub Stoplight
- Monitoring Your Continuous Integration Server with Traffic Lights and an Arduino
- Operation Stoplight: Jenkins + Arduino Build Status Notification
- adafruit digital-led-strip wiring
- Adafruit NeoPixel Überguide
- Arduino and WS2812 LEDs
- Bit banging step-by-step: Arduino control of WS2811, WS2812, and WS2812B RGB LEDs
- Digital Addressable Led Strip & Arduino - code for simple example
- Driving a WS2811 RGB LED Strip with an Arduino
- FastLED Animation Library
- FastSPI LED Effects - some custom code for driving the ws2811
- thread on connecting datalines to LED array
- Use a $1 ATTiny to drive addressable RGB LEDs
- WS2811 Digital RGB LED - good data sheet and tips resource - addressable LEDs
- ..as mentioned on my blog

