#315 MT3608 Variable Boost
Testing the canonical variable boost circuit using the MT3608 High Efficiency Step Up Converter.

Notes
The MT3608 (parts also produced as the B6286) is a very efficient boost converter that can deliver up to 24V at 4A. It requires only 6 external passive components, and is readily available as a complete module for as little as $0.40.
In this project, I wanted to build up the standard variable converter circuit from scratch and verify its performance.
WARNING: all these boards share a common circuit design that is only really safe if the input voltage is below about 7V, since otherwise it is possible to push the FB pin beyond the rated 6V when the pot is turned to the extreme. See LEAP#642 MT3608 Safe Control for an alternative that is safe for higher input voltages.
MT3608
- 2V to 24V Input Voltage
- 1.2MHz Fixed Switching Frequency
- Internal 4A Switch Current Limit
- Internal Compensation
- Up to 28V Output Voltage
- Automatic Pulse Frequency Modulation Mode at Light Loads
- up to 97% Efficiency
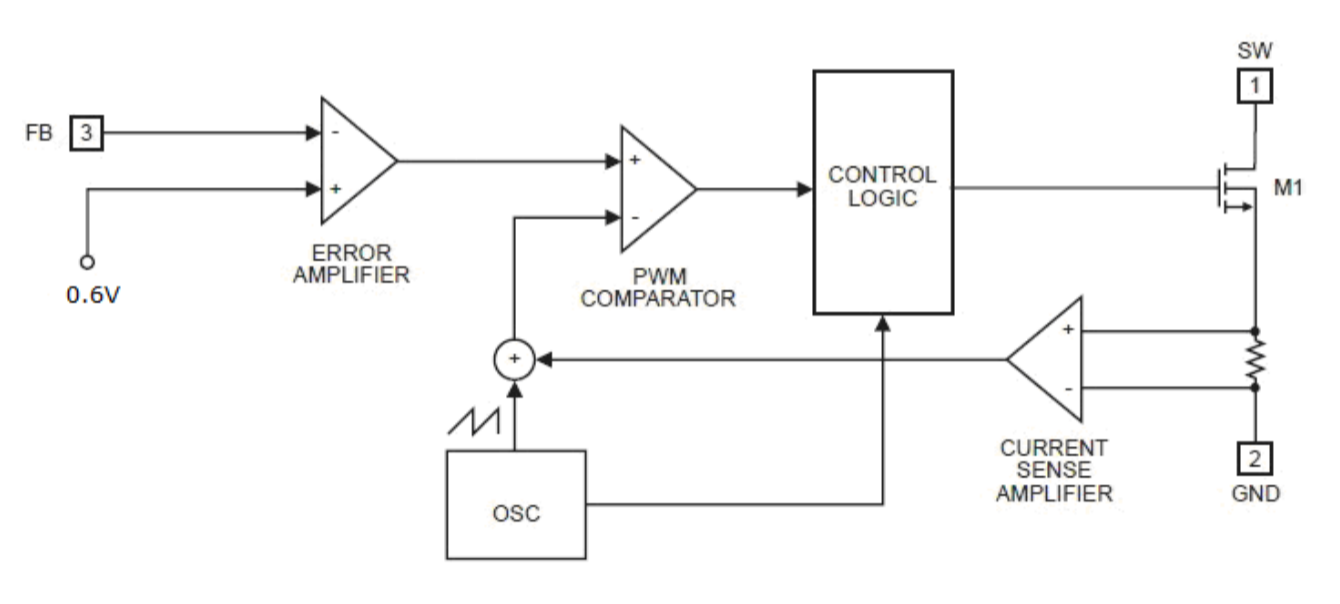
Circuit Layout
The M3608 comes in a miniscule SOT23-6 package. If I was building this circuit for a real application, I would design an SMD custom PCB. I might still do that, but it would very much be purely for education & fun, as the total cost would probably be over 50 times commercially available modules.
So for this build I’m going ugly style on a hand-prepared copper PCB.
Component Selection
Inductor
The datasheet recommends a 4.7µH to 22µH inductor with low core loss at 1.2MHz. I’m using a 22µH CDRH104R SMD power inductor.
Filter Capacitors
22µF input and output ceramic capacitors are recommended. I don’t have any ceramics of that capacity on hand, so I’m using through-hole electrolytics. They are rated for 50V.
Diode Selection
A low forward-voltage schottky diode is recommended. Seems like a 1N5819 would be a good choice, but I don’t have any available right now. I’m using a 1N4148 instead - not ideal, but satisfactory as reverse breakdown voltage is sufficiently high at 75V.
Feedback Resistors
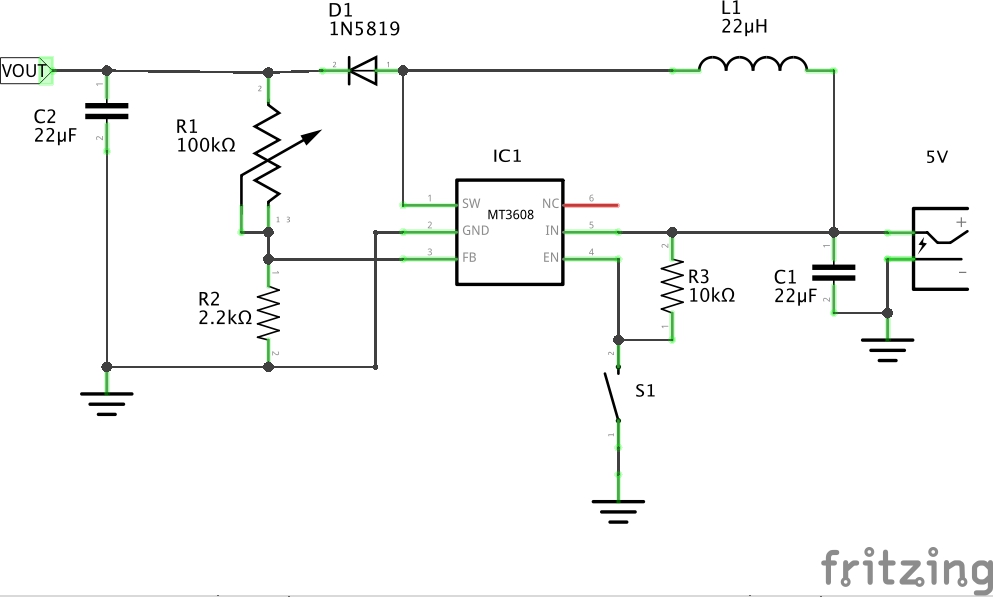
The feedback voltage-divider with two resistors establishes the output voltage level where Vref is 0.6V:
Vout = Vref * (1 + R1/R2)
I chose a 2.2kΩ for R2 fairly arbitrarily, mainly because I’ve seen that used in MT3608 modules. Adding a 100kΩ variable resistor for R1 means a theoretical output voltage range of 0.6V to 27.9V.
The lowest output voltage is in fact not that low. In practice it would be limited to around 1 diode drop less than the input voltage.
Enable Pin Connection
The enable pin is active high. If the chip should always be on, the pin can be connected directly to the input voltage. Since I want to test the enable functionality, I connect it with a 10kΩ pull-up resistor, so I can ground the enable pin to turn off the output.
When running with Vin=4.97V and Vout=16V, the enable pin is pulled-up to Vin with a 10kΩ resistor.
Grounding (pulling down) the enable pin disables the converter. But this does not cut output. It just removes the voltage boost, and output passes directly through the inductor and diode to output (less a diode drop).
With Vin=4.97V, Vout drops to 4.40V when disabled (given my choice of diode).
Note: one of the disadvantages of most commercial modules is that they tie the enable pin to Vin so the enable functionality is not available (without cutting and patching the board traces).
Performance - Build #1
I’m not getting efficiencies anywhere near what the datasheet claims, but I suspect this is mainly due to the low currents I am testing at. My component selection might be responsible for most of the losses: the forward voltage of the diode, and I’m not sure how well the electrolytic capacitors perform at 1.2MHz.
| Load | Vin(V) | Iin(mA) | Pin(mW) | Vout(V) | Iout(mA) | Pout(mW) | Efficiency(%) | Note |
|---|---|---|---|---|---|---|---|---|
| n/c | 4.97 | 2.0 | 4.33 | 0mA | n/a | minimum Vout | ||
| n/c | 4.97 | 2.0 | 28.2 | 0mA | n/a | maximum Vout | ||
| 10kΩ | 4.97 | 2.4 | 11.9 | 4.30 | 0.43 | 1.85 | 15.5% | minimum Vout |
| 10kΩ | 4.97 | 22.3 | 110.8 | 28.1 | 2.88 | 80.9 | 73% | maximum Vout |
| 10kΩ | 4.96 | 4.5 | 22.3 | 12.11 | 1.23 | 14.9 | 66.7% |
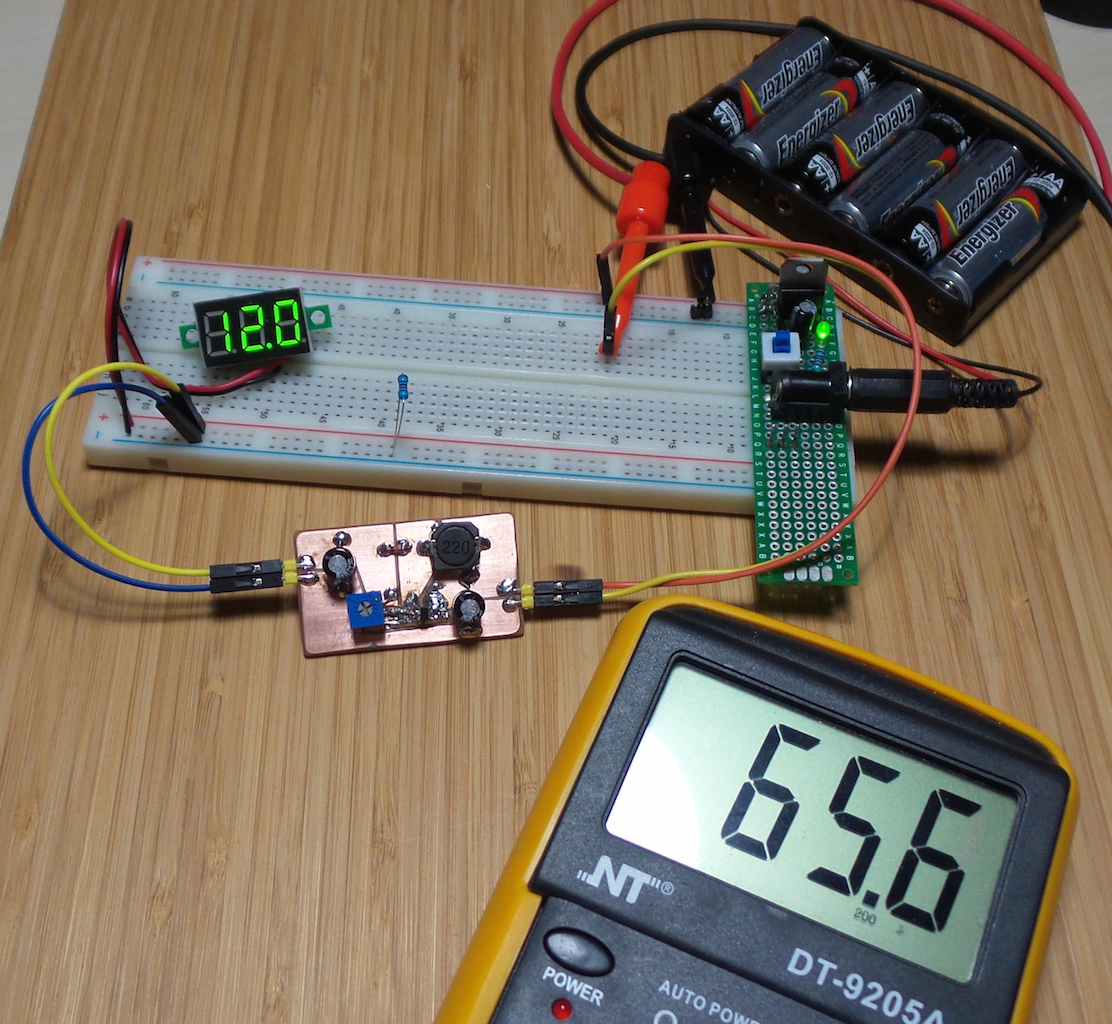
The module under test with Vin=5V, Vout=12V and a 10kΩ load.
Most of the current is drawn to power the voltmeter I have attached on Vout:
Performance - Build #2
I received some more appropriate components (1N5819 diode and 22µF ceramic caps) and built a new board. Interestingly, results are approximately the same, although the diode does allow for a lower voltage drop.
The maximum voltage I’m getting (38.2V with a 10kΩ load) is way over spec - SW Voltage maximum is 30V. I still ran the test and everything seemed to survive the short over-voltage.
| Load | Vin(V) | Iin(mA) | Pin(mW) | Vout(V) | Iout(mA) | Pout(mW) | Efficiency(%) | Note |
|---|---|---|---|---|---|---|---|---|
| n/c | 4.96 | 1.0 | 4.75 | 0 | n/a | minimum Vout | ||
| n/c | 4.96 | 1.0 | 44.2 | 0 | n/a | maximum Vout | ||
| 10kΩ | 4.96 | 2.75 | 13.6675 | 4.75 | 0.48 | 2.28 | 16.7% | minimum Vout |
| 10kΩ | 4.96 | 41.6 | 206.752 | 38.2 | 3.94 | 150.508 | 72.8% | maximum Vout |
| 10kΩ | 4.96 | 4.71 | 23.4087 | 12.16 | 1.24 | 15.0784 | 64.4% | |
| 50Ω | 4.95 | 139.2 | 689.0 | 5.00 | 93.3 | 466.5 | 67.7% |
Performance - Commercial Module
I compared the performance of a commercial MT3608 module from a seller on aliexpress. The module has very similar parts selection to my DIY builds:
- 100kΩ pot and 2.2kΩ for the feedback voltage divider
- SS34 SMD schottky diode
- Enable pin tied directly to Vin
- 22µH SMD inductor
- ceramic caps - appears ~15µF on the output and the input cap appears to be higher, but I can’t measure it reliably in-circuit.
Performance is slightly better. This may be due to the layout which follows the guidelines in the datasheet very closely.
| Load | Vin(V) | Iin(mA) | Pin(mW) | Vout(V) | Iout(mA) | Pout(mW) | Efficiency(%) | Note |
|---|---|---|---|---|---|---|---|---|
| n/c | 4.96 | 0 | n/a | minimum Vout | ||||
| n/c | 4.96 | 0 | n/a | maximum Vout | ||||
| 10kΩ | 4.96 | 1.27 | 6.3 | 4.81 | 0.489 | 2.352 | 37.3% | minimum Vout |
| 10kΩ | 4.96 | 21.7 | 107.6 | 27.3 | 2.79 | 76.2 | 70.8 | maximum Vout |
| 10kΩ | 4.96 | 4.25 | 21.08 | 12.01 | 1.251 | 15.025 | 71.3% | |
| 50Ω | 4.95 | 135.7 | 671.7 | 5.00 | 92.8 | 464 | 69.1% |
Construction
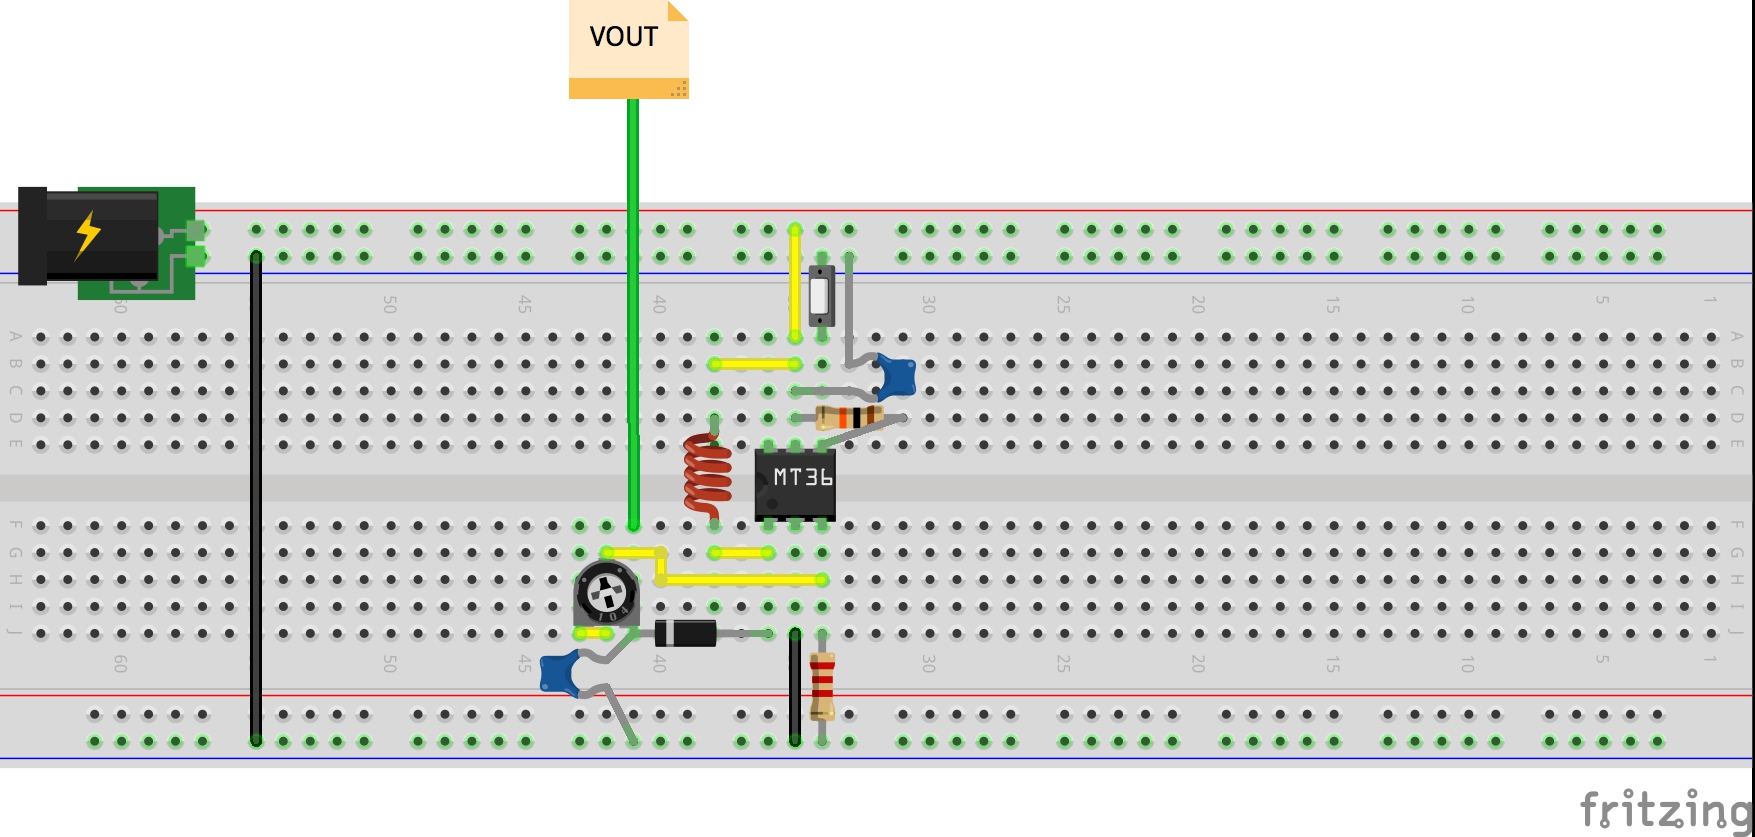
Here’s a notional breadboard layout:
Build #1 - Ugly-style on Copper Stock
Passives selection:
- 1N4148 diode
- 22µH CDRH104R SMD power inductor
- 22µF through-hole 50V electrolytics
Layout for an ugly-style build on some copper PCB stock with mainly SMD components:
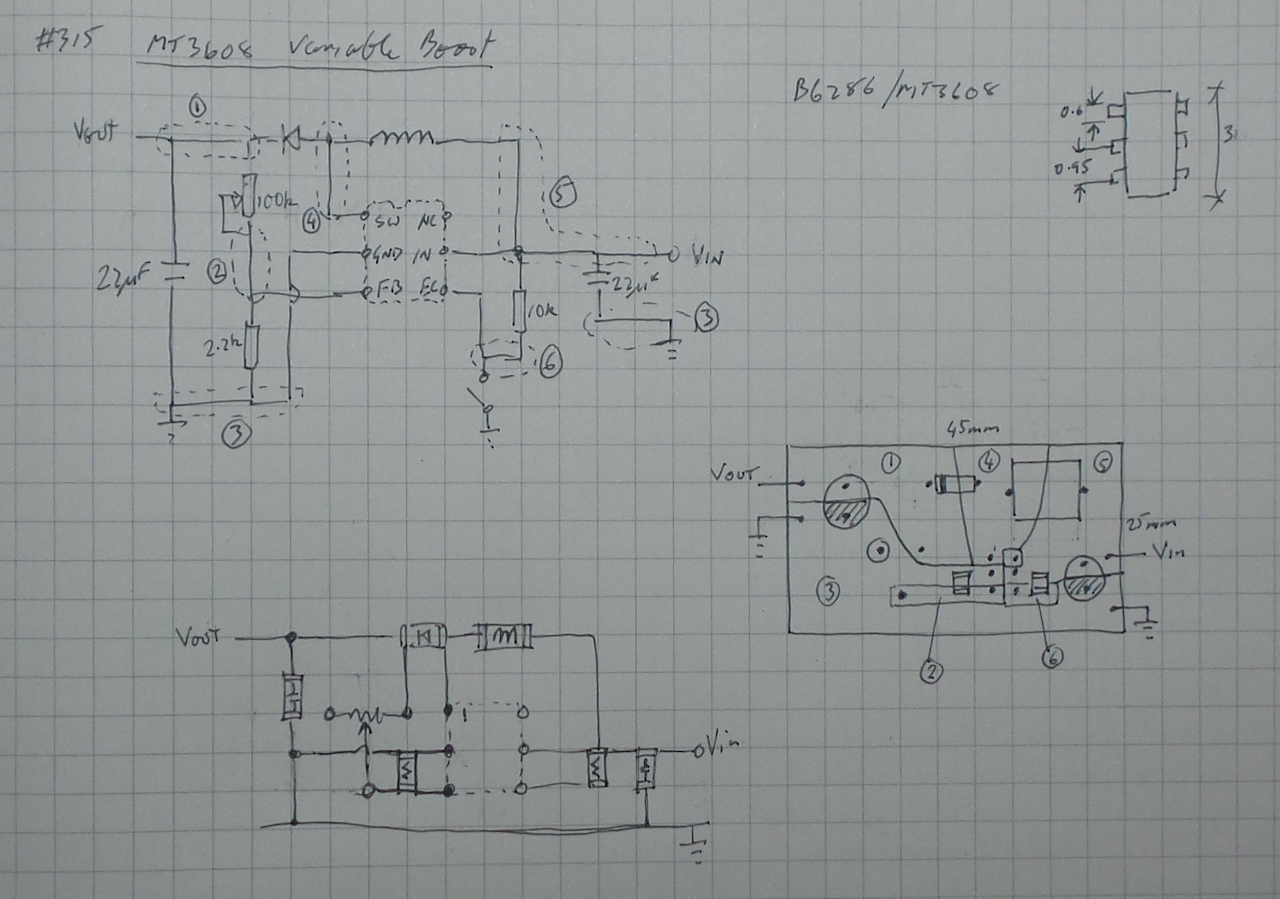
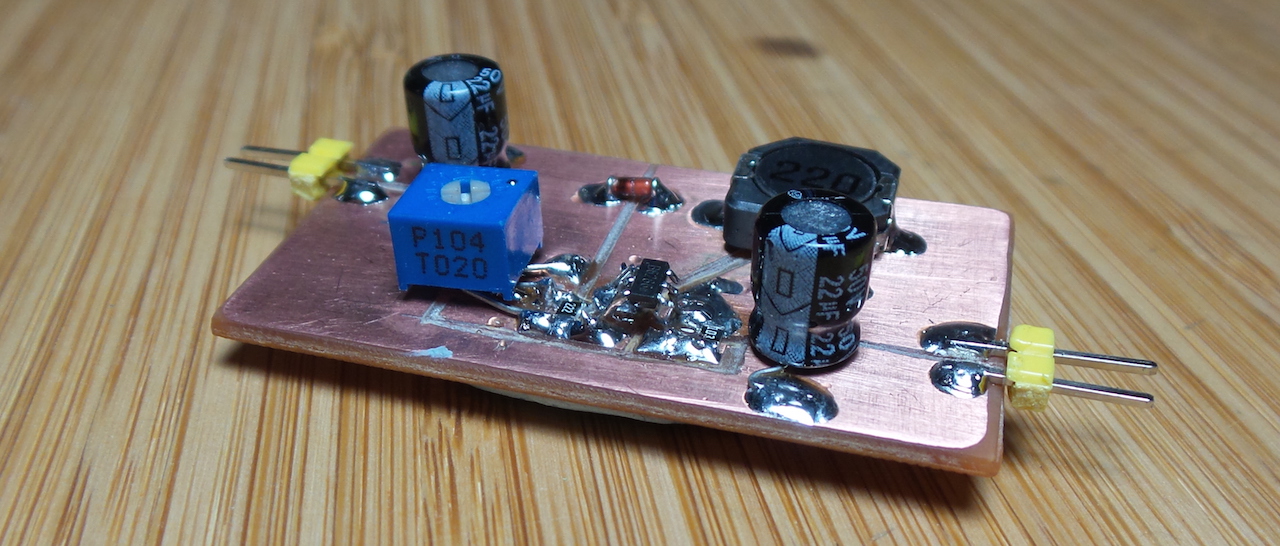
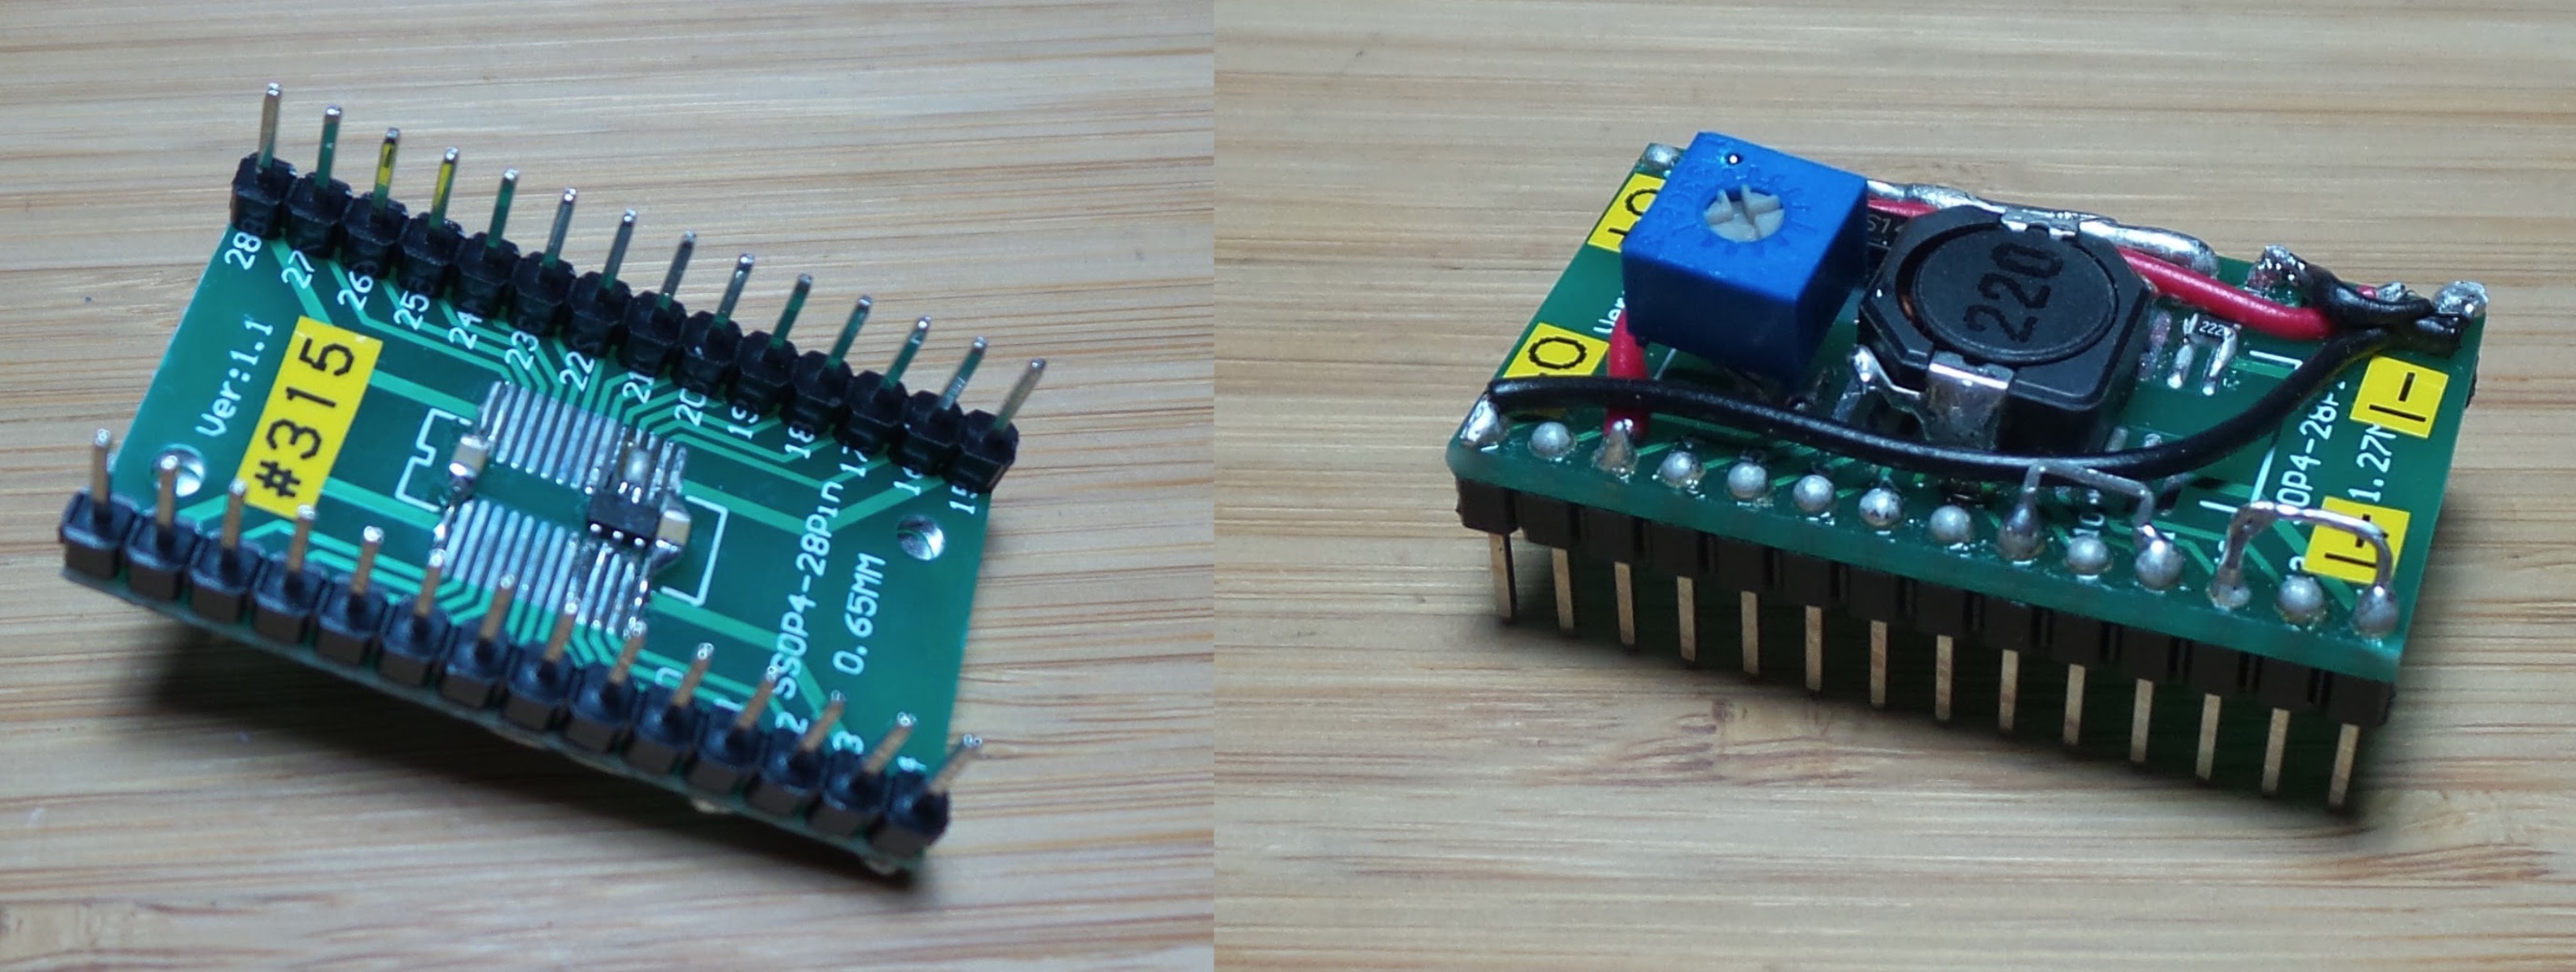
Build #2 - protoboard with Better(?) Components
Passives selection:
- 1N5819 diode
- 22µH CDRH104R SMD power inductor
- 22µF ceramic SMD capacitors
Credits and References
- MT3608 datasheet
- 1N4148 Datasheet
- 1N5819 Datasheet
- MT3608 module - from a seller on aliexpress
- ..as mentioned on my blog
