#288 Basic AVR-controlled Inverting Buck-boost
Build and test an inverting buck-boost converter controlled by an ATtiny85.
Notes
The basic inverting buck-boost circuit uses an inductor to build up an electromagnetic field during the switch-on period, and dump this energy into the capacitor during the switch-off period. The diode provides steering.
I’ve based this circuit on the DIY Buck/Boost Converter video by GreatScott!
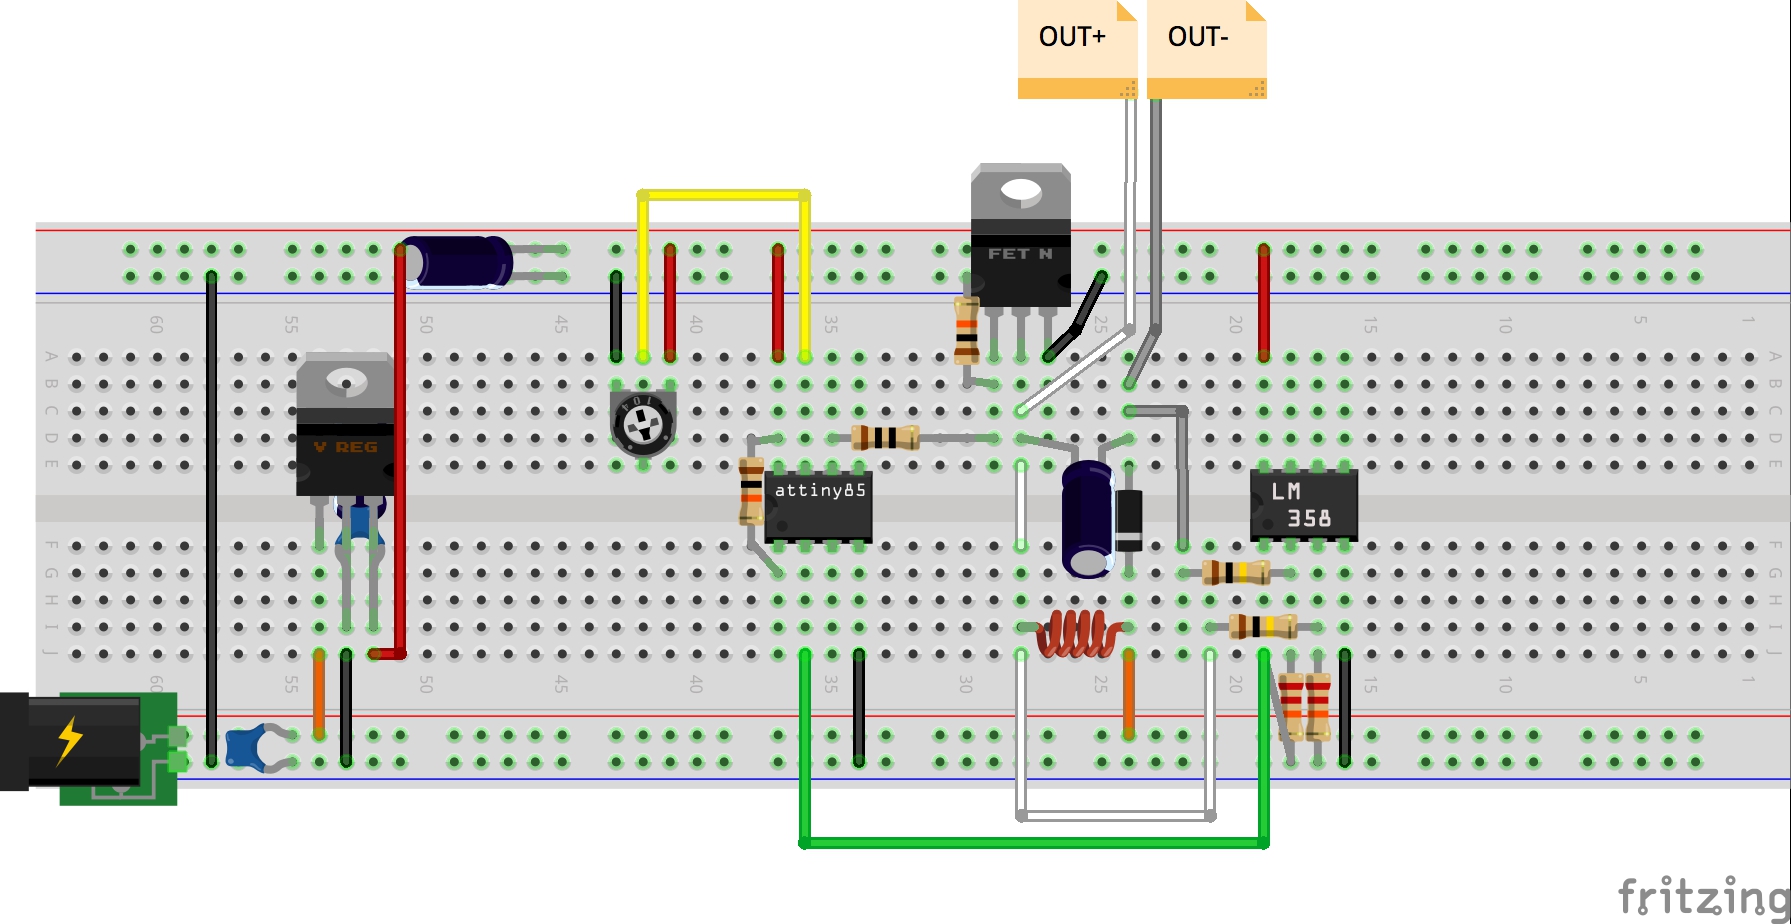
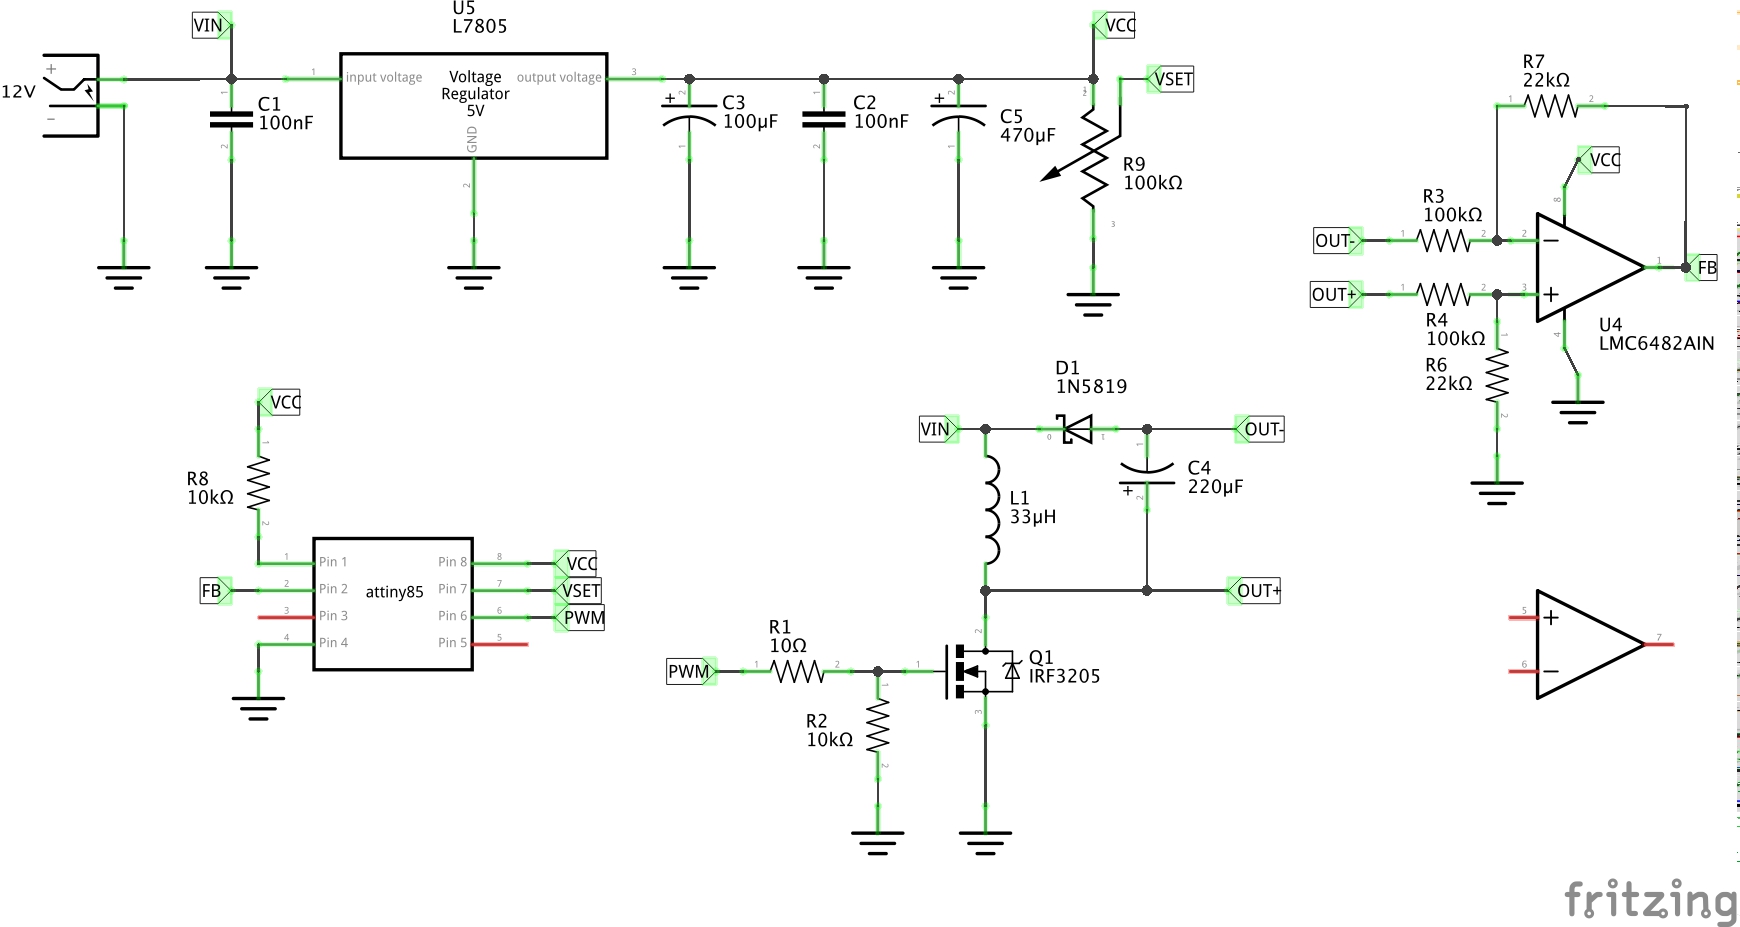
An overview of the circuit:
- basic inverting Buck-Boost configuration
- n-channel MOSFET low-side switching
- ATtiny85 controls the MOSFET with PWM output proportional to the actual/desired output differential
- rail-to-rail OpAmp provides actual voltage feedback, scaled to 0-5V for the ATtiny
- L7805 taps a 5V supply for the ATtiny and OpAmp
It is important to note that the output voltage is inverted. Because low-side switching is used, it is also not referenced to either the positive or negative supply rails.
Modifications to the Original Circuit
I’ve added additional capacitive smoothing on the 5V rail. This counters the effect of the switching circuit interfering with a stable ground-5V supply.
The voltage dividers on the feedback circuit have been boosted to larger value resistors (100kΩ/22kΩ) from the original (20kΩ/5.1kΩ). This allows for a minimum voltage of around 1.7V.
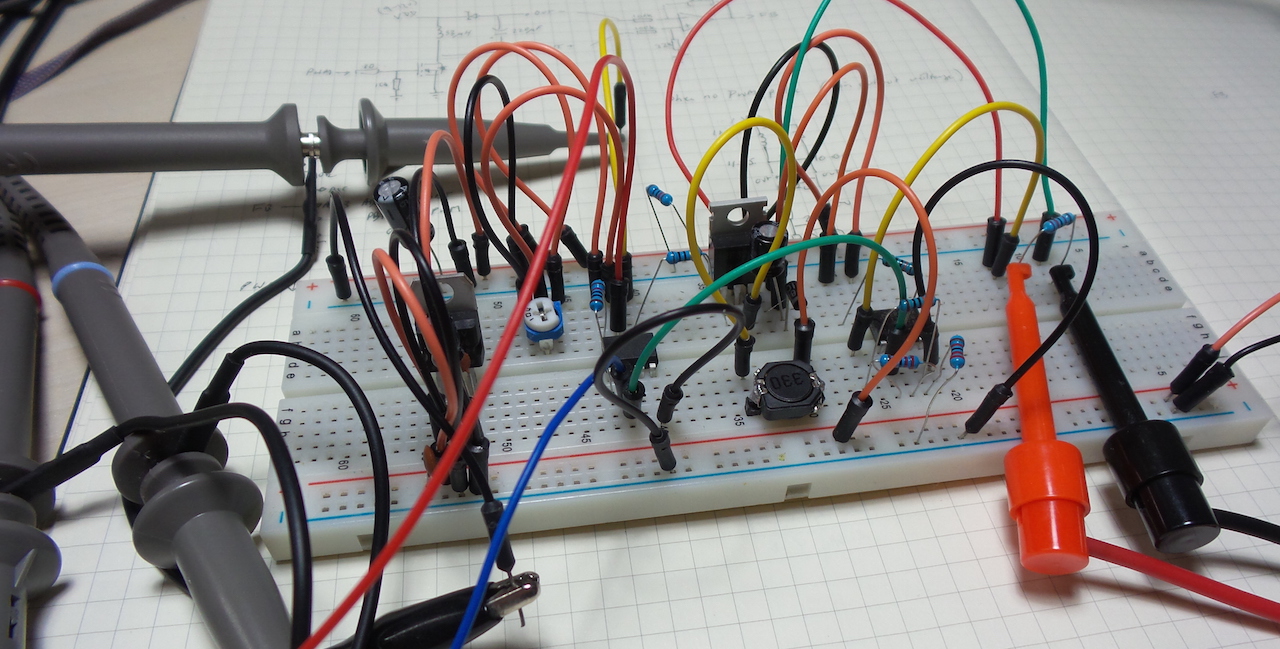
I’ve only breadboarded this so far, and it works reasonably well - at least as an investigation of how inverting buck-boost converters actually work.
PWM Control
The BasicInvertingBuckBoostAvrControl.ino sketch is based on on original script from instructables.
The original sketch uses 8-bit Timer/Counter0 Fast PWM with no clock prescaling (CS=0b001). Using (non-default) internal clock of 8MHz, this generates a PWM signal on PB1 (pin 6) of 31.25 kHz [measured: 31.72 kHz].
It uses analogWrite to adjust the duty cycle:
- value: the duty cycle: between 0 (always off) and 255 (always on), but is limited in code to a maximum of 203 max (~80% duty cycle).
- note that analogWrite resets timer COM settings, so much of the setup in the original sketch is redundant
It is important to set the fuses on the ATtiny for the higher clock in order to achieve sufficient switching frequency - see LEAP#255 AvrHardwarePWM/ATtiny for details.
Performance Analysis
Settings (buck mode):
- Vout = -9V
- Vin = 12V
- fs = 31.72 kHz
- Rload = 10kΩ
Theoretical Performance - Buck Mode
Required duty cycle:
D = Vout/(Vout - Vin) = 42.86%
Output ripple voltage:
Ia = Vout/Rload = 0.9mA
∆Vc = Ia * D / (fs * C) = 0.05528mV
Average input current:
Is = Ia * D / (1 - D) = 0.68mA
Average inductor current:
Il = Ia / (1 - D) = 1.58mA
Inductor peak-peak ripple current:
∆Ii = Vin * D / (fs * L) = 4.913A
That’s quite a spike
Actual Performance
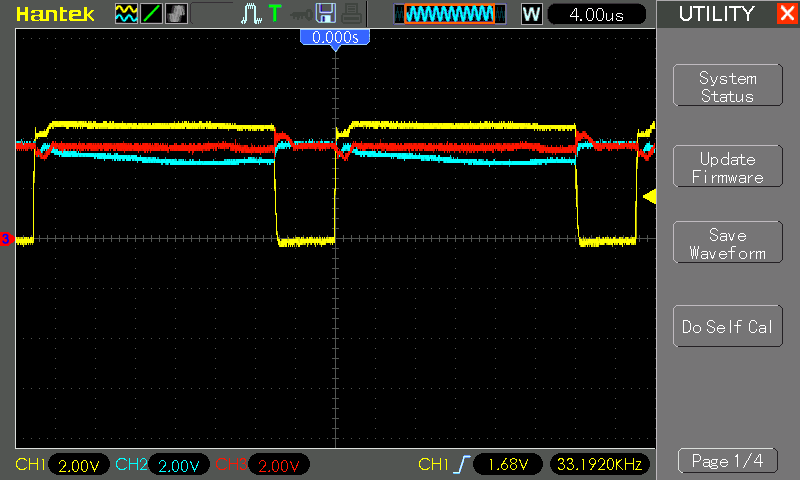
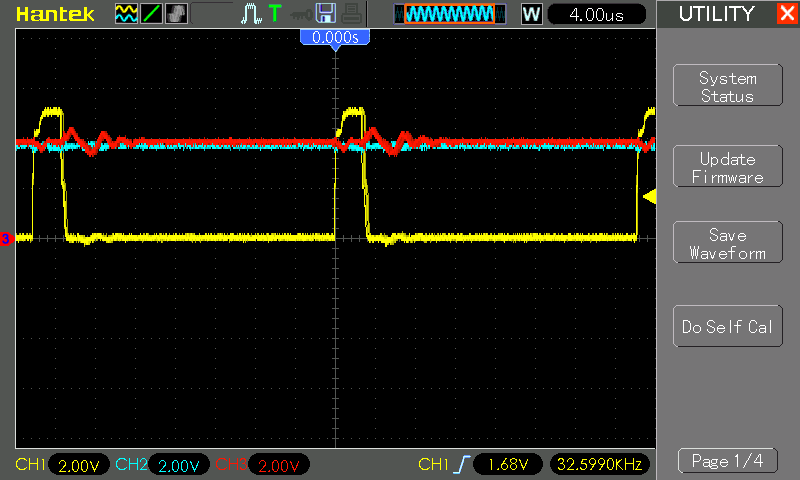
Here are some scope traces of the PWM and control signals in action.
- CH1 (yellow).
- CH2 (blue) is the feedback FB input
- CH3 (red) is the buffered VSET input
In the first case, VREF is adjusted to the max PWM duty cycle (hitting the limit of 80%):
VREF adjusted to a mid-point:
Construction

Credits and References
- LEAP#255 AvrHardwarePWM/ATtiny
-
[DIY Buck/Boost Converter (Flyback) How to step up/down DC voltage efficiently](https://www.youtube.com/watch?v=ZiD_X-uo_TQ) - video by GreatScott! - DIY Buck/Boost Converter - instructables
- Buck–boost converter - wikipedia
- Power-Switching Converters - Simon Ang, Alejandro Oliva
- IRF3205 datasheet - parts.io
- LMC6482 datasheet - parts.io
- ATTINY85 datasheet - parts.io
- L7805 datasheet - parts.io
- ..as mentioned on my blog
