
#836 Using the Open HamClock Backend
Using the new Open HamClock Backend (OHB) to give my HamClock client installation a new lease of life. Testing clients on Raspberry Pi, macOS, and Ubuntu.

Notes
The Open HamClock Backend (OHB) project was started in Feb-2026 with the objective of re-implementing a fully compatible HamClock backend, so that the wel-known HamClock client could still continue to operate after the demise of the original Clear Sky Institute services.
Originally started in the now defunct https://github.com/BrianWilkinsFL/open-hamclock-backend, the project has as of Apr-2026 largely reached feature-parity with the original Clear Sky Institute service.
The OHB project is currently available at:
- https://ohb.works/ - main website
- https://github.com/komacke/open-hamclock-backend - backend source
- https://github.com/komacke/hamclock - client source
- https://discord.gg/wb8ATjVn6M - Discord
As this is a fully open-source solution, with an inviting group of maintainers, I am fully onboard with this as my preferred successor to HamClock!
The notes that follow document my first steps in using the HamClock client with the new Open HamClock Backend.
See LEAP#762 HamClock for more on HamClock itself.
Using OHB with an Existing Raspberry Pi Client
I have an old Raspberry Pi 1 Model B+, fitted with the LEAP#831 HamClock Hat, and running a slightly modified version of the final Clear Sky Institute 4.22 client.
Switching it over to use the OHB backend is easily done with the -b parameter to specify a different backend:
pi@raspi1:~ $ hamclock -b ohb.hamclock.app:80
I have the HamClock is configured to run headless. I am using the default ports and the Raspberry Pi is on 192.168.10.36, so I can now access hamclock interfaces
- RW live view: http://192.168.10.36:8081/live.html
- RO live view: http://192.168.10.36:8082/live.html
- REST API e.g. get config: http://192.168.10.36:8080/get_config.txt
When I first started the client, I would see errors such as “Sat error: Epoch for AO-95 is out of date” when trying to track satellites (as in the screen below).
This due to outdated information cached in the ~/.hamclock/esats.txt file.
The client will eventually refresh this file in 3-6 hours, but a quick way to get an immediate update is to remove this file before starting hamclock e.g.:
pi@raspi1:~ $ rm ~/.hamclock/esats.txt
pi@raspi1:~ $ hamclock -b ohb.hamclock.app:80

With satellite data updated, HamClock is working perfectly with the new backend:

To ensure that HamClock automatically loads on startup, I modify crontab -e accordingly:
@reboot /usr/local/bin/hamclock -b ohb.hamclock.app:80
Fresh Raspberry Pi Installation
Let’s test the automated installation script for the Raspberry Pi. First I’ll remove the existing install:
rm -fr ESPHamClock
rm ~/Desktop/hamclock.desktop
# rm -fr ~/hamclock # not done - I'll leave my previous settings in place
sudo rm /usr/local/bin/hamclock*
Down load the HamClock RPi installer from the latest https://github.com/komacke/hamclock/releases:
curl -LO https://github.com/komacke/hamclock/releases/download/v4.22.4/install-hc-rpi
chmod u+x install-hc-rpi
./install-hc-rpi
The installer takes care of installing pre-requisites and offering other options such as autostart configuration.
Under the cover, the core is a source installation, which may be performed manually as follows. Here I’ve chosen to build for web-only at 1600x960 resolution:
curl -O  https://ohb.hamclock.app/ham/HamClock/ESPHamClock.zip
unzip ESPHamClock.zip
cd ESPHamClock
make help
...
make -j 4 hamclock-web-1600x960
sudo make install
And then startup in the background:
$ hamclock -b ohb.hamclock.app:80 &
[1] 1088
$
All working fine…

Using OHB with macOS Client
I’m running macOS with an Apple Silicon M1 chip. The HamClock client runs with XWindows.
Installing XQuartz (for XWindows support) with brew:
brew install --cask xquartz
Then run the installation steps per the documentation:
curl -O https://ohb.hamclock.app/ham/HamClock/ESPHamClock.zip
unzip ESPHamClock.zip
cd ESPHamClock
make -j 4 hamclock-800x480
sudo make install
The sources can then be removed:
cd ..
rm -fR ESPHamClock
rm ESPHamClock.zip
To run HamClock, first start XQuartz
open -a XQuartz
Then within XQuartz, choose “Applications > Terminal”, and run the hamclock command with the -b parameter to specify the backend server:
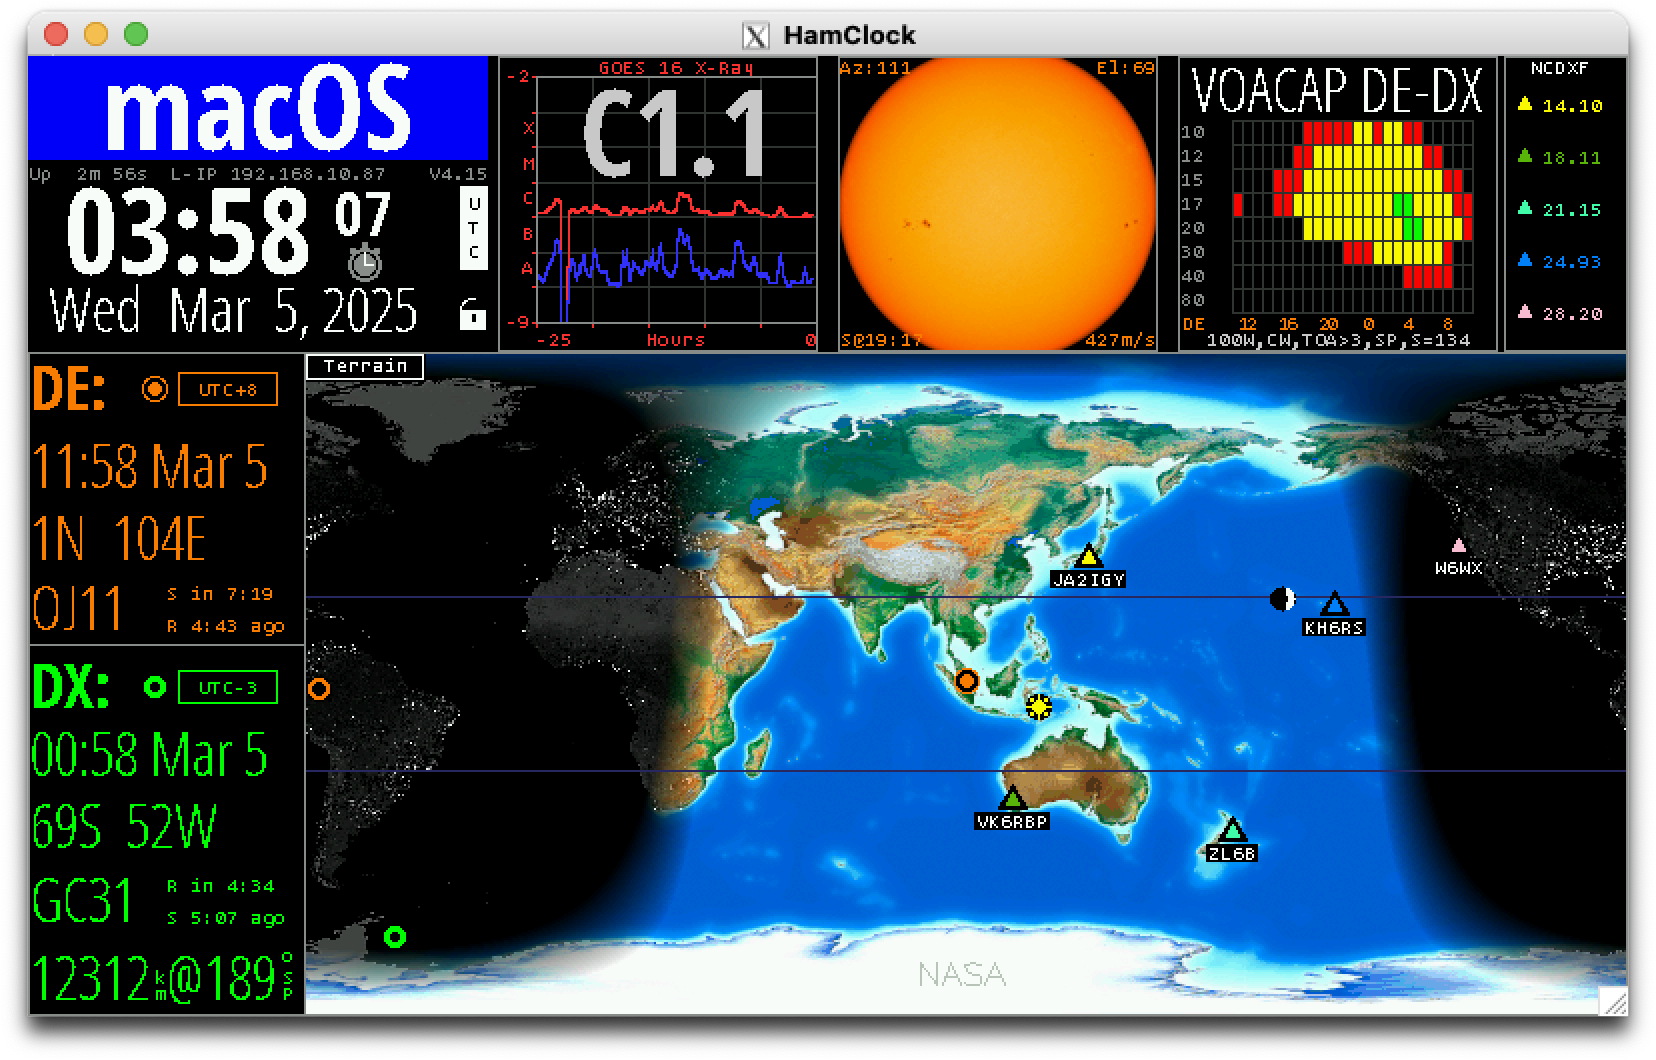
After entering call sign, lat lng options etc, HamClock starts and I can start to play with the display options.
Ubuntu
I also routinely use Ubuntu (currently version 24.04). Let’s try.
Make sure pre-requisites are installed:
sudo apt install curl make g++ xorg-dev xdg-utils
Run the installation steps per the documentation (this time a slightly larger 1600x960):
curl -O https://ohb.hamclock.app/ham/HamClock/ESPHamClock.zip
unzip ESPHamClock.zip
cd ESPHamClock
make -j 4 hamclock-1600x960
sudo make install
The sources can then be removed:
cd ..
rm -fR ESPHamClock
rm ESPHamClock.zip
Run HamClock from the console with the -b parameter to specify the backend server:
hamclock -b ohb.hamclock.app:80

Nice! Also works great.
Credits and References
- LEAP#762 HamClock
- LEAP#831 HamClock Hat
- Open HamClock Backend (OHB)
- https://ohb.works/ - main website
- https://github.com/komacke/open-hamclock-backend - backend source
- https://github.com/komacke/hamclock - client source
- https://discord.gg/wb8ATjVn6M - Discord