
#355 Snow Flake
The Snow Flake is an Atmel SAM D ARM Cortex-M0-controlled LED ornament produced by @LuckResistor and shared with the Boldport Club community as a special project.
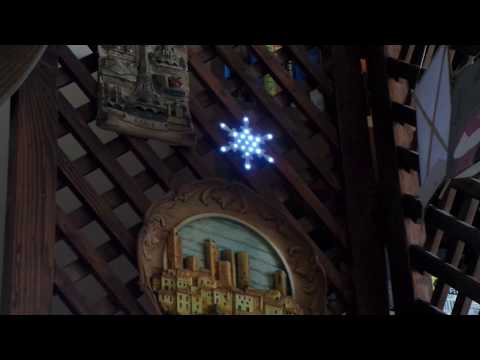
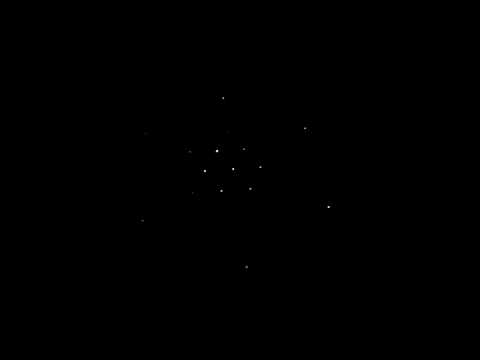
Here’s a quick demo of my first Snow Flake running in solo mode…
Notes
When @LuckyResistor announced the Snow Flake to the Boldport Club community, I knew I had to join in! It was fascinating watching the design evolve and the production process get underway. And then one day my batch of 5 snow flake kits arrived!
I’ve just completed building the first, and it went without a hitch. Once I have built some more I will be able to experiment with co-ordinated operation, but even a single snowflake makes an impressive display.

Parts
The Snow Flake is a custom 2-sided board with SMD components. The heart of the board is an Atmel SAM D ARM Cortex M0, which drives an array of 19 white LEDs.
| Ref | Item | Qty |
|---|---|---|
| J1 | Harwin M50-3600542R 2x5 SMD programming header | 1 |
| LED1-19 | Rohm SCMP13WBC8W1 white 150mcd LED package 0402 | 19 |
| IC1 | Microchip ATSAMD20E17A-AUT Atmel SAM D20E 128kb flash | 1 |
| R1-19 | KOA Speer RK73H2ATTD82R0F 82Ω (white) | 19 |
| R20 | KOA Speer RK73H2ATTDD1002F 10kΩ (blue) | 1 |
| R21 | KOA Speer RK73H2ATTDD1001F 1kΩ (green) | 1 |
| C1,3,6 | Murata GRM21BR71H104JA01L 0.1µF (black) | 3 |
| C2,4,5 | Murata GRM21BR71A105KA01L 1µF (no marking) | 3 |


Circuit Schematic

Power Board
The kit came with a bonus small white board that is an optional small power converter. It can be used to build a simple power adapter to convert USB 5V down to 3.3V for the snow flakes. I haven’t used this yet.
There’s a BOM for the Snow Flake Power Converter on octopart.

Construction
I followed the basic build procedure recommended by @LuckResistor:
- Solder the 0402 LEDs onto the board.
- Solder all of the other components the other side of the board.
- Before you program the chip, power the board with 3.3V and test the LEDs. Use a wire to ground and touch the correct pins of the MCU with ground and check if all LEDs light up. If not, search for problematic solder joints.
- Connect the wires to the snow-flake and chain them.
- Program all snow-flakes with the firmware.
I picked up some construction hints along the way:
- The polarisation of the LEDs: They always point inwards, and the pads have a very small marking visible in the solder mask.
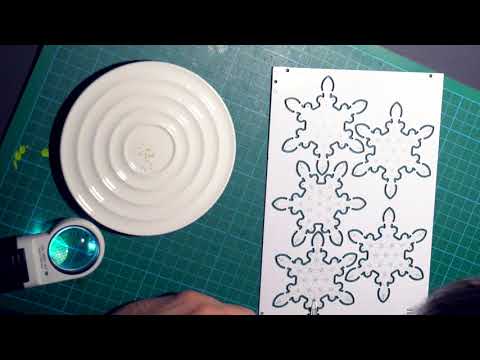
- The LEDs are very small! I used a procedure based on a technique described by @prof:
- unwind 19 LEDs from the tape onto a white plate or saucer
- organise the LEDs so they are all face up (I use a very fine paintbrush and toothpick for this)
- use tweezers to transfer the LEDs to the board near their final position
- apply solder paste to the LED pads
- use multimeter diode tester to get the right orientation
- push/move the LED onto the pasted pads with the probe leads or tweezers
@LuckResistor produced some videos to demonstrate construction:
Snow Flake Panel Assembly - LED Side
Snow Flake Panel Assembly - Components

Assembly
I don’t have a stencil but I decided to try hand-applied paste and hot air. This is fiddly, but worked fine.
The LED side is most challenging, as those suckers are mighty small!

Component-side was more straight-forward, but it was important to test all component connections ( I had a few that were open after the first pass with hot-air).

My final 4 Snow Flake’s coming off the line:

Programming
An SWD programmer is required to program the micro controller. Options inclde:
- Atmel ICE
- Black Magic Probe
- Segger J-Link
- STlinkV2 - or a clone from aliexpress;-)
- or a DevBoard with built-in programmer
I have both a Black Magic Probe and STlinkV2 on hand, but only had the correct cable for the BMP, so I went with that.
I haven’t compiled the sources from scratch yet. My first tests were with the binaries from threebytesfull. Note: @luckyresistor subsequently added FirmwareBinaries to the GitHub project.
The snow flakes have to be programmed individually using a SWD programmer. Perhaps someone will take up @luckyresistor’s challenge to write a boot loader to automatically write the firmware from the first snow flake over the data connection to all other snow flakes;-)
Flash with the Black Magic Probe
I knew the BMP should work fine, since threebytesfull had already documented the same.
With the ARM gcc toolchain installed, all that is required is:
- find the port of the BMP - I’m on MacOSX, so it appeared for me as
/dev/cu.usbmodem7BB19AA1 - the compiled ELF binary
Plug in a Snow Flake and flash the chip:
$ arm-none-eabi-gdb -nx --batch \
  -ex 'target extended-remote /dev/cu.usbmodem7BB19AA1' \
  -ex 'set confirm off' \
  -ex 'monitor version' \
  -ex 'monitor tpwr enable' \
  -ex 'shell sleep 0.1' \
  -ex 'monitor swdp_scan' \
  -ex 'attach 1' \
  -ex 'load' \
  -ex 'compare-sections' \
  -ex 'kill' \
  assets/SnowFlake.elf

Black Magic Probe (Firmware v1.6.1) (Hardware Version 3)
Copyright (C) 2015  Black Sphere Technologies Ltd.
License GPLv3+: GNU GPL version 3 or later <http://gnu.org/licenses/gpl.html>

Target voltage: 3.3V
Available Targets:
No. Att Driver
 1      Atmel SAMD20E17A (rev E)
0xfffffffe in ?? ()
Loading section .text, size 0x33f4 lma 0x0
Loading section .relocate, size 0x68 lma 0x33f4
Start address 0x0, load size 13404
Transfer rate: 19 KB/sec, 893 bytes/write.
Section .text, range 0x0 -- 0x33f4: matched.
Section .relocate, range 0x33f4 -- 0x345c: matched.

Power and Wiring
For now with one Snow Flake, I’ve simply wired a 2xAAA battery pack to the VCC and GND with some “invivible” 30AWG. When I have a few more Snow Flakes I’ll have to figure out a better arrangement for power and data communications.

The QRP Challenge!
How much power does a Snow Flake use? @LuckResistor estimates around 18mA, so approximately 100 hours running time with 2 x 900mAh.
My first Snow Flake was deployed to test the theory. Powered by 2 “almost new” Panasonic Evolta LR03EG AAA batteries, it ran continuously for 125 hours. The batteries were providing 2.35V (in circuit) at this point.
This Snow Flake just won’t quit! I finally pulled the plug before it died completely, as it was getting ridicuously dim. Here’s what it looked like:
A Four-Flake Mobile
I used four Snow Flake to make a little decoration for my Fretboard CI build status indicator. Just a little hack to give it some xmas cheer;-)
I mounted the four snowflakes from an improvised bit of wire art. The copper wire carries 3.3V and additional wire (just 30AWG) is ground. I didn’t wire up the data lines because I thought it would make the wiring too prominent, and synchronisation is not important.
The Fretboard is supplied with 5V/2A, so I tapped 3.3V with an AMS1117-3.3 in an Altoids tin to power the flakes.
Here’s the first bench test:

I haven’t really been able to capture the full effect in a photo. IRL it is much more impressive and glittery:

Credits and References
- Snow Flake - original order form (currently inactive)
- SnowFlakeProject - GitHub
- Snow Flake Power Converter BOM - octopart
- Black Magic Probe
- Atmel SAM D ARM Cortex M0 info
- LED ornaments - interesting article in Elektor issue 12/1983 p30: various old-school oscillator and LED-driver ideas
- ..as mentioned on my blog