
#710 Race To Jitra
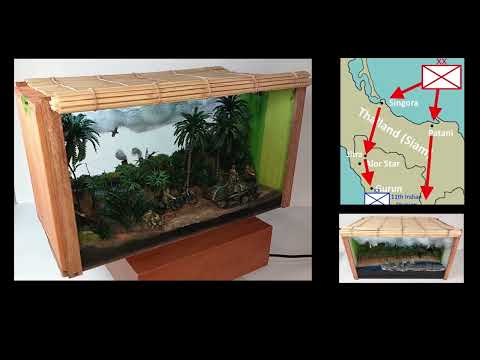
Building a double-sided box diorama in mixed scales to capture the rapid advance of Japanese forces during the Invasion of Malaya. The Battle of Jitra was one of many engagements where the advancing force overwhelmed the under-prepared defenders on the peninsula.

Here’s a quick demo..
Notes
In December 1941, the Japanese launched Operation “E” - The Invasion of Malaya.
The transport ships Awazisan Maru, Ayatosan Maru, and Sakura Maru, were escorted by the light cruiser Sendai, destroyers Ayanami, Isonami, Shikinami, and Uranami, minesweepers No. 2 and No. 3, and submarine chaser No. 9.
Landings in Thailand (Singora and Patani) were unopposed, but the Indian-British brigade defending Kota Bharu put up stiff resistance before being outflanked and overrun. This commenced the rapid advance down the Malayan peninsula, ultimately leading to the fall of Singapore by 15 February 1942.
The Battle of Jitra was fought between the invading Japanese and Allied forces during the Malayan Campaign of the Second World War, from 11–13 December 1941.
just two days after the invasion of british-held malaya in 1941 japanese troops arrived at the town of jitra there they faced a british force determined to halt their advance south but in a remarkable day of fighting a handful of tanks and troops routed an entire division and pushed the british defense of northern malaya into collapse.

The Japanese 3rd Air Corps (飛行集団, Hikō Shudan) and three Air Combat Groups (飛行戦隊, Hikō Sentai) of the 5th Air Corps took part in the Malaya Campaign.[29] In total there were 354 Imperial Japanese Army Air Service (IJAAS) first line aircraft involved together with the 110 Imperial Japanese Navy Air Service (IJNAS) aircraft. The Army units were variously equipped with
- fighters:
- Nakajima Ki-27 Nate,
- Nakajima Ki-43 Oscar,
- Mitsubishi Ki-51 Sonia;
- bombers:
- Kawasaki Ki-48 Lily,
- Mitsubishi Ki-21 Sally,
- Mitsubishi Ki-30 Ann;
- reconnaissance:
- Mitsubishi Ki-15 Babs,
- Mitsubishi Ki-46 Dinah.
A couple of videos that I found useful in researching this:
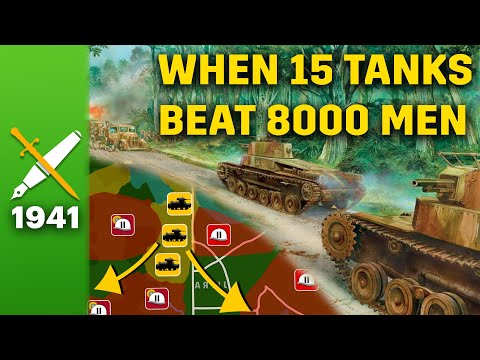
- “Britain’s Worst Defeat” - The Battle of Jitra 1941 Animated
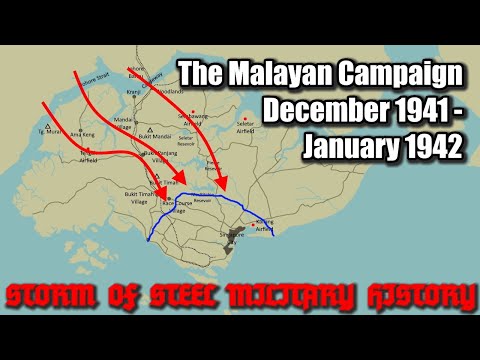
- The Malayan Campaign, December 1941 - January 1942 - Storm of Steel Military History
Build Concept
The scene is packed into a small double-sided box diorama. From one side, the forced perspective is intended to capture the Japanese Army in the foreground, with a peek of the Navy in the background. From the other side we see a destroyer and landing forces coming a-shore, with the action on the other side obscured by jungle foliage
This is definitely an experiment: I wasn’t sure how effective the forced perspective would be. There’s some complex blocking and staging required to make the scene look right from all perspectives.
Planning the Scene
The army is represented by a Type 89 Medium Tank accompanied by Japanese Bicycle Infantry and some unmounted Japanese Infantry.
The Navy is represented by the Destroyer Ayanami 綾波
I’ve set the foreground (land) and background (sea) on different levels to help with the forced perspective.

Jungle foliage will help block the views appropriately


I found a range of trees and foliage on amazon that do a decent enough job and avoid having to scratch build all the trees

Building a Tank
I had both a Type 89 Medium Tank and Type 95 Ha-Go Light Tank from IBG Models that I started building. I wasn’t sure which would be best.
As it seemed that the Type 95 was most used in the Malayan Campaign, I went with that in the end, but using the figures that came in the Type 89 kit.


Building the Base


Assembly


Lighting the Box
Circuit Design
A short section of 12V Cool White LED strip is mounted in the front and rear of the box.
To make it possible to power from a 5V USB 18650 power bank, I’ve added a boost converter in-line to bring the voltage up to 12V - using LEAP#358 MC34063 Boost Converter Kit.


Final Gallery
Does it work? Let me know! I’m pretty happy that it came out close to what I’d planned, and all the tricks of perspective are generally working OK!


Here’s a quick demo..
Credits and References
- this project on scalemates
- Type 89 Japanese Medium Tank OTSU Diesel IBG Models No. 72041 1:72
- Type 95 Ha-Go Light Tank IBG Models No. 72088 1:72
- Japanese Navy Destroyer Ayanami 綾波 Water Line Series Tamiya No. 31405 1:700
- Japanese Bicycle Infantry WWII HäT No. 8278 1:72
- Vintage Classics: WWII Japanese Infantry Airfix No. A00718V 1:76
- Malayan campaign
- Battle of Jitra
- Battle of Kota Bharu
- The Malayan Campaign, December 1941 - January 1942 - Storm of Steel Military History
- Osprey Japanese Tanks 1939-45
- LEAP#358 MC34063 Boost Converter Kit