
#229 555 Timer Dice
A 555/4017-based dice circuit with slow-down and auto power-off.
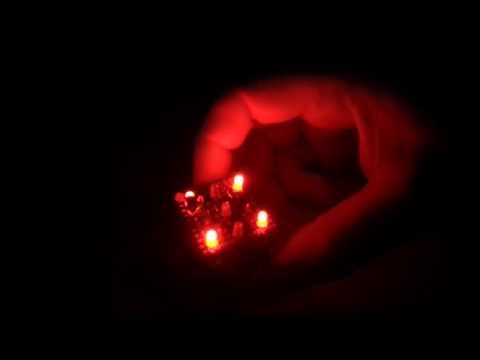
Here’s a quick video of the dice in action:
Notes
This circuit is a combination of circuit ideas freely available around the net. It breaks down into 5 main systems:
- Counter: The 555 timer and CD4017 provided a clocked 1-of-6 line output
- Die Display: A network of steering diodes and transistors decode the 6 outputs to a 7-LED conventional dice display
- Counter roll & slowdown: An RC network and high-side PNP switch slow the counter speed over time until the “roll” stops
- Auto Power-off: a p-channel MOSFET with RC timer cuts the circuit power after the roll
- Trigger: a mercury switch simulates a “shake”
Counter Roll and Slowdown
A high-side PNP switch (P2) is controlled by an RC network (C1/R14/R15). From initial triggering (C1 cathode pulled to ground), C1 discharges through P2. As it does, the voltage of the base gradually rises until all base current is throttled.
This collapses the voltage across the 555 timer network and stops the clock signal.
This is the end of the “roll”.
Obviously, this produces a pseudo-random roll. But it appears enough to produce an unbiased die roll.
The basic frequency of the 555 timer output is 48Hz.
However the resistor R2 across the timing capacitor C4 forces the trigger voltage to be maintained. As the voltage from P2 reduces, this slows the frequency. When the threshold voltage can no longer rise above the trigger voltage, the “roll” stops.
Auto Power-off
A high-side p-channel MOSFET is used to cut the power after a period of time determined by the C5/R19/R20 RC network.
The values in the RC network may need to be adjusted depending on the mosfet, voltage of the power supply, and the rating of the capacitor.
With a 47µF 16V capacitor (C5) and BS250 FET (PF1), I found the following worked well:
| VDD | R19 | R20 | Performance |
|---|---|---|---|
| 5V | 1MΩ | 0Ω | 60 seconds to LEDs off, 90 seconds to total current < 10µA |
| 9V | 330kΩ | 0Ω | 20 seconds to LEDs off, 35 seconds to total current < 10µA |
| 12V | 330kΩ | 330kΩ | 26 seconds to LEDs off, 35 seconds to total current < 10µA |
Trigger Mechanism
The circuit is triggered with a single switch. It could be a push-button, but I’m using a mercury switch as I plan to mount the circuit in something that can be shaken to “roll”.
When the switch activates, it triggers both the power control and counter roll:
- it pulls the charge from C5, turning on mosfet (PF1) and powering the circuit
- it pulls the cathode of C1 to ground(-ish), turning on NPN (P2) and starting the roll.
Steering diodes D6/D7 prevent cross-over from the power control and counter roll circuits.
Decoding the LED Dice Display
The clock signal from the 555 drives the 4017 decade counter, providing 10 signal lines (Q0 to Q9). Q6 triggers the reset, so we effectively have 6 signals (Q0 to Q5) corresponding to the 6 die faces.
The 7 LEDs correspond to the conventional spots on a die, arranged as follows:
| Col1 | Col2 | Col3 |
|---|---|---|
| LED1 | LED2 | |
| LED3 | LED4 | LED5 |
| LED6 | LED7 |
The LEDs are controlled in 4 groups by transistors. Steering diodes are used to control the transistors according to this table:
| BJT | LED1 | LED2 | LED3 | LED4 | LED5 | LED6 | LED7 | On for Qhi |
|---|---|---|---|---|---|---|---|---|
| N1 (NPN) | X | X | Q0, Q3, Q4 | |||||
| N4 (NPN) | -X | -X | not Q5 (inverted logic) | |||||
| N2 (NPN) | X | X | Q4 | |||||
| N3 (NPN) | X | Q0, Q2, Q5 |
The outputs from the 4017 decade counter are decoded thus:
| Qhi | Qpin | Die | Col1 | Col2 | Col3 |
|---|---|---|---|---|---|
| Q0 | 3 | 2 | - | LED1 | |
| LED6 | - | ||||
| Q1 | 2 | 5 | LED1 | LED2 | |
| - | LED4 | - | |||
| LED6 | LED7 | ||||
| Q2 | 4 | 3 | - | LED2 | |
| - | LED4 | - | |||
| LED6 | - | ||||
| Q3 | 7 | 4 | LED1 | LED2 | |
| LED6 | LED7 | ||||
| Q4 | 10 | 6 | LED1 | LED2 | |
| LED3 | - | LED5 | |||
| LED6 | LED7 | ||||
| Q5 | 1 | 1 | - | - | |
| - | LED4 | - |
Component Selection and Tweaks
Component values:
- diodes are all 1N4148 but this is not critical, normal 1N400x rectifiers work fine
- NPN and PNP BJTs are all small signal 2N3904/2N3906. Not critical.
- The p-channel MOSFET is a low-power BS250. Another part may require tweaking the power control RC values.
The die roll timing can be modified as follows:
- the basic (starting) speed of the counter is governed by the conventional 555 timer controls based on the values of R1/R18/C4. Easiest way to speed the roll is to reduce C4.
- the roll duration is controlled by the C1/R14/R15 RC network. Easiest way to slow the roll duration is to increase C1.
The power-off timer obviously needs to be longer than the roll duration:
- the power-off time is governed by the R19/R20/C5 RC network and the gate threshold voltage (Vgs) of the MOSFET
- my empirical results are based on using a BS250 with rated Vgs from -1V to -3.5V
- for 12V supply, I use R19=R20=330kΩ and C5=47µF
- for 9V supply, I use R19=330kΩ, R20=0 (short), and C5=47µF
- for 5V supply, I use R19=1MΩ, R20=0 (short), and C5=47µF
Construction
Designed with Fritzing: see Dice.fzz.


This is the breadboard build. Next I want to try and mount this all in a small shakeable cube:

Here’s the layout I used for a 3-tier 3x3cm protoboard build:

The three layers ready for testing before final assembly:

All put together:


Credits and References
- LED DICE (with Slow Down) Circuit - http://www.555-timer-circuits.com/led-dice.html
- Electronic Dice Circuit - http://www.electroschematics.com/5011/electronic-dice/
- CD4017 datasheet
- LM555 datasheet
- BS250 datasheet
- 1N4148 Datasheet
- 2N3904 datasheet
- 2N3906 datasheet
- ..as mentioned on my blog