
#425 The Boldport 3x7
Building the Boldport 3x7, Project #29, with custom flip-top layout so you can see inside this discrete 3-digit, 7-segment display.

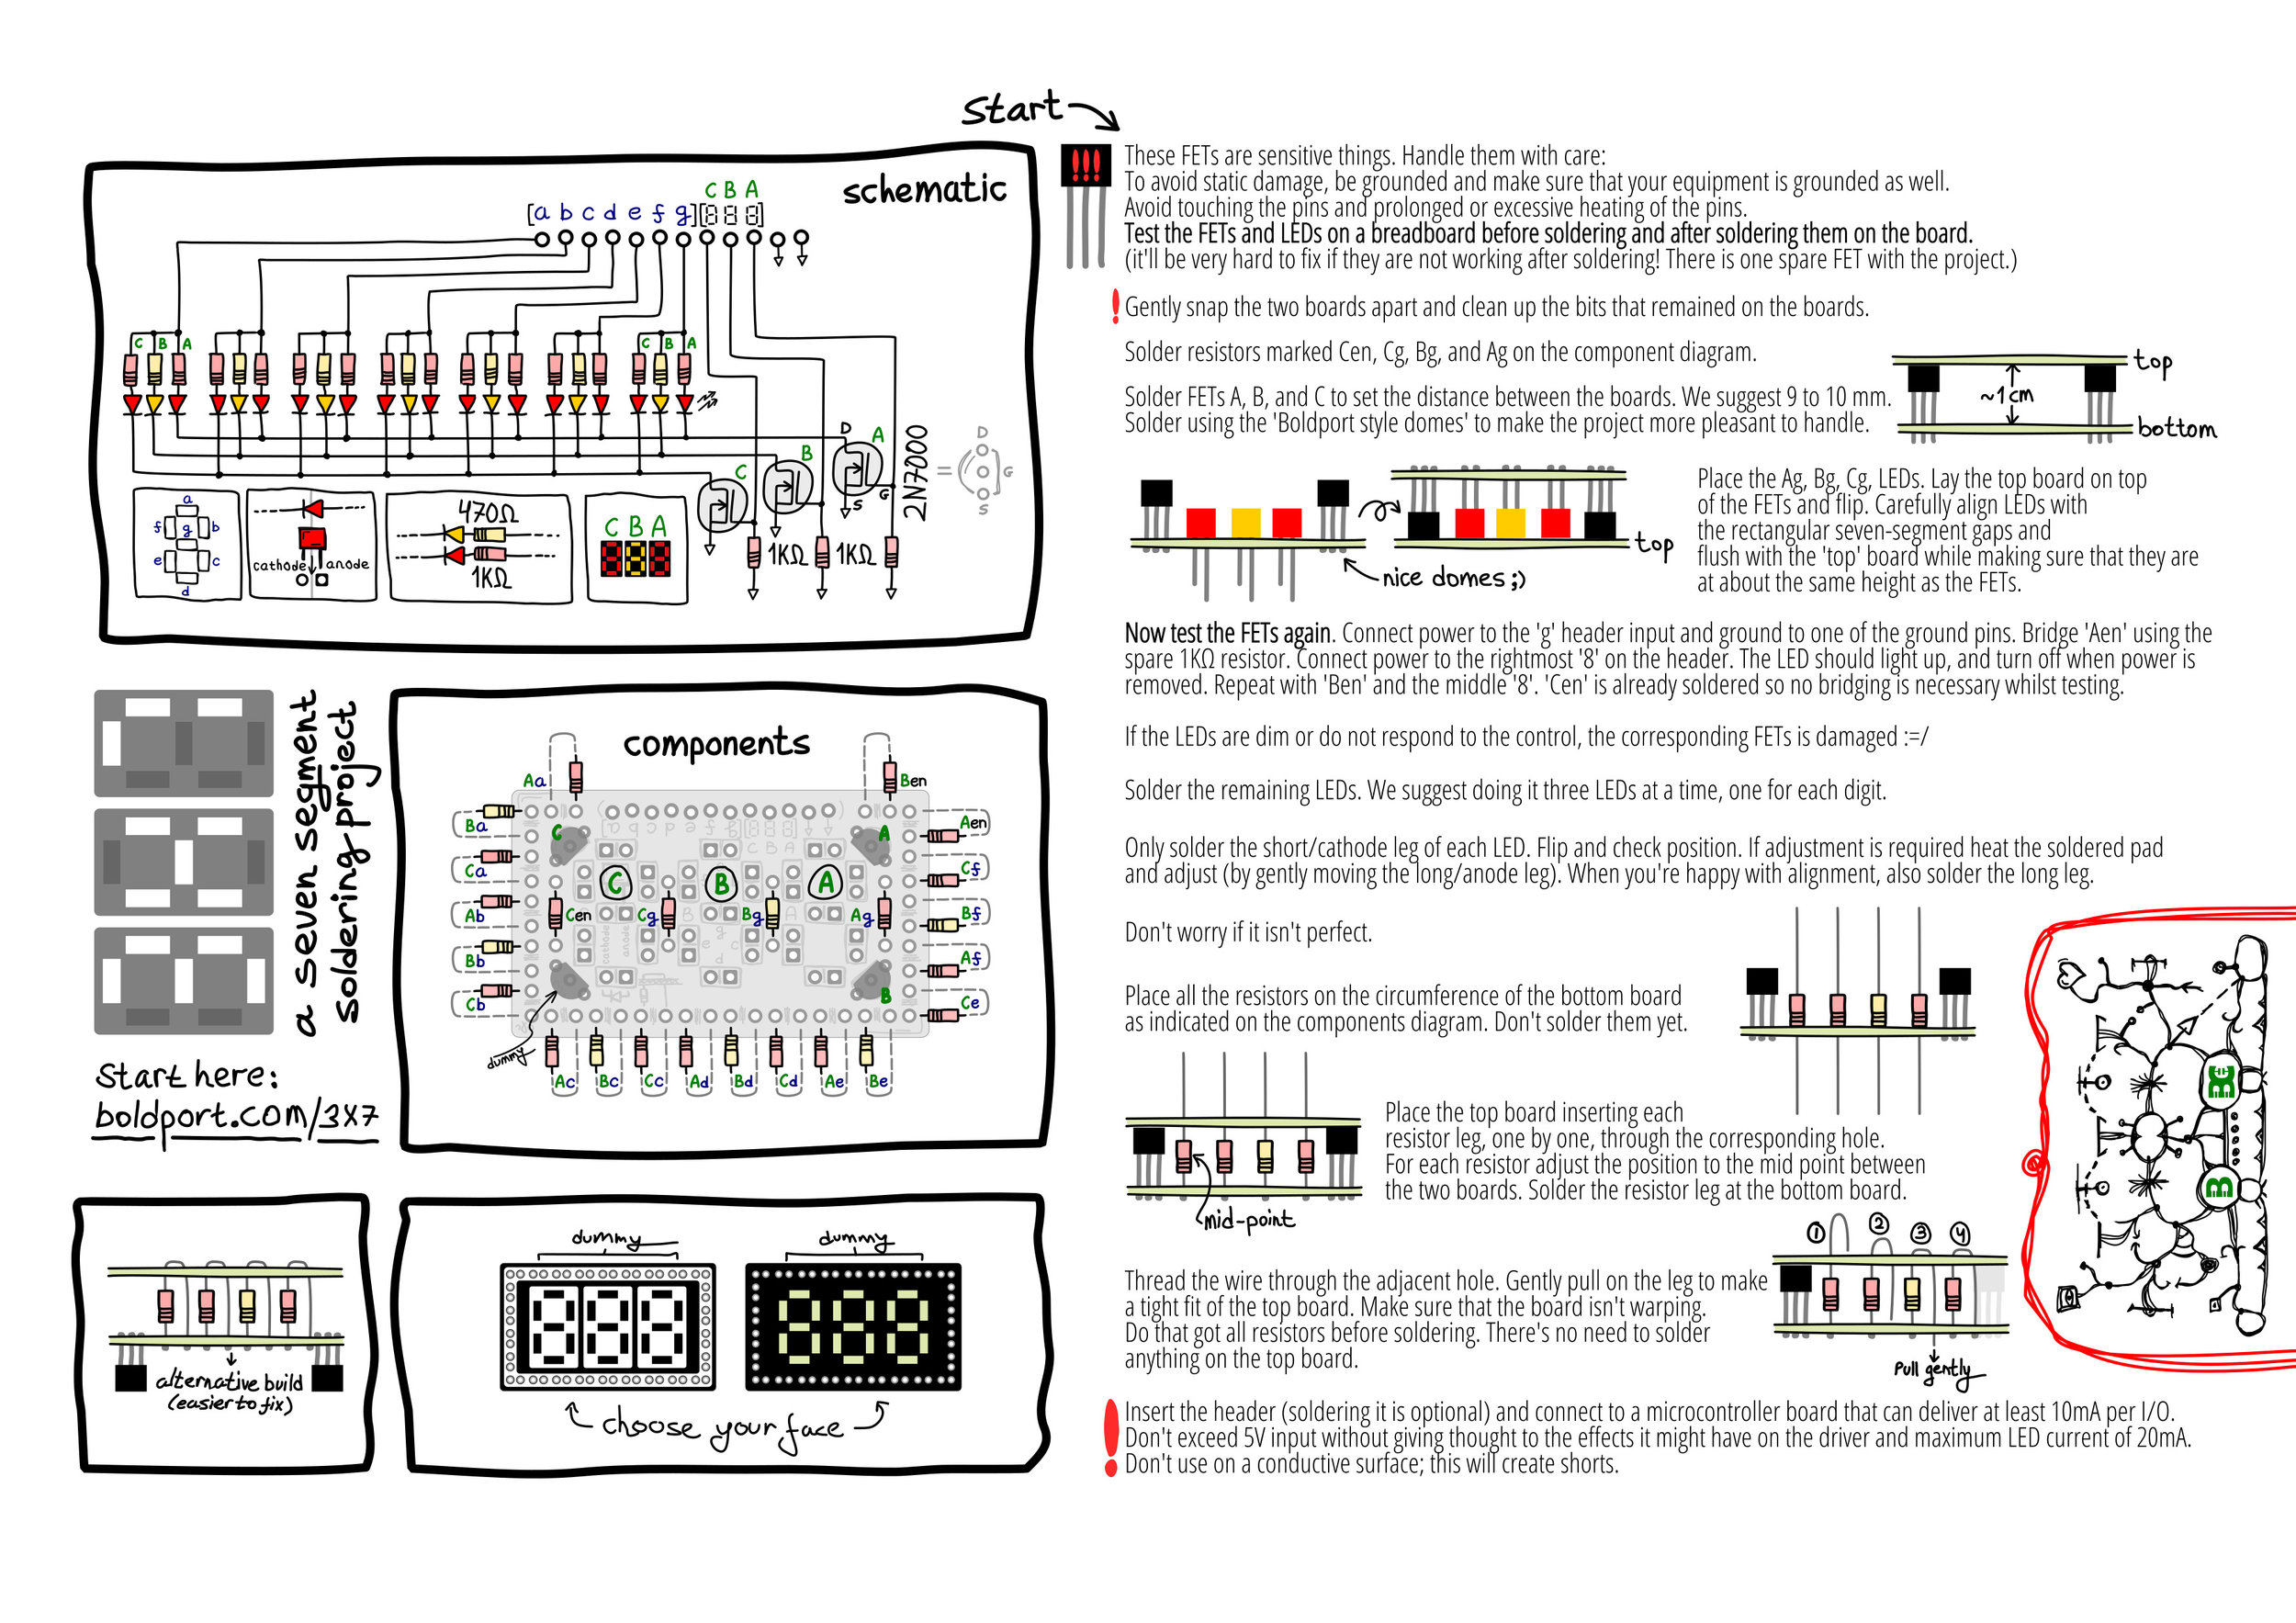
Notes
A lovely PCB and classic Boldport instructions:
This project is a challenge to construct
The Boldport 3x7 is essentially a 3-digit common-cathode 7-segment display, rendered with discrete components.
Since it’s a chance to look inside the workings of a 7-segment display unit, I decided to modify my build somewhat to flip the lid, so the internal wiring is open for inspection.
Parts
| Qty | Item |
|---|---|
| x14 | 2x5mm lens red LEDs, Valcon VRLED-52-R |
| x7 | 2x5mm lens yellow LEDs, Valcon VRLED-52-Y |
| x1 | 1x12 right angle header, Multicomp MC34757 |
| x4 | N-channel MOSFET transistor , 2N7000_D26Z |
| x18 | 1KΩ resistors, MF25 1K |
| x7 | 470Ω resistors, MF25 470R |
| x1 | Lovely PCB panel |


LED Current Limiting Resistors
The standard kit uses 1kΩ current-limiting resistors for red LEDs and 470Ω for yellow LEDs. I put these on a breadboard to see the effect, and after a few comparisons decided that 680Ω for red LEDs appeared to provided more even illumination. It is not particularly noticable in my pictures, but IRL the result seemed a bit better:

Circuit Design
Here’s the schematic from Boldport:
And here’s a quick redraw, focusing just on a single segment control across 3 digits. The key things to note:
- segment and digit selection inputs are active high logic (common cathode)
- an example of traditional grid multiplexing: enable to segment, and enable the digit to light
- yellow LEDs have lower resistor value to ensure red and yellow LEDs run at roughly the same perceived brightness
The schematic fragment shows a single segment control across 3 digits. Note: Ra1, Ra2 are 1kΩ in original kit, but swapped for 680Ω to equalise apparent brightness of red and yellow LEDs.


Construction
I actually super-glued the LEDs to the face plate in preparation for assembly. It seemd the best way to ensure alignment, and also provide maximal illumination for each segment.

Test, test and test again during construction! Once assembeld, I knew that any issues would be a major exercise to rectify. And since the kit is already sold out on Boldport - no chance to just buy a replacement!

Fully assembled, with “333” powered directly from a 5V source:


Next…
So far so good! I have a few projects in mind to follow.
The LED segments illuminate very nicely. I think super-gluing the LEDs to the face plate was a good decision. But I also notice quite a bit of bleed from a lit segment to unlit segments. In retrospect, I think it would have been a good idea to put baffles between the LEDs or paint their sides with an opaque coating to ensure all illumination only radiates via the face plate.
Credits and References
- Boldport Club 3x7 - product page
- ..as mentioned on my blog